
Skinamarinky Shrinky Dink
Happy 2018! Whew what a whirlwind the past few weeks have been. Both of our kids were home for the holidays so it was an extra special year. Lots of food, laughter and conversation…makes my heart so happy. Our daughter is an elementary school teacher in Australia and she is spending part of her ‘summer’ holiday with us. She’s quite the crafty girl too so together we can turn what was once a contained craft room into an epic explosion of creative sprawl. The projects creep onto the kitchen counter, then cover the dining room table and gradually, bits of crafty goodness spread from room to room on the soles of our shoes and shirt sleeves. It’s always so much fun.
This visit, my daughter and I became obsessed over Shrinky Dinks. Yep…that wonderful 1970’s creation that allows you to color a picture on a sheet of polystyrene plastic, pop it in the oven and watch it ‘magically’ curl, shrink and flatten into a hard plastic mini version of the original creation. So cool… and addicting! There really should be a warning label on this stuff because it is serious craft crack. One of the best things about Shrinky Dinks is that they give you a perfectly good excuse to sit and color for hours and coloring is so relaxing… and fun…and you can chat and laugh and eat and drink while you’re doing it. Seriously, what a perfectly wonderful way to spend an afternoon (or two…).
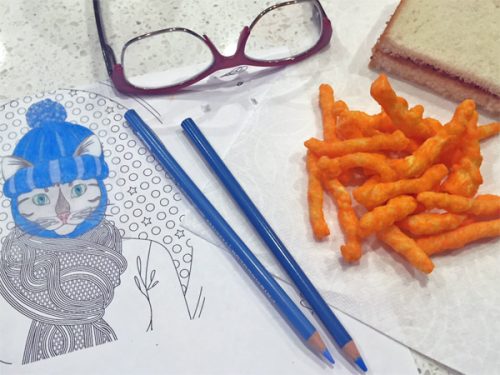
Peanut butter and jelly on white squishy bread and Cheetos.
(Don’t forget to wipe your fingers)
General Shrinky Dink Tips
Of course, being the curious craft happy gals we are, we had to experiment with the Shrinky Dinks before settling on our preferred method. Here’s what we discovered.
Also, scroll down to the very bottom of the post for a supply list with links.
Coloring Images
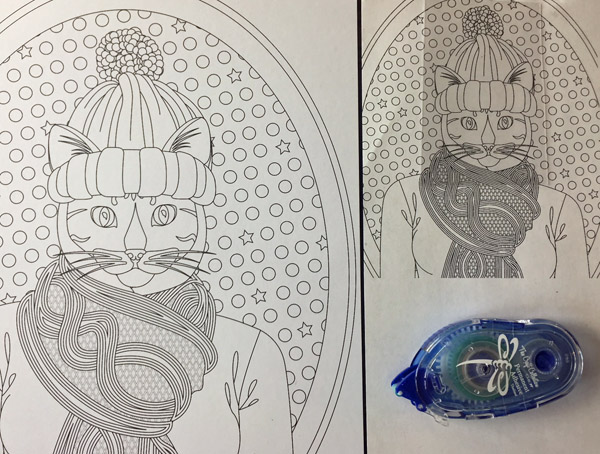
Google ‘coloring images’ + topic (i.e. cats) to get a ton of image options to re-size, print and color. My daughter found some really fun adult coloring books and we resized the images and printed them out on our printer. You can also draw your own images but remember, you will need to trace everything with a Sharpie AND cut out the image so don’t get too detailed. Your image will shrink by about 65% (finished item is 1/3rd the size of the original)
Coloring Mediums

Scissors
Black ultra-fine Sharpie
Coloring Books
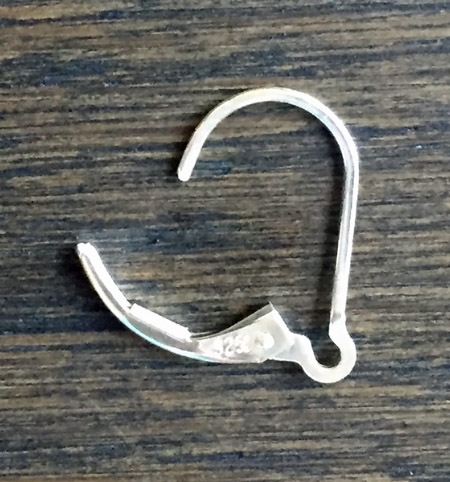
Earring parts (see image)
Shrink Film – Clear
Shrink Film – Sanded
Scroll down to the bottom of the post for links to more supplies and coloring book options
We tried various permanent markers, including Copics, but in the end we liked the look of colored pencils the best. The coloring done with markers turned very dark when baked, making it difficult to see details. No matter what medium you use, the colors will darken when baked. We got the best results when using light to medium shades.
We also found that the color adhered best to the plastic if you lightly sanded the plastic sheet prior to coloring it. We used a very fine sand paper but a nail file (not the really rough ones) works well too.
Tracing Your Image
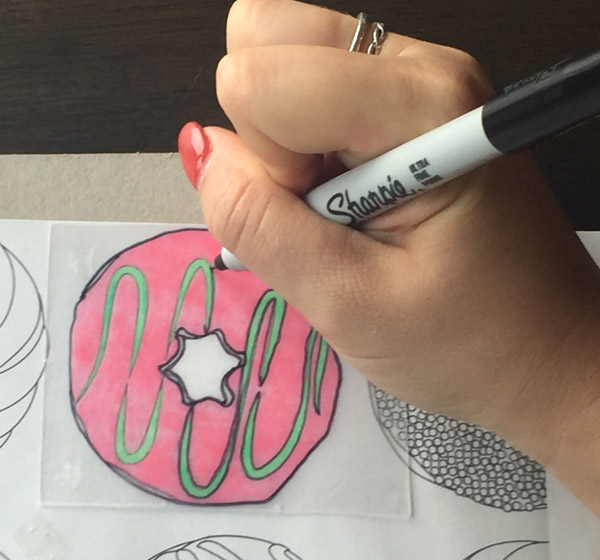
An ultra-fine black Sharpie was our favorite product for tracing the images. For crisp, clean tracing lines, we found it best to color first then trace. Coloring after tracing often erased or smudged the Sharpie lines. And yes, you really do need to trace your image.
You don’t want images with too much fine detail. Here are some good options at Amazon
Cutting and Punching Holes
Get yourself a nice little pair of micro tipped scissors. We love LOVE love the Cutter Bee’s. The Shrinky Dink plastic can tear so go slow and be careful turning corners.
A 3/16″ hole punch was the perfect size for running wire, cord or jewelry findings through. For ribbon, go bigger. For thread, go smaller. Just keep in mind; the hole will shrink to 1/3 of it’s pre-baked size.
Shrinky Dink Shrinkage
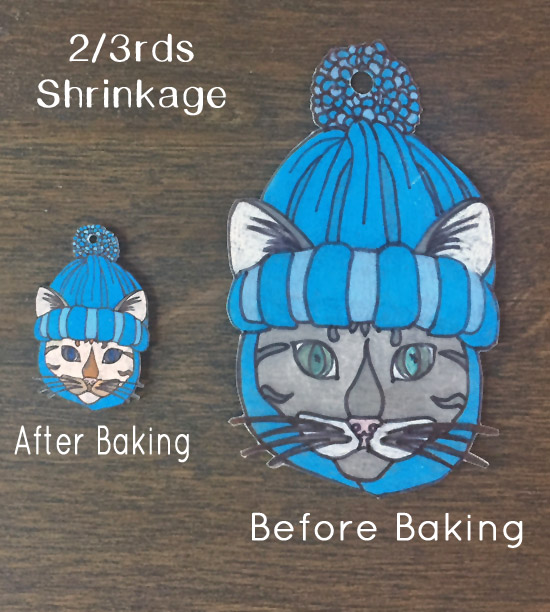
Your finished Shrinky Dink will be ABOUT 1/3 of it’s original size so a 3″ tall original image will be about 1″ tall after baking. Each ‘batch’ of Shrinky Dinks may shrink a little bit differently (probably due to slight differences in the oven temperature or baking time). Bottom line, if you want two Shrinky Dinks to match in shrinkage (like for earrings), make sure you bake them in the same batch. (Yep, we learned this one the hard way.)
Baking Your Shrinky Dinks
Watching the Shrinky Dinks bake is kind of magical – no matter how old you are.
We found that your really need to use a solid cookie sheet rather than a perforated (holey one) and parchment paper rather than aluminum foil. Every hole or wrinkle under your Shrinky Dink will leave a mark on your piece so it’s best to have a smooth baking surface. When you take your cookie tray out of the oven, immediately press a flat item (like a book or a stamping block) onto the top of each piece to insure it is flat. You only have about 10 seconds to do this so be quick.
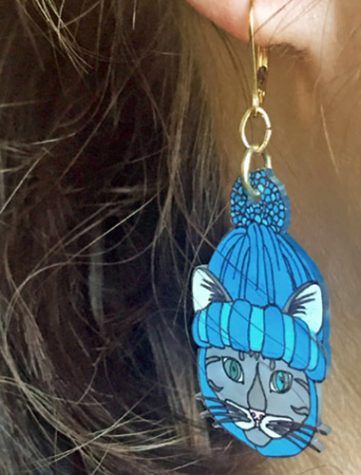
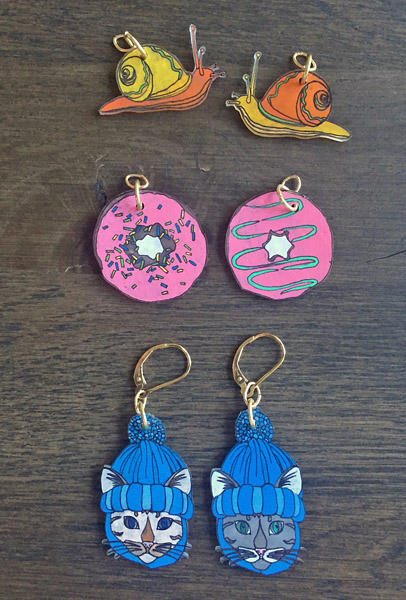
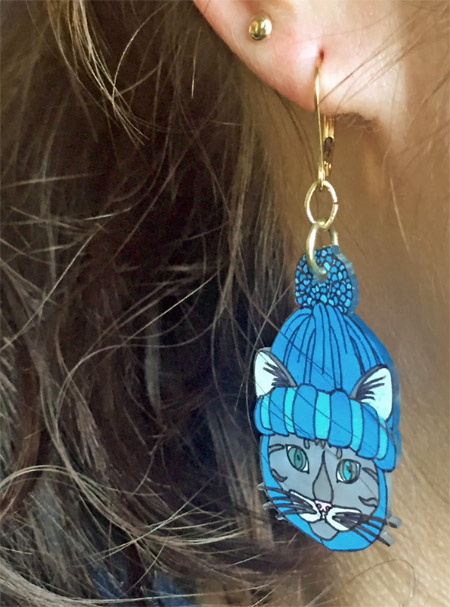
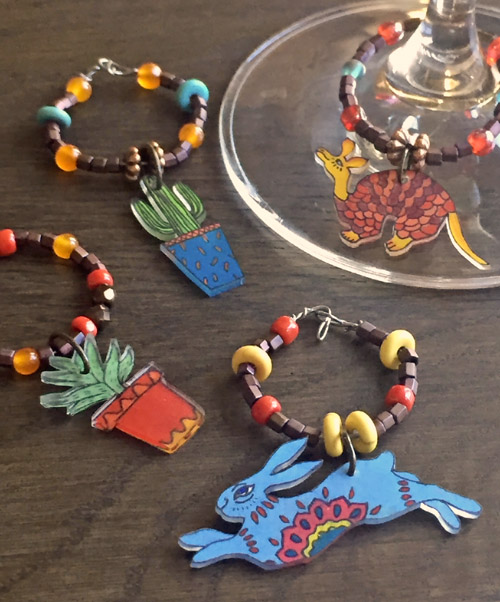
Finished Shrinky Dink Projects
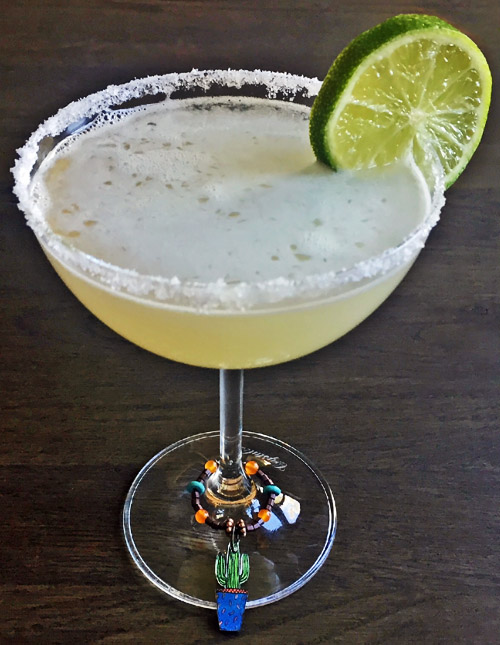
Shrinky Dinks make the perfect charms. We used ours to make earrings and wine/charms but the possibilities are endless. My daughter came up with over 100 different image ideas for earrings that coordinating with her schools curriculum – too fun! I wish I had a teacher like her in primary school.
And now for a little refreshment after a long day of coloring. Hey! Coloring is hard work… I got a callus and Ashie has a cramp in her thumb! I think a recovery beverage is in order don’t you?
Fun Comment Question:
When is the last time you used Shrinky Dinks and what did you make?
Answer in the comment section below and don’t forget to subscribe at the top right side bar. Cheers!
Project Shopping List
The product links are to Amazon but you can get all or most of the supplies at your local craft store (Michael’s, Hobby Lobby…). Check out your local bead store too for the earring/wine charm supplies – they are often very helpful and knowledgeable.
Shrink Film, Clear or Pre-Sanded
Colored Pencils: I love Prismacolor but they are pricey. Here is a Budget Friendly option
Scissors: I love the Cutter Bee Precision Cut scissors for all my craft projects.
3/16″ Hole Punch: I love my Crop-a-Dile which has a 3/16″ and a 1/8″ hole punch PLUS it sets eyelets!
Solid Cookie Sheet
Parchment Paper
For Earrings: Lever back earrings, 6mm open jump rings (19-20 gauge)
For Wine/Cocktail Charms: 22 gauge craft wire , 6mm open jump rings, crimp beads/tubes in coordinating metal (make sure you can fit two strands of your wire into the crimp tube), and assorted beads: seed beads (size 10), metal spacer beads, fun frosted beads.
Related Posts

5-Minute Mini Gift Bag
If you have followed A Crafty Composition for a while you know it is fairly…
January 26
Gum Nut Paper Garland
Have you ever seen a Eucalyptus tree blossom? It’s one of the most…
November 711 COMMENTS
COMMENTS (I love hearing from you!)


Veronica | 18th Jan 18
Thanks, Joelle! I have picked up most of the supplies from the sources you recommend. Plus, I need to add some basics generally.
Beads: What’s your recommendation for on-line bead sources? I saw Michael’s has quite a variety, but in small supply. Thanks – hope to see you soon.
JoElle | 20th Jan 18
I hope you are having fun with your shrinky dinks Veronica. For beads, I’ve always gone to a local bead store so I can see the exact color and size I’m getting. I love Bead World at the 101 and Shea Blvd. and if you sign up for their mail list they offer a 40% off one item coupon every month. If that is not convenient for you, I have a good source that says Fire Mountain Gems is the best for on-line ordering. Have fun!!
Veronica | 15th Jan 18
I don’t remember these from the 70’s! These are darling. Are all of materials available from places like Michael’s or Joanne’s or best purchased on-line?
This looks super fun. Thank you!! Love, love, love.
JoElle | 16th Jan 18
Thanks Veronica. Yes, all of these supplies can be purchased at a Michael’s or Hobby Lobby…or on line at Amazon. I will try to add a shopping list link to the post. Thanks for following.
Tania | 13th Jan 18
I love Shrinky Dinks and actually, you reminded me that I have some!!
Tania
JoElle | 16th Jan 18
They are so much fun. Thanks for the comment. I think you have some coloring in your near future.
Maria Conti | 13th Jan 18
That was supposed to be Happy New Year!
Maria Conti | 13th Jan 18
What fun and with your daughter 🙂 <3
Thanks for the inspiration and Happy to you and your whole family, Hugs M
JoElle | 16th Jan 18
Thanks so much for your comment and following the blog Maria.
Vikki | 13th Jan 18
That looks like so much fun and I do remember them from the 1970s. Pour another drink, I’ll be right over.
JoElle | 16th Jan 18
If only we could perfect the BEWITCHED transport nose twinkle…then we could just zip over to each others’ houses and play. Thanks for your comment Vikki.