
Sweet Old Cupboard Gets New Life As Jewelry Cabinet
Oh if this little red cupboard could talk… it would have tales of being a tea cabinet, a spice rack, storing beautiful silk ribbons and protecting trinkets and treasures. Today though, this sweet old cupboard is transforming into a a darling jewelry cabinet.
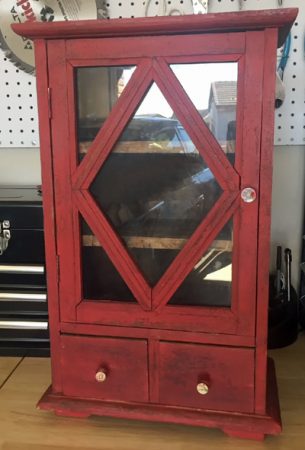
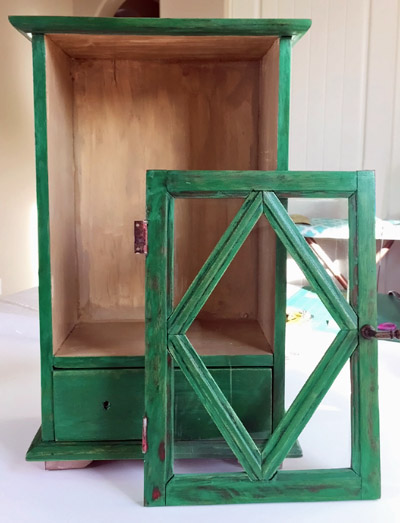
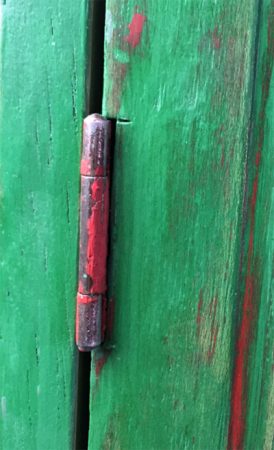
The cupboard has two shelves inside and a pair of little drawers below. I’m not sure how old it is but it’s made of solid weathered wood and the nails are a bit rusty. It’s still holding together quite well and needs only a slight remodel to become a fantastic little jewelry cabinet
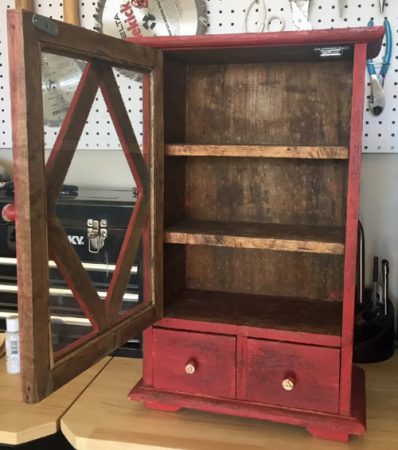
Since we moved back to Arizona, my jewelry storage has been very hodgepodgey. My necklaces are hung over a closet bar, my bracelets in a mini storage drawer thing and my rings in various ring boxes. It’s far from organized and worse, thanks to the VERY dry Arizona climate, my necklaces have a thin layer of dust in every nook and cranny. So, after much contemplating, I decided to knock out the two shelves to make room for hanging necklaces.
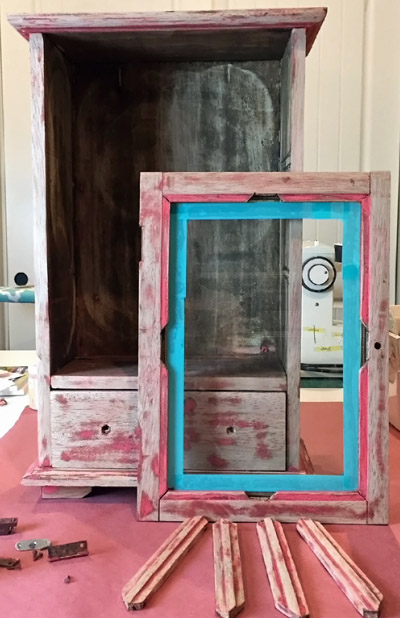
I sanded down the cupboard, making sure to leave some bits of the old paint for nostalgia. A few nails and screws were replaced to firm things up a bit.
I knew I wanted the cabinet to have a vintage/distressed look so I decided to go with Plaid FolkArt Milk Paint in Absinthe. Milk paint has been used for hundreds of years and historically consisted of milk protein (casein), lime and earth pigments for color. Modern day milk paint is most commonly available in powder but Plaid FolkArt Milk Paint is premixed and manufactured without lime, providing a non-toxic paint for a variety of surfaces.
The milk paint is very thin and goes on more like a stain. It is best applied to raw or sanded wood although Plaid does have a PRIMER/SEALER to help the paint adhere to metal or pre-painted surfaces. A couple things to note about the Plaid FolkArt Milk Paint…
It smells funky. Not chemical funky, like cow pasture funky.
It has a nice velvety flat finish…until you put the sealer on it. I was a bit sad to see a slight sheen on the paint after applying the sealer. The sheen reduced after a light buffing with some fine steel wool but it never again had the velvety flat pre-sealer finish.
So why put the sealer on? Because the paint will rub off on your hands/clothes if you don’t (sad face). There is a finishing oil available which I did not try but I’d like to see if that holds down the paint without creating sheen. That will be for another project.
Overall, I really liked working with the milk paint. I purchased mine at the local Hobby Lobby but I noticed there are more colors available on-line. I applied two coats of milk paint with a very light sanding in between. Once the paint was completely dry, I sanded down a few areas, exposing some of that nostalgic red paint. Lastly, I brushed on the sealer and after dry, lightly buffed it with some fine steel wool.
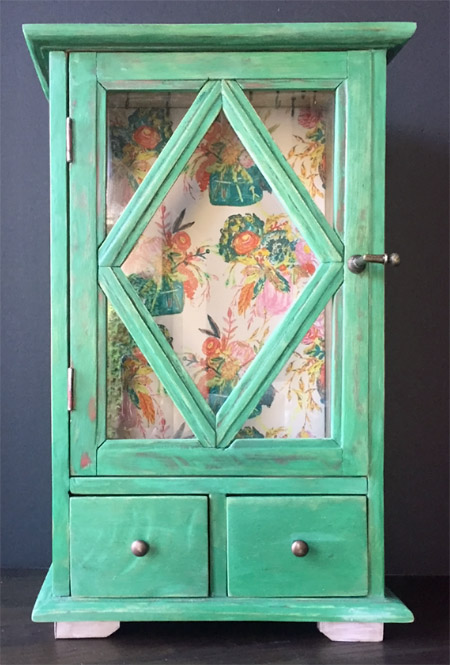
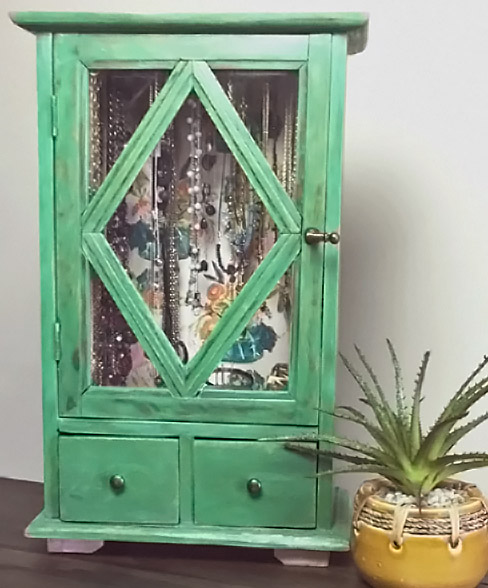
I love how the bits of pink/red come through – it looks a little Christmasy in this picture but the green is really not that bright in real life. Now, with the exterior of the cabinet complete, I turned my focus to the inside.
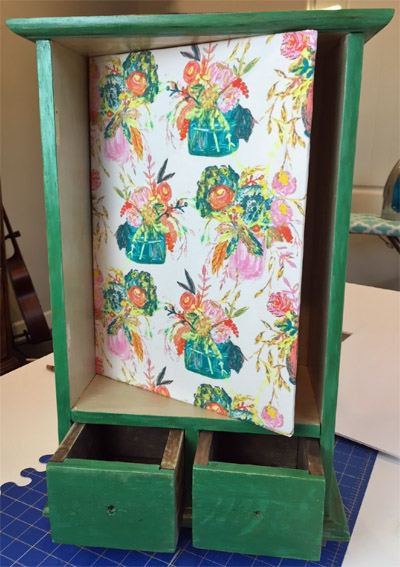
Foam board (from the dollar store because it is WAY cheaper there) was the perfect solution for adding fabric to the back of the cabinet. I simply cut the board to the correct dimensions, sprayed it with adhesive and smoothed my fabric over it; folding the edges over to the back. Easy in and easy out if I ever change my mind (pffft, who are we kidding…).
Now for the necklace hooks…
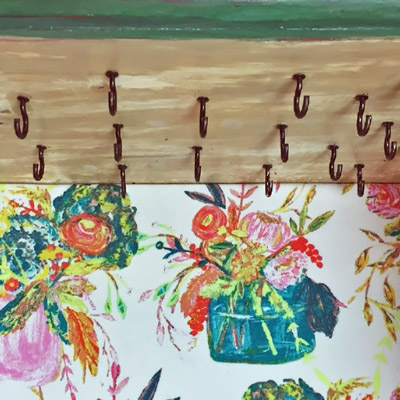
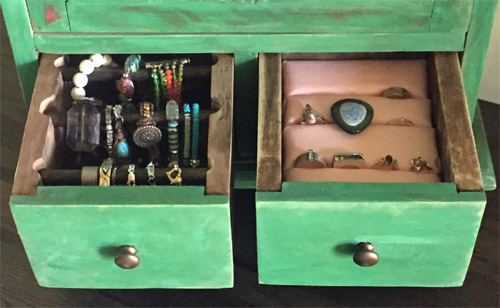
I twisted cup hooks into the ‘ceiling’ of the cabinet. It was definitely helpful to pre-drill the holes but be careful not to drill too far and poke through the top. Next, I needed to figure out the best way to store rings and bracelets in the two lower drawers.
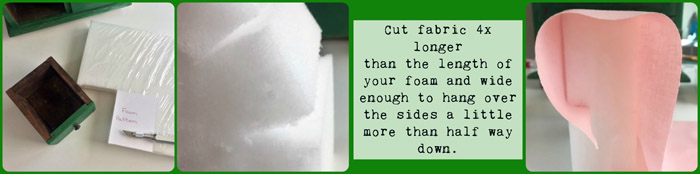
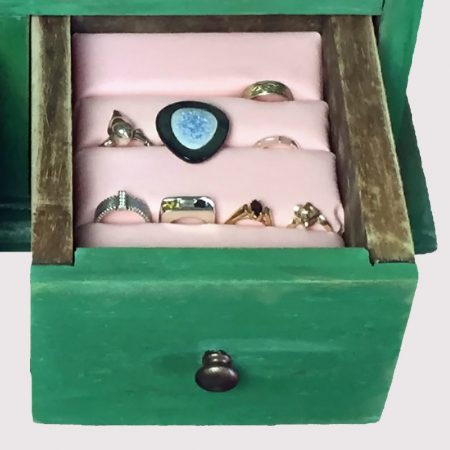
Polyfoam (like for a chair pad) was the perfect product for creating a ring holder. I cut the foam to fit the drawer and then made slits in the foam for the fabric to be pushed into. This created padded ‘cracks’ for the rings to slide in and out of.
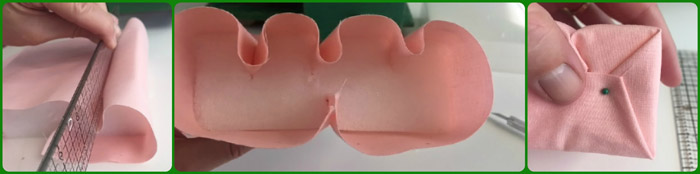
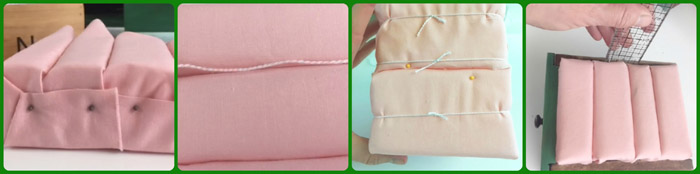
I was thrilled with how well the ring drawer came together. Gotta love it when things go better than planned!!
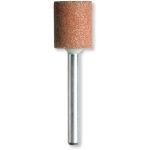 The bracelet drawer was a little time consuming but super simple in design. Basically, I used my Dremel grinding bit that looks like this… to create arcs on the drawers’ sides. I then used sections of a wooded dowel to create rods for the bracelets to hang on.
This idea had a few more quirks than the ring drawer. I ended up lowering the rods so that the drawer would close properly. Also, the rods like to pop out of the drawer sometimes but hey… not all drawers can be as good as the ‘ring drawer’. (Enter angel music and glowing light).
I actually learned a lot on this project and now I’m super happy to share my wonderfully sweet and mostly functional . . .
Jewelry Cabinet
Thanks for checking out this post and I hope you have a SUPER weekend!!
Related Posts

DIY Tortoise Table
Last fall we introduced these little guys to our family. They are Arizona Desert Tortoises…
April 184 COMMENTS
COMMENTS (I love hearing from you!)


Vikki | 3rd Feb 18
This looks so much better than the red–and letting a little red show through here and there adds to it. I like that the little feet are a lighter color and I love the fabric. It’s like a creative puzzle you figured out. Good job!!
JoElle | 5th Feb 18
Thanks so much Vikki. It was a fun project and I fell in love with that green color.
Tania | 2nd Feb 18
I am in love with that little cabinet, so cute and I love how you transformed it!! If I ever see a small cabinet like that at a thrift store or garage sale I will definitely look at it with different eyes now!
Tania
JoElle | 5th Feb 18
Thanks so much Tania! That’s what I love about craft blogs (yours included) – inspiration everywhere you turn.