
WINE CORK Craft Inspiration: Part two
Happy Tuesday lovelies. I’m so excited to show you what I came up with for my wine cork project. These place card holders are easy to do and quite inexpensive. I think they would make a perfect hostess or house warming gift and you can whip them up in an afternoon.
The supply list is fairly simple: wine corks, paper clips, clear craft glue, and beads (make sure their holes are large enough to slide onto your paper clip). The only tools you will need are: a knife for cutting the corks, an x-acto knife and pliers.

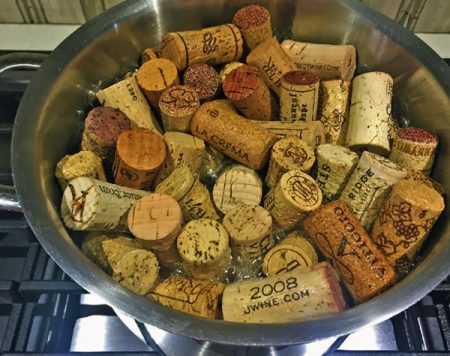
Originally, I tried to just cut the corks in half. This was difficult and the cut was often crumbly so I googled ‘cutting wine corks’ and found this great solution. You BOIL the wine corks for 10 minutes! Who knew? A big thank you to the genius who discovered this! The wine corks get all plump and soft and are much easier to cut.
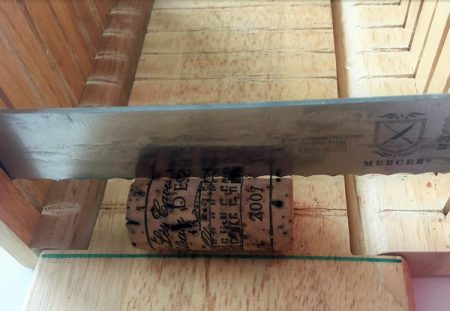
The second issue I had was getting my slices straight and for that, I found that using a bread slicer and a sharp bread knife helped considerably. Regardless of how careful your are though, some of the wine corks just won’t come out like you want so cut some extras and pick the best.
Cut the bottom 1/3 of the cork off so you can preserve as much of the the writing or image as possible. Also pay attention to the direction of the writing when you are cutting – you don’t want it to be upside down.
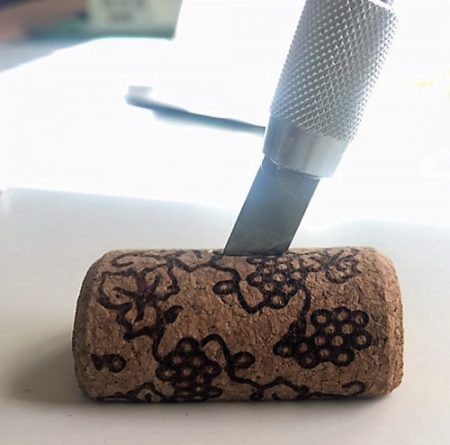
After your corks are cut you just need to make a simple slot in the top of each cork with an x-acto knife. I did about 1/4″ to 1/2″ wide… as it’s just to slide the base of the paper clip into.
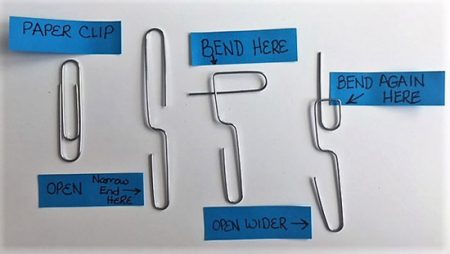
Now for the paper clips. I found the square ended pliers to work better for the bending than the needle nose. See the (not so great quality) picture below for the steps.
Squirt a little clear craft glue ( I like E6000 or Alene’s) at the base of the paper clip and slide it into the slit you made at the top of the cork. Now for the fun part… B E A D S!
A NOTE ABOUT THE BEADS: You want a variety of sizes and styles. For the bottom beaded section chose beads that will slide onto the paperclip without too much play – so they stack nicely. For the top focal bead, it is best if it’s hole is big enough to fit the nozzle of the E6000 glue into. The glue will keep the large bead on the top 1/8″ of the paper clip. If your big bead is much lower than that, you won’t have much room for the place card. Change up your bead combinations for added interest.
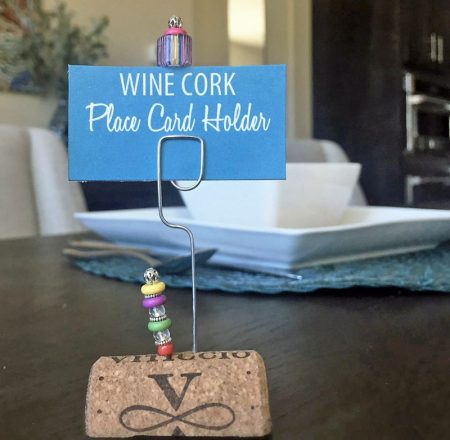
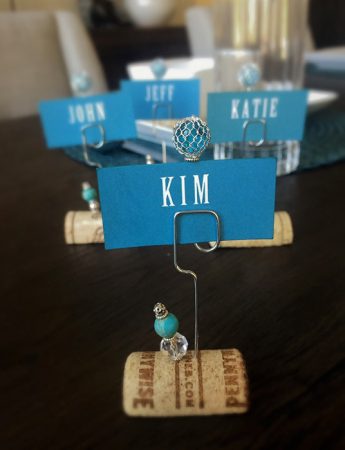
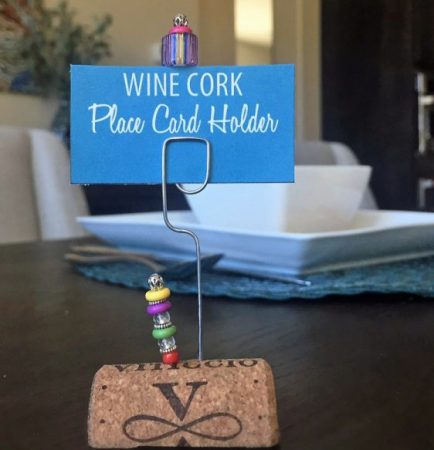
And there you have it! a fun, one of a kind place card holder.
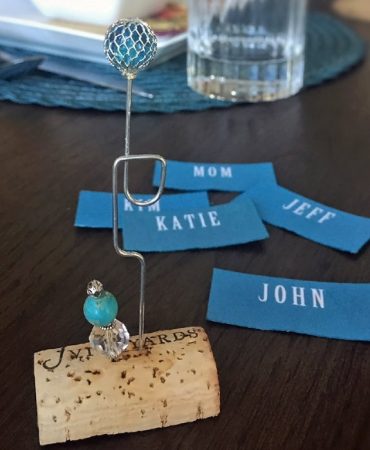
I did one set in funky primary colors and another set for my sister-in-law using crystal, silver and turquoise. The place cards are done in Word by typing the names into 1″ x 2.25″ text boxes. Keep the name towards the top of the text box so the paper clip doesn’t cover it up. I just printed out the place cards on a smooth cardstock and cut them out. I think I will laminate the names that I use frequently so they are more durable.
Well there you go. I hope you enjoyed this little project. I think these would make a great hostess gift and once you buy the beads, they are super economical to make. Please feel free to comment or ask any questions in the comment section below. You can also go to my PINTEREST account and re-pin any of my projects easily from there.
CHEERS!
Related Posts

5-Minute Mini Gift Bag
If you have followed A Crafty Composition for a while you know it is fairly…
January 26
Gum Nut Paper Garland
Have you ever seen a Eucalyptus tree blossom? It’s one of the most…
November 77 COMMENTS
COMMENTS (I love hearing from you!)


Karen R | 28th Nov 17
LOVE LOVE LOVE, can’t wait to get started on these! ❤️
JoElle | 5th Dec 17
Yeah!!!!! Who can’t use a set…right?!
Tania | 28th Nov 17
Well, those are just adorable! Great job! I would never have guessed that boiling them would make a difference, good to know!
Tania
JoElle | 5th Dec 17
I know! Who thinks of these wonderful things. Boiling them made it 100% easier so totally worth the 10 minutes and a pan wash.
Wendy | 28th Nov 17
Oh, these are going on the list! Great girlfriend gift too. Who wouldn’t want a cute set! Thanks!
Vikki | 28th Nov 17
This would be such a cute hostess gift. Thanks for the good tutorial–especially about boiling the corks before slicing.
JoElle | 5th Dec 17
Thanks Vikki!. It’s really quite inexpensive and if you already have the wine corks, the supply list is pretty basic. It’s a great way to use up leftover beads from other projects too. Tell Mel he better get busy with the wine drinking!