
I LOVE JEANS
As soon as the weather begins to cool down I live in denim so when I found this darling pair of capri jeans for $20, there was no question they were coming home with me. When I tried them on they fit great everywhere except the hem on the very bottom of the legs; it was bulky and tight. They were such a great buy and I loved everything else about them so I decided a little jean makeover was in order.
I looked through my stash of fabric and found just enough of a mustard and white pattern that worked perfectly. I didn’t want to lose any length off the capris so rather than cutting the old hem off, I took all the stitching out and gave it a good ironing. The old hem had been folded over 3 times which explained why it was too thick and tight. I trimmed off the bottom half inch to give myself a fresh start and then began to turn the fabric into a fresh bohemian style trim.
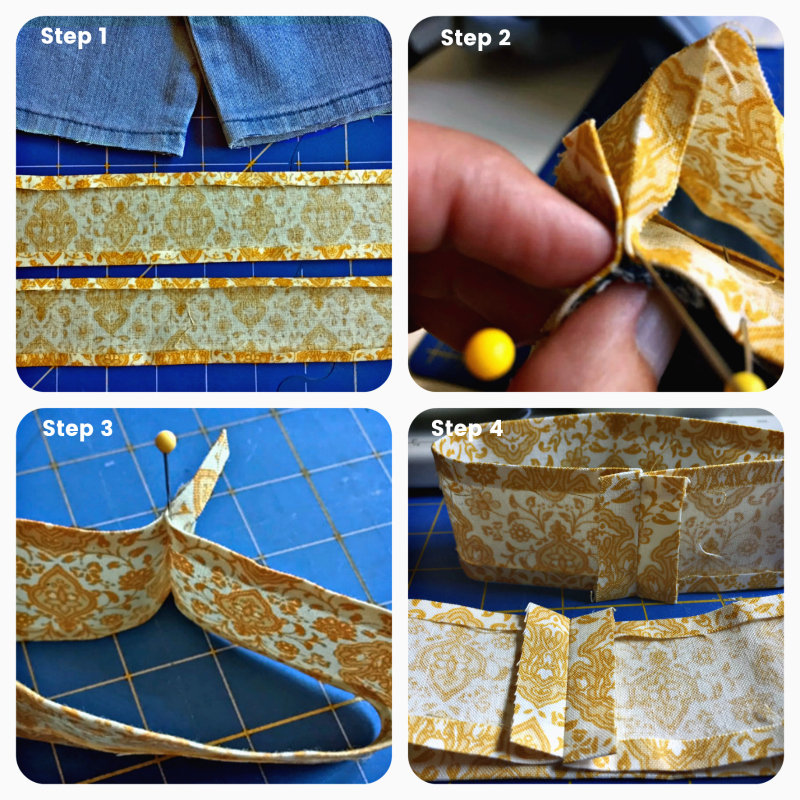
Step 1: Cut two 2.5″ strips of fabric; longer than what you will need. Turn the top and bottom edges in 1/4″ and press
Step 2: Pin the trim piece around the leg bottom and mark as precisely as possible, where the two ends meet; pin
Step 3: Unpin the trim piece from the leg, leaving the pin that marks where they meet. Now you have a loop
Step 4: Sew the two ends together at the pin and trim off the extra
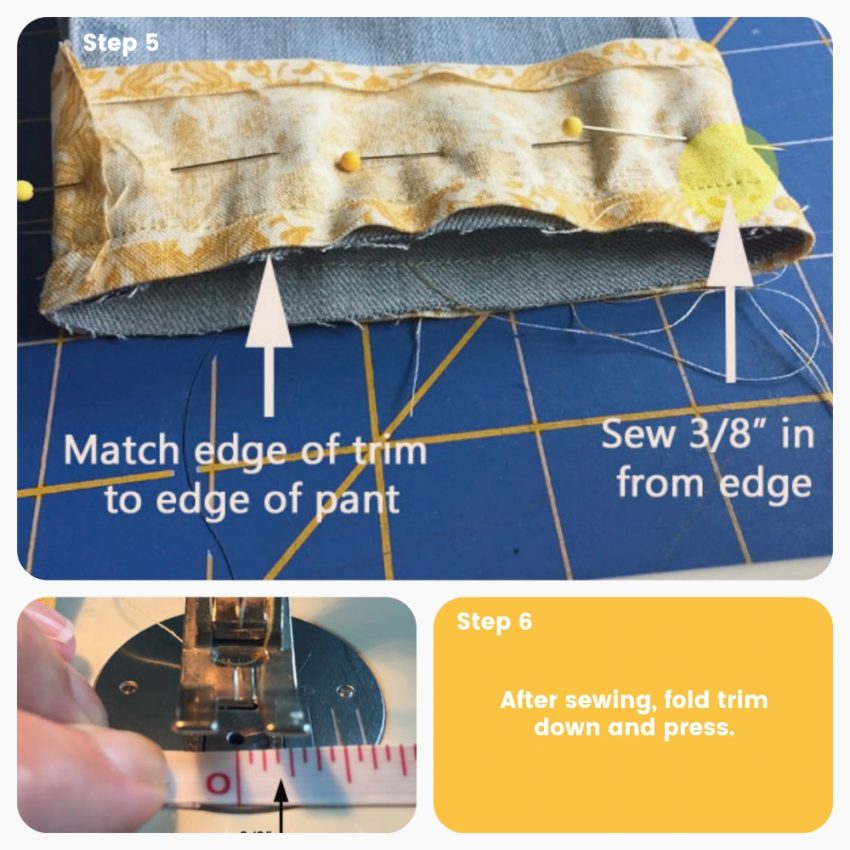
Step 5: Slide the fabric ‘loop’ onto the jean leg (right sides together), matching the edge of the trim to the edge of the jean. pin and sew 3/8″ in from this edge.
Step 6: Unpin and fold trim down. Press
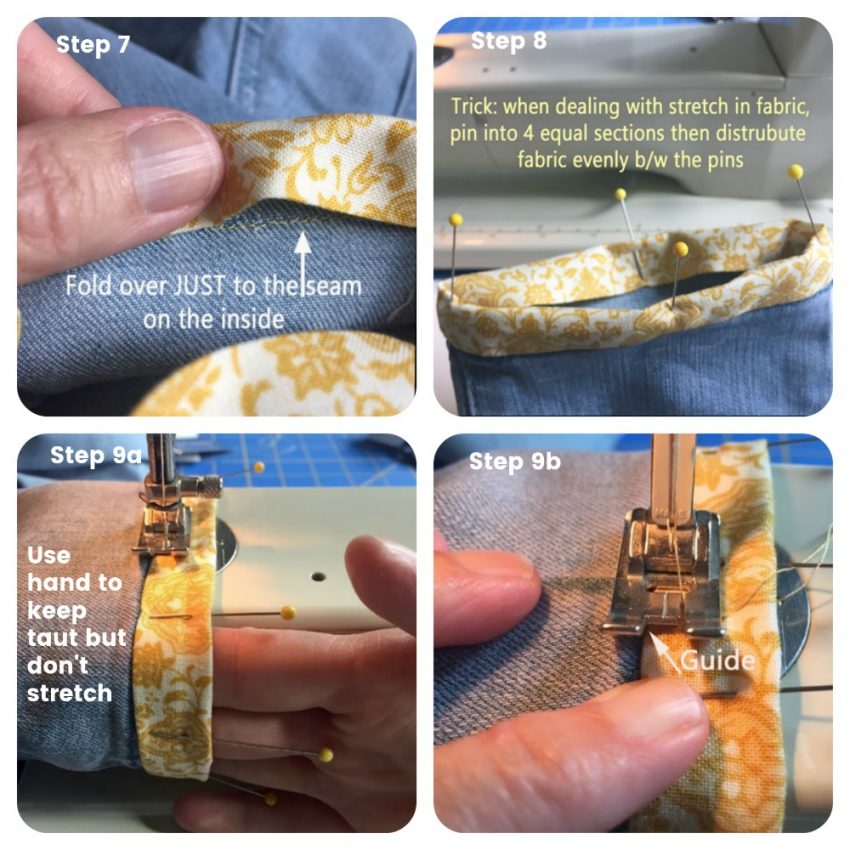
Step 7: Match the trim edge to the stitching you just made ON THE INSIDE OF THE PANT LEG. You are enclosing the jeans raw edge into the fabric trim.
Step 8: Pin into place – See above picture for tip.
Step 9a: The jeans have stretch but the fabric trim does not. In order to make sure there is no puckering or gaps, I slide my fingers into the cuff and make sure it is pulled taut but NOT stretched.
Step 9b: Top stitch about 1/4″ down from where the trim was attached to the jean.
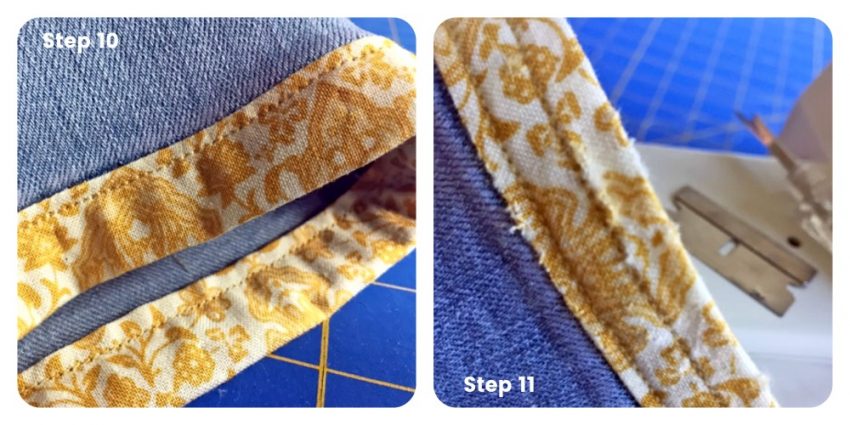
Step 10: This is what it should look like. The raw bottom edge of the jean is fully enclosed in the trim so that there are no raw edges to fray. You can stop at this point but I wanted to give the trim a worn look to match the distressing on the denim.
Step 11: using a razor, scissors, and/or seam ripper, carefully scratch and pull at the trim to give it a worn look. For stability, I did another run of top stitching 1/4″ below the first row of top stitching.
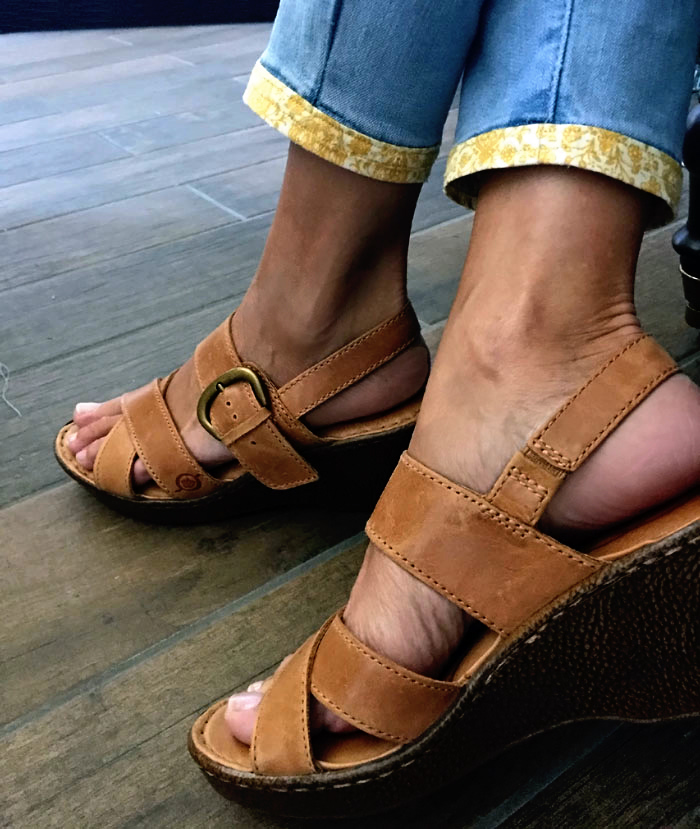
And voila… my too tight hem is no more and I have a one of a kind pair or denim capris with a fresh bohemian style. What’s not to love about that!
Sharing is caring!
Related Posts
Three Projects From One Tablecloth
By now I think you know that I love two-fers. Like the Green Chili…
June 29The Luxury of Crafting
Happy Thursday lovelies. I’m sitting in my craft room today, sewing barefoot with…
November 294 COMMENTS
COMMENTS (I love hearing from you!)
This site uses Akismet to reduce spam. Learn how your comment data is processed.



Tania | 30th Aug 17
Well now, those are CUTE!! Such a simple way to fix them too, thank you for sharing!!
Tania
Lenneke | 29th Aug 17
This is so cute!!
Vikki | 29th Aug 17
These are VERY cute! Good job, Jo!!
JoElle | 29th Aug 17
Thank you!