
Fabric Backed Distressed Jeans

Hellowwww my fellow crafters. I’m gonna be quite honest right now. Tomorrow I leave for girls week in Sonoma, CA so this post – well, it’s a little rough. You see, I started with one project that ended up a TOTAL FAILURE!!! So now, on the last day, I’m throwing together another denim DIY. Mostly because I want these fun fabric backed distressed jeans for for my trip. Sooo, here we go…
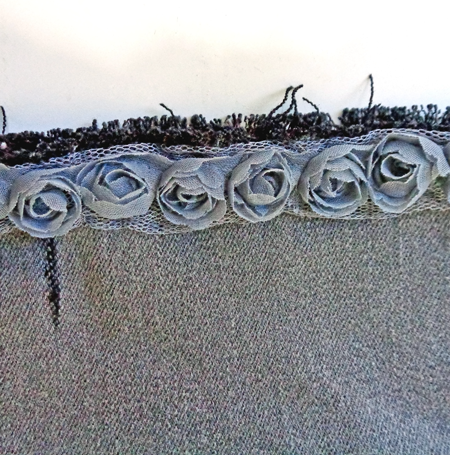
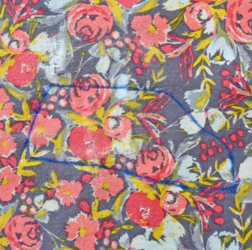
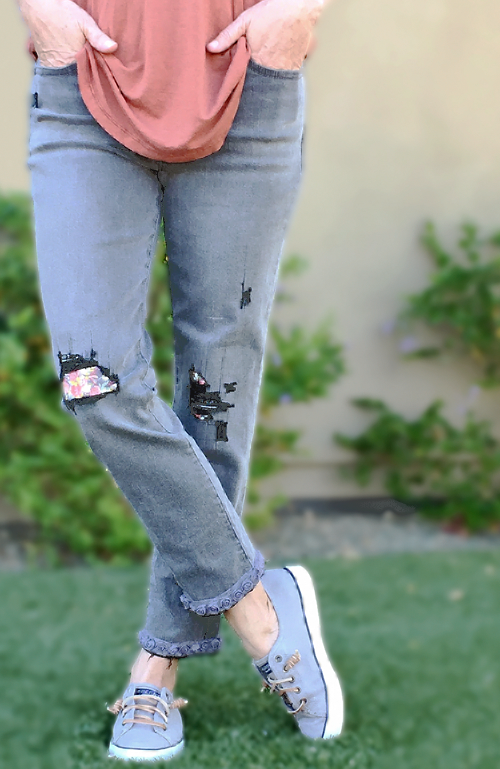
I bought this pair of jeans at Costco for $19.99 (steal). They fit well but the grey wasn’t as flattering as I thought when I first saw them AND, as usual for someone 5′ tall, they are too long. I decided to crop them and distress them but to my surprise, the thread when distressed was black rather than white or light grey. WOW! Harsh! So I decided to line them with a cute floral fabric and some little grey ribbon rosettes on the hem. What do you think?
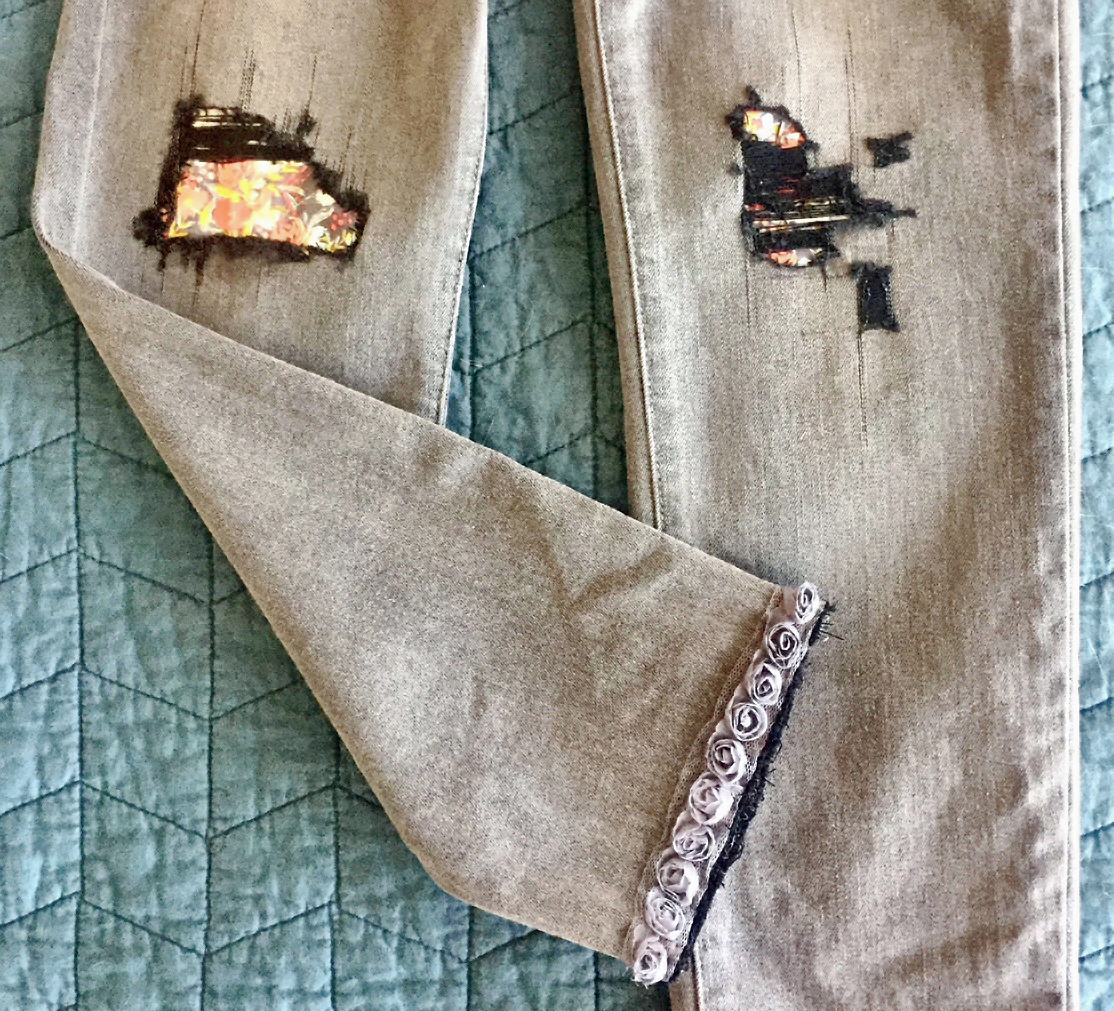
I love the distress jeans look but I feel like it’s gone way overboard. Like the entire front of the jeans is missing…What the flippity floo!! I need some coverage for my pasty white skin! This is my solution…a little bit sweet and a little bit grunge.
How To Crop Your Jeans With A Frayed (non)Hem
First thing you need to do is put the jeans on and mark where you want the final hem to be and where you want the distressing to be. I know I recommend a lot of things to you guys but seriously… this one is a must. The Pilot FriXion Pen is AMAZING! You can mark any kind of fabric with it, iron it, and the mark is completely gone. This pen is perfect for quilting, altering clothes… you name it. And your guessed it, here’s the Amazon link AND if you purchase this amazing pen from this link I will receive a little tiny commission. Woohoo!!
So, now that you know how short you want your jeans, cut them just a little below that point. To follow the latest fashion trend of a frayed (non-hemmed) hem we aren’t going to turn the hem under so we only need about an 1/8″ more than the final length you want.
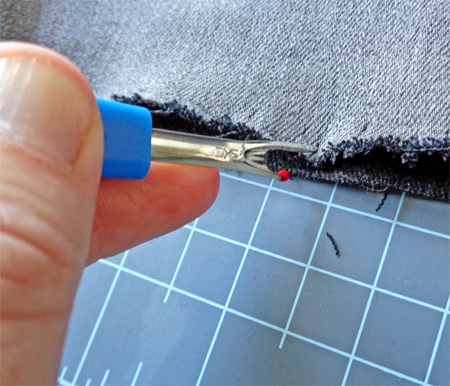
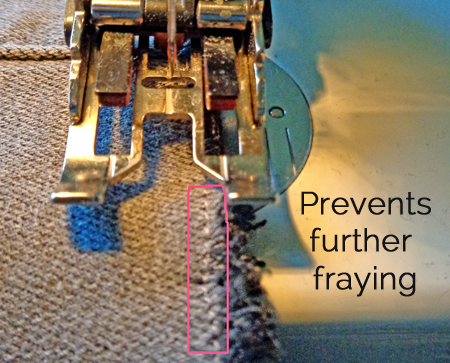
Cut the jeans and with a seam ripper or the tip of a pair of scissors, fray the edge. Cut off any super long threads and sew a straight stitch about 1/8″ from the frayed edge. This will help prevent the fabric from continuing to fray farther up the leg.
Next, I hand stitched a rosette trim. You can use any kind of trim from velvet to laced or woven.
How To Distress Your Jeans
Your hem is done! See how easy that was. Now for the distressing. For this you will need a pair of scissors, a razor or X-Acto knife and some tweezers. You can also use some sand paper if you like.
Using your Frixion pen marks as a guide, make some horizontal cuts. Scrape your scissor edge or the X-Acto knife along the edge of the cut to fray it. You can also run the sand paper over the top of the jeans around the distressed area. To get the look where there are threads running across the opening make two cuts, one above the other.
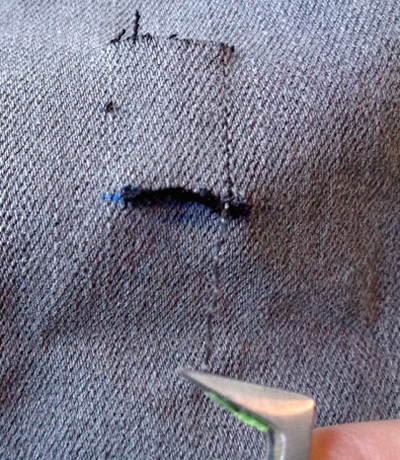
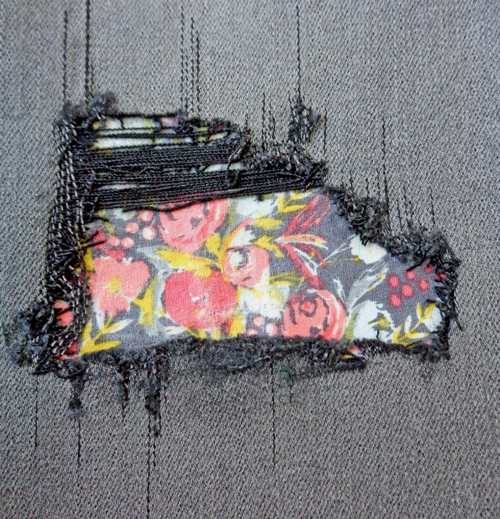
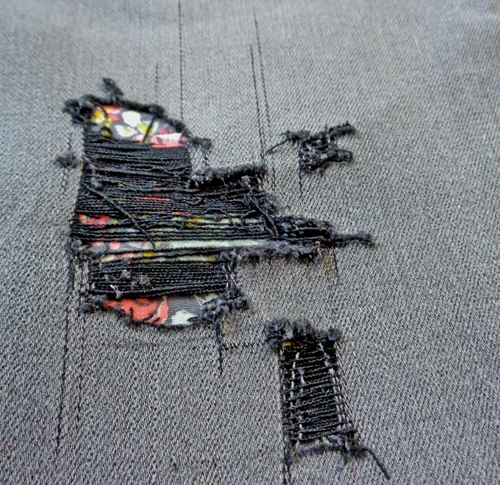
Then use a pair of tweezers to pull the vertical threads out. You will be left with only the horizontal threads of the jean fabric; like the top portion of the picture below.
How To Add Fabric Behind Your Distressed/Worn Jeans
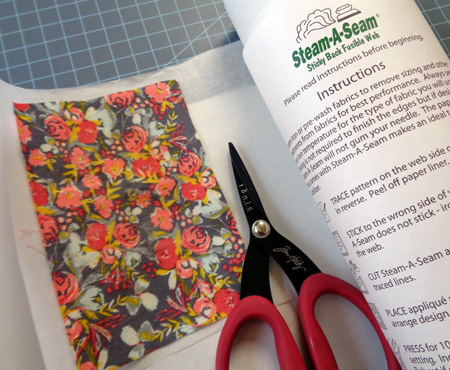
Once you are happy with your distressing, all you need to do is add some decorative fabric behind the holes/distressing. For this step all you need is your fabric, a pair of scissors, an iron and some Steam-A-Seam.
First, cut a piece of fabric about an 1″ larger than your distressed area (all the way around). Cut a piece of Steam-A-Seam to the exact same size as your fabric.
Contrary to the Steam-A-Seam instructions, you will be applying it to the FRONT of your fabric. If you have a big hole in your distressed jeans, like I do, you will need to remove the sticky part from that area. Here’s how you do that.
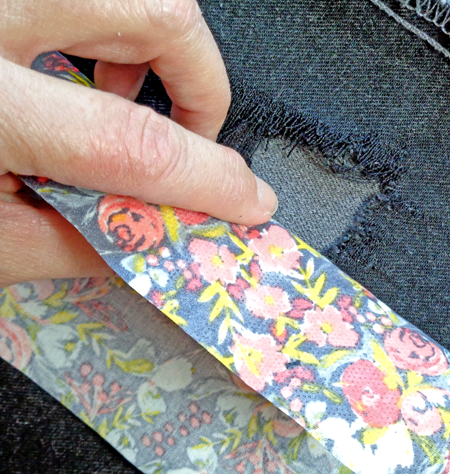
Place your fabric up the leg of your jeans so that it is centered behind your distressed area.
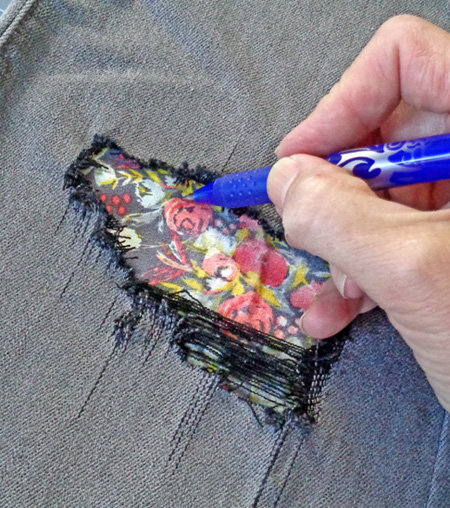
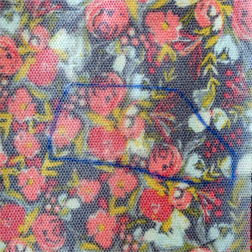
Using your FriXion pen, trace the part of your distressing that is completely void of jean material.
Pull your fabric out of the jean leg. It should look something like this. Now peel the backing paper off of your cut piece of Steam-A-Seam. Set the paper aside. Place the Steam-A-Seam piece on top of this marked piece of fabric. Press gently and it will temporarily stick to your fabric. You should be able to see the marking on the fabric through the Steam-A-Seam. Trace over the marking on your Steam-A-Seam and then gently peel it off of your fabric.
Next, Cut out the traced shape on your Steam-A-Seam – NOT YOUR FABRIC.
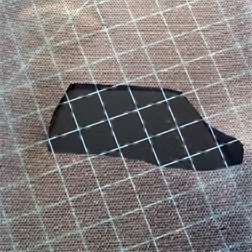
After cutting, lay the Steam-A-Seam back onto the good side of your fabric (tacky side down). Place the piece of paper that you peeled off the Steam-A-Seam onto the top. So to recap: Fabric piece on the bottom with good side facing up, Steam-A-Seam piece with the hole cut out of it (tacky side down) next, then paper on top.
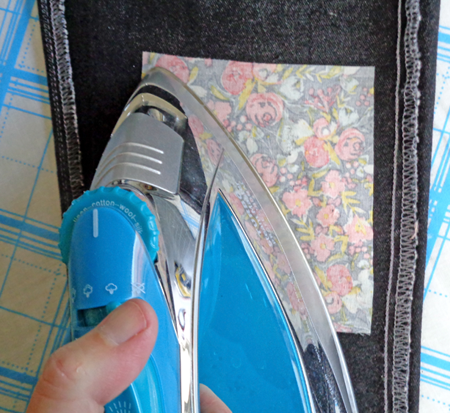
Press for 10-15 seconds with your iron on the COTTON and STEAM setting. Give this a minute or two to cool and then peel the paper off. Now look at the good side of your fabric. See the faint dots where the Steam-A-Seam is? Rub your hand over it. Feel the difference between the area with the Steam-A-Seam and the area without?
Now, turn your distressed jeans inside out. Place your Steam-A-Seam fused fabric (good side/Steam-A-Seam side down) over the distressed area of your jeans. Reach into the pant leg, feel for the hole in your jeans, then line up the piece of backing fabric so that the section that does not have the Steam-A-Seam on it is aligned with the hole in your distressed jeans.
Now simply press with your iron for 10-15 seconds. MAKE SURE THE RIGHT OR GOOD SIDE OF YOUR FABRIC IS FACING DOWN.
Now turn your jeans right side out and Voila!!! I really love this look because it’s a little sweet and a little Rocker-ish (I totally made that word up!). Remember, you only have to cut out part of the Steam-A-Seam if you have full holes in your jeans. If not, you can just fuse the full piece of fabric.
I hope you enjoyed this quick tutorial. It can be used for denim jackets too… how cute would that be on a worn elbow!!!
Well, I’m off to pack now so I can catch my plane first thing in the morning. These girls have been my sidekicks for over 40 years and I can’t wait to spend a week with them. Have a fantastic week and I will talk to you in JUNE!!

Related Posts

DIY Tortoise Table
Last fall we introduced these little guys to our family. They are Arizona Desert Tortoises…
April 188 COMMENTS
COMMENTS (I love hearing from you!)


Sharla Bowling | 9th Jan 24
Very confusing directions – a video would be so so helpful!
JoElle | 16th Jan 24
I know – it is a hard process to describe. I’m sorry it was confusing and possibly frustrating for you. I very much appreciate your feedback and, if I resume actively contributing posts to the site, I will keep a video in mind. Thank you.
Victoria J | 7th Apr 22
Does steam a seam 2 work the same way? I am confused about which side of the paper is peeled away first. Thanks!
JoElle | 11th Apr 22
Hello Victoria. Thank you for your question. I went back and read through the instructions and I see where your it gets confusing. I’ve update the instructions to be more clear about sides of the Steam-A-Seam/fabric etc. I think there was an a production issue with the company that makes Steam-A-Seam and now they only sell the Steam-A-Seam 2 and a lite version (less stiff). You can use either one for this project. Every time I use the iron on Steam-A-Seam, I make sure to place the paper on top before I iron – that way, if I’ve made a mistake on which side I put down, the adhesive doesn’t get all over my iron. I hope these things help. Please let me know how your project goes.
Kimberley Grable | 25th May 18
Such a great idea!!!!!
JoElle | 5th Jun 18
Thank you very much Kimberley.
Tania | 25th May 18
I love this, those jeans look so cute!
Tania
JoElle | 5th Jun 18
Thanks so much Tania.