
DIY ART
I felt a little bit like a kid this Christmas. All I wanted was my front tooth and a bike. I know that sounds like a strange wish list for a 53 year old but honestly, that was my heart’s desire. I’m still working on my front tooth – more on that later. First, let me tell you about my new bike and the totally cool box it came in – a box I loved so much, I actually turned it into a piece of DIY Art.
The Bike (box)
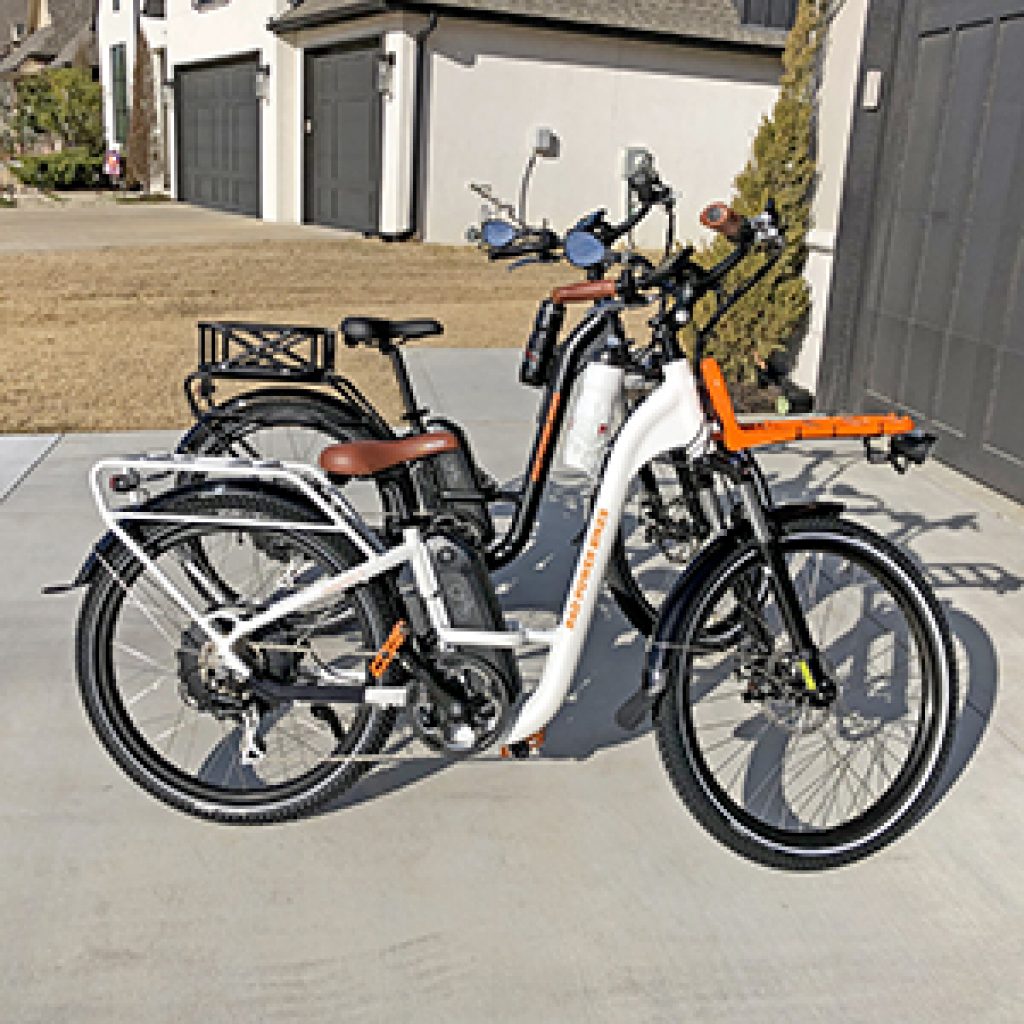
Ever since my husband got his mountain bike he’s wanted me to ride too. I personally nixed the mountain bike idea immediately – I like my thigh bone to be connected to my hip bone thank you. But, I’ve always loved the cruiser style bikes and with a little help from the electric version (E-bike), I figured I could actually keep up with Jeff.
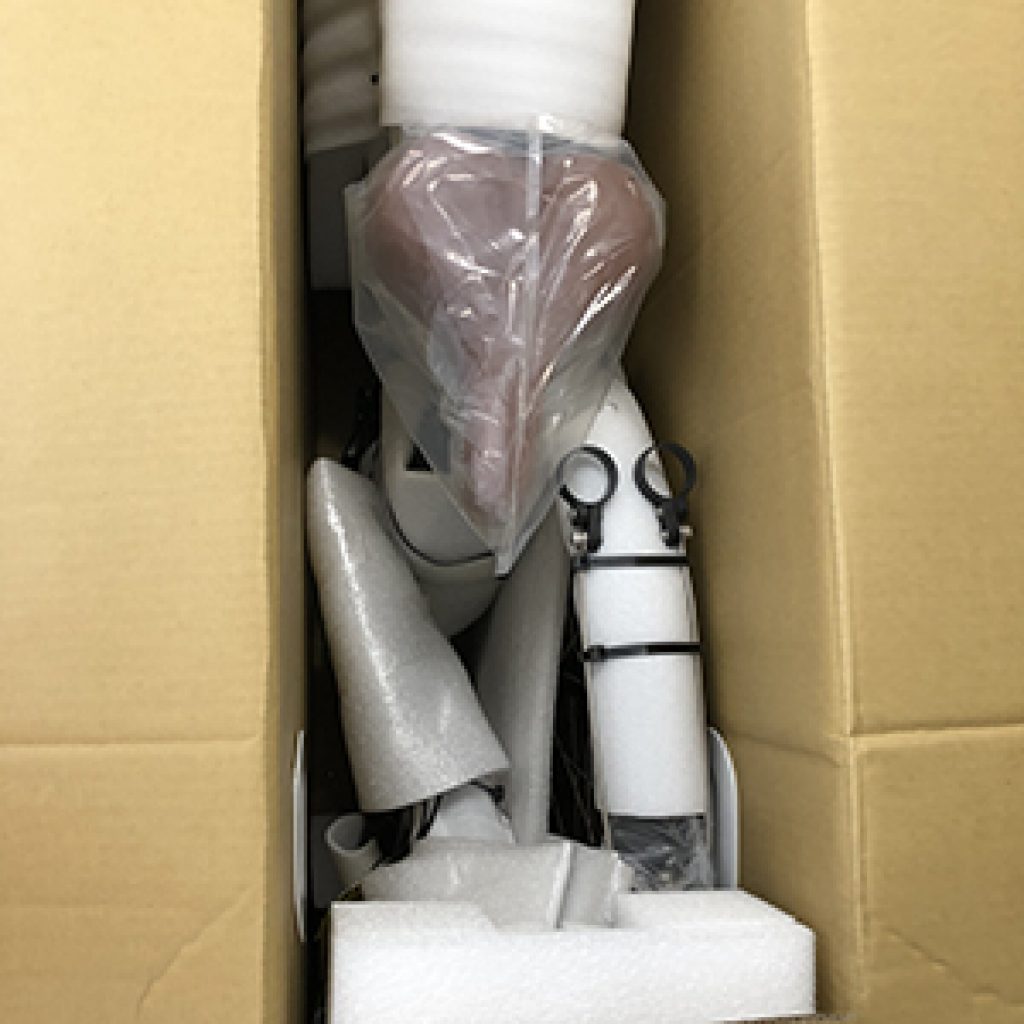
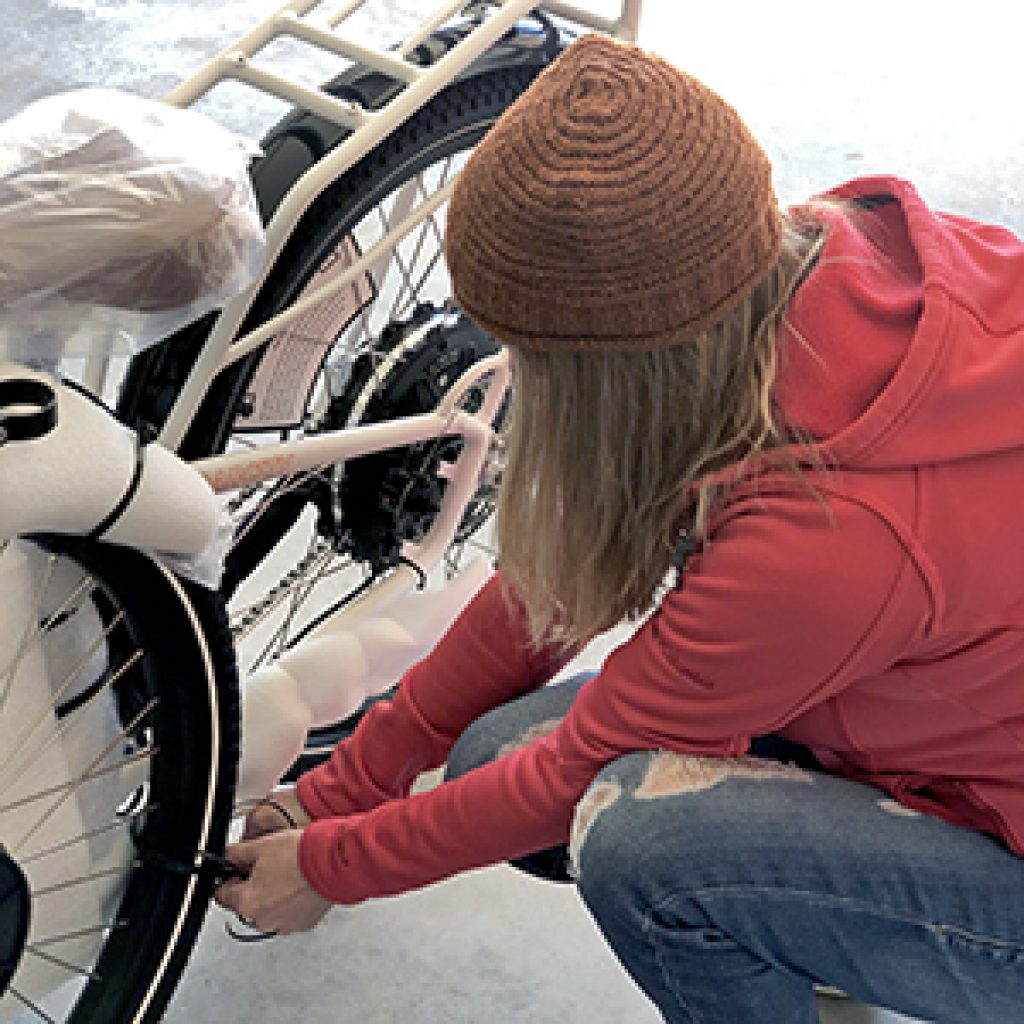
After doing a ton of research we decided on the Rad Power Bikes and mine arrived the day after Christmas. Par for the course of my child-like Christmas, I was absolutely elated . . . about the box it came in.
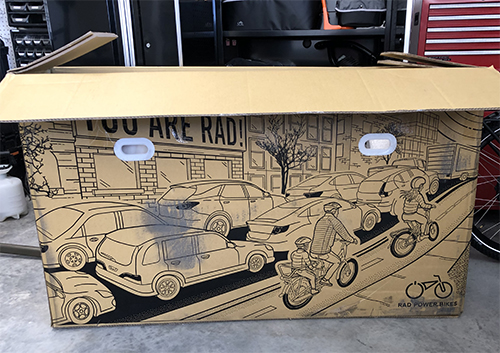
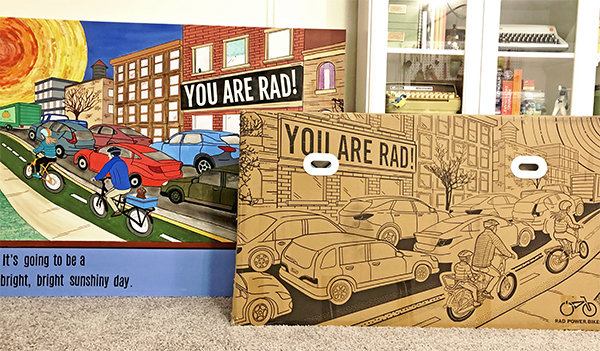
How cool is that!? The Rad company actually has a coloring contests for their boxes which I think is so fun. I, however, had a slightly different idea. I was in great need of a LARGE piece of art for my media room and this image gave me the perfect start to an inexpensive piece of DIY art.
Trace & Transfer: How to Art When You Can’t Draw
I believe I’ve mentioned many times that I can’t draw. Seriously. I don’t understand perspective or shadow and if there were a draw a straight line sobriety test, I would fail every time. I just can not draw. Therefore, there was only one way I was going to turn this image on the bike box into a piece of art – Trace & Transfer.
I use the trace and transfer method all the time for my kindness rocks. You can see how it works in the post Trace and Transfer: A Simple Technique with Endless Applications and Rock Painting From A Coloring Book
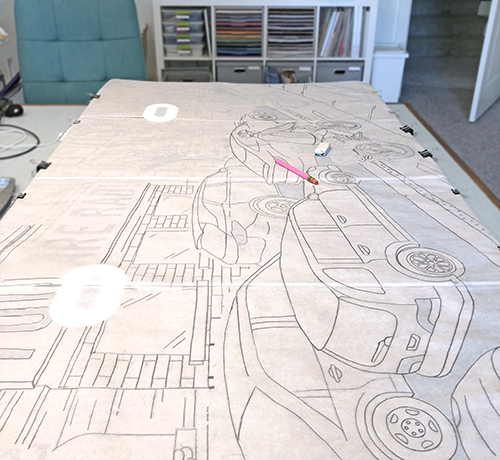
It’s actually a super simple process -even on a large scale. Basically, lay some parchment paper over the image you like. Trace it with a fat #2 pencil. Make sure to press fairly hard. Then flip your parchment paper over onto the surface you want your image on. Trace over the lines again. The pressure from the pencil on the second trace will transfer the lead marks onto the new surface. Easy peasy art.
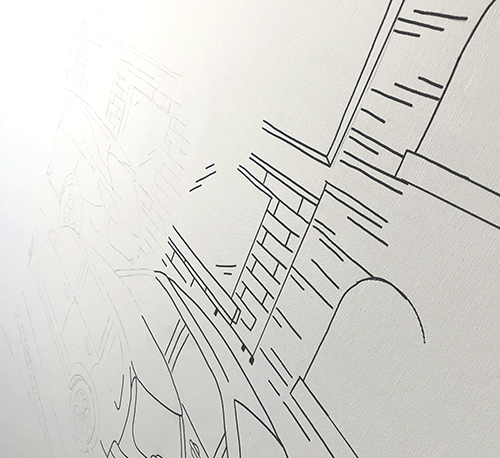
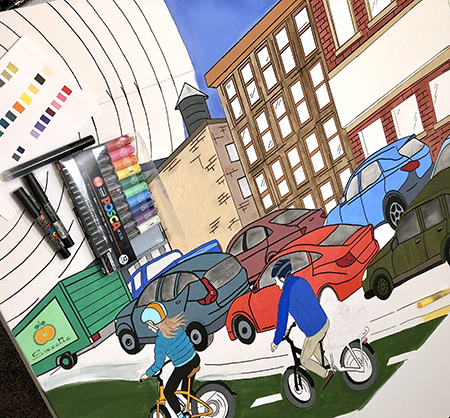
I used a 48″ x 60″ art canvas which I purchased from Michaels at 50% off. Once all the pencil lines were transferred onto the canvas I outlined them with a black Sharpie pen. The canvas was taller than the box so I extend the image a few inches and placed a big strip of color across the bottom. You’ll see that in upcoming pics.
NOTE: Of course, copying others’ artwork is only okay for projects you are personally using/keeping. In other words, don’t sell pieces you made from others’ art. But you already know that.
Mixed Media Art: A Great Way to Fill Big Spaces
When I have so much space to color, I use a variety of mediums to create different textures and effects. The end product is more interesting that way AND you don’t get bored while making it.
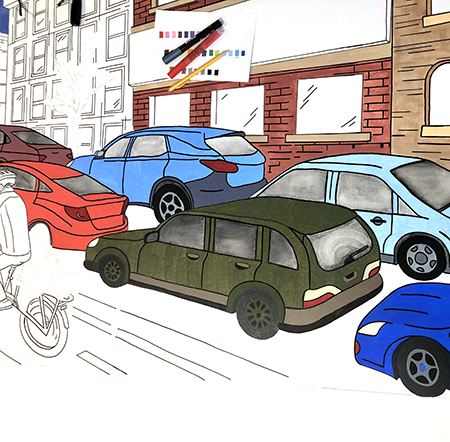
In this project, I used Posca Pens (fine & medium tip) and Artistro Acrylic Pens (medium tip) on most of the cars. Basic art pencils, Cretacolor Aquastic Oil Pastels and opaque watercolors worked really well for windows, tires and the street while most of the buildings were painted with standard acrylic paint so I could mix my own colors.
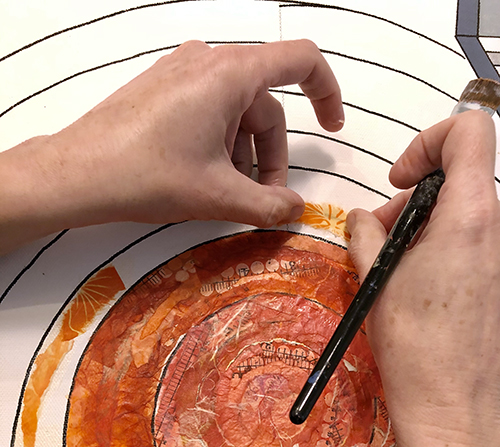
I decided to decoupage/collage the big sun in the corner using pieces of tissue and mulberry paper along with Liquitex Gloss Gel Medium. I love how it turned out and it was a nice break from all the coloring.
Add Personal Touches to Your Art
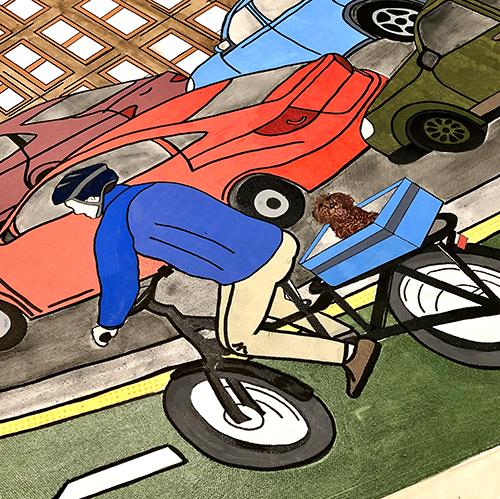
One of the best things about DIY art is that you can slip in details that mean something to you, making the piece more personal. For example, in one of the windows you’ll find a sleeping kitty (representing our kitty, Maisy). Also, I changed the child riding on the back of the bike (see the original box) to a basket with a puppy. Perhaps this is an indication of what’s to come (wink wink). I also made the bikers’ appearance (hair and size) similar to Jeff and I.
DIY Art Isn’t Perfect
There are so many “mistakes” in this piece. Three pictures above you can see where I had to gesso an area because I didn’t like the color/lines I used. Take a look at the green car below – no matter how I tried I could not get the watercolor on the windows to lighten up. My solution – I used a Q-tip to write “wash me” and create windshield wiper marks. It’s actually one of my favorite parts now!
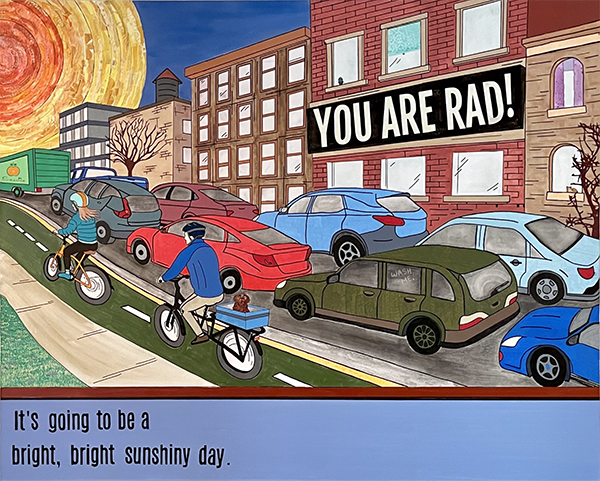
I also believe it doesn’t all have to be realistic. For example, in real life, the space inside the bike tires would not be white but I felt trying to replicate “reality” in this instance would just be too difficult so I left it alone.
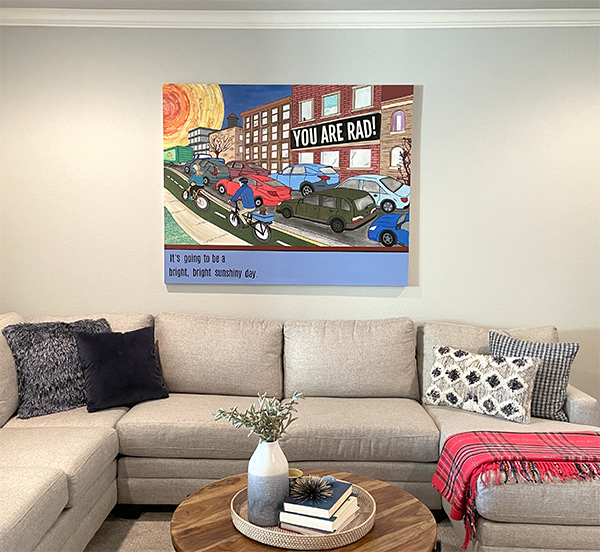
So yea, My song lyrics aren’t perfect and the D in Rad drives me a little nuts but it’s quirky and fun – kind of like us. It’s perfectly imperfect. And who would ever think you could get a major piece of art from a cardboard box?!
Oh yea – the bike is really cool too!
And the front tooth . . .?
That is going to take some time to fix. This is the only time I will ever say, THANK GOODNESS for face masks!
Related Posts

DIY Tortoise Table
Last fall we introduced these little guys to our family. They are Arizona Desert Tortoises…
April 18
DIY Mood Bracelets
Do you ever get moody? I had to start the post with that question because…
February 1410 COMMENTS
COMMENTS (I love hearing from you!)


Tania | 9th Jan 21
Shut up… that is so cool!! I wish I would get something in a cool box like that!! My daughter gets the Fab Fit Fun boxes and they always come in really cool boxes but they are already colored and I had never thought of transferring to another item!!! So sorry about your tooth!!!
Tania
JoElle | 12th Jan 21
Thanks so much Tania. You’ll have to save the next Fab Fit Fun box and give it a go. LOL – the tooth will be fixed but will take a few months so, until then, just call me Toothless Jo.
Diane | 8th Jan 21
What a fun idea! Turned out great! Enjoy your bikes!
JoElle | 8th Jan 21
Thank you Diane! Yes, we are waiting for some warmer days to hit the trails.
Ashlyn | 8th Jan 21
Awesome post! Thanks for sharing your idea and process.
JoElle | 8th Jan 21
Thanks Ashlyn! It was a fun project.
Elizabeth Vincent | 8th Jan 21
How fun – you are so imaginative and creative.
JoElle | 8th Jan 21
Thank you Elizabeth. I loved doing the project as it kept me busy for a solid two or three weeks.
Vikki | 8th Jan 21
This turned out so well. You did a great job and that was creative of you to see the potential in a shipping box!!!
JoElle | 8th Jan 21
Thank you Vikki. I knew as soon as I saw it that I wanted to paint it – I guess because it just looked like fun.