
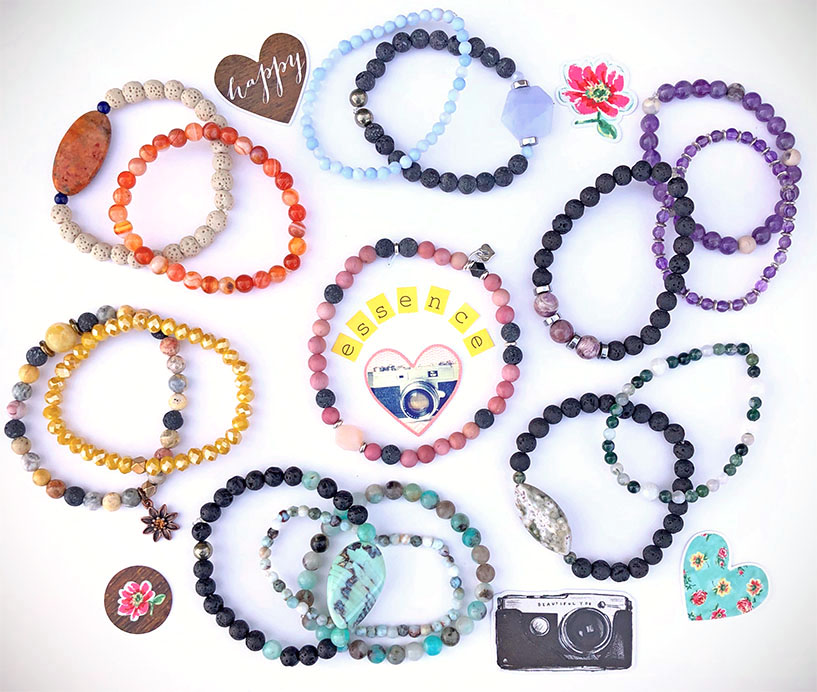
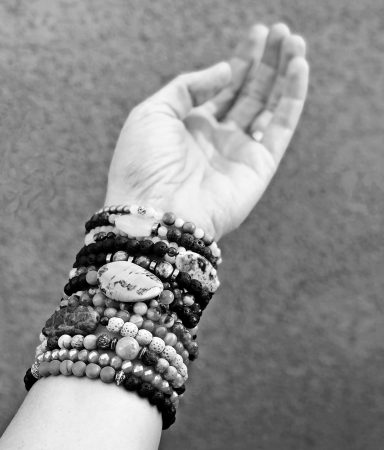
DIY Mood Bracelets
Do you ever get moody? I had to start the post with that question because I assume there is someone out there who never gets moody, right? I mean, we’re all made to believe there is a state of mind that is 100 percent, 24/7 accepting of all feelings and just goes with the flow like a gentle, meandering river… right? Anybody?
Hello Reality!
Okay, so it’s probably safe to say that a good majority of use get moody on occasion. We wake up and for no special reason (aka hormones) we’re in a funk. It happens to me for sure. Out of the blue I’ll welcome my morning with the thought . . .
“I just want to hold puppies all day . . . lots of them. That’s all I can do today; that and eat bakery goods…in bed.”
Other days my insides feel like sand paper and everything I touch is rough and wrong and prickles my feelings. Most days I’m good. Generally speaking, I have decent energy and usually feel inspired but occasionally, I feel tired, irritated and emotionally ugly. I had two of those days this week so I think it’s a perfect time to share one of my favorite mood enhancers.
No. I’m not referring to cocktails . . . not until 6pm anyway and then, you should give this fresh update on a classic cocktail a try. But really, I’m actually talking about these super pretty and ridiculously easy DIY Mood Bracelets.
Why Do I Call Them Mood Bracelets?
Simply put, they make me happy. First of all, they go together quick enough to make one in every color of the rainbow. Secondly I use stones that are believed to have healing properties related to things I’m working on like creativity, self esteem, and anxiety. Most importantly, I use lava stones and essential oils to add beautiful, uplifting scents that are with me all day long. I also must admit, ‘JoMama’s Be Mellow Don’t Curse Outloud Bracelet’ didn’t seem like a great blog post title. But seriously, it is hard to stay in a funk when you’re wearing one of these.
Love is All You Need . . .
Well, not really. You will also need stone/gem beads, lava beads, stretchy cord and some jewelry glue. It’s also super helpful to have a bracelet bead tray and they’re cheap so. . . why not. And of course, LOVE. You do need love.
Here’s the nitty gritty on each item
Stones & Gems
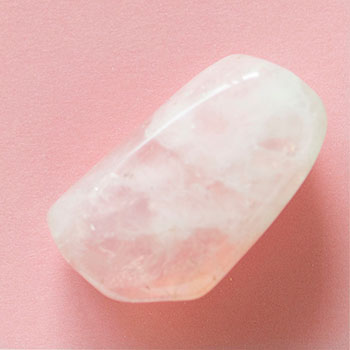
What to get: I keep it simple, using round or faceted beads – usually about 5-6 mm in size. Some of my favorite stones are agate and jasper (because they come in so many colors), and rose quartz. If you are interested, there’s a PDF of my Top 10 Gemstones and Their Super Powers on the Subscriber Freebie page.
Where to buy: Of course, you can get beads at your local craft store if you don’t care if they are real gemstone or what type they are (i.e. jasper, jade etc..) I do recommend visiting a local bead shop if you have one. They’d love the business, carry good quality stones and are usually the most helpful. If you prefer to shop on-line, look at Fire Mountain Gems. They have a $5.99 flat rate shipping (up to 10 lbs).
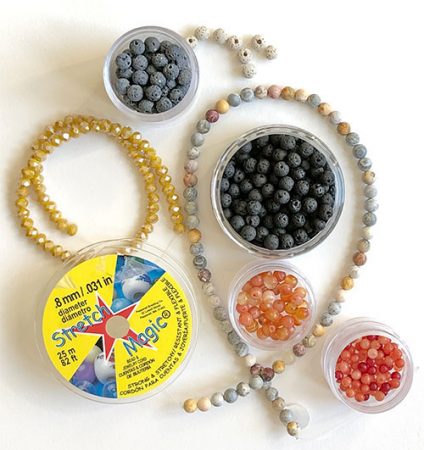
Lava Beads
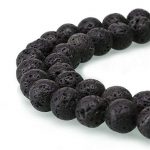
What to get: Beads made from lava rock are naturally porous so they are perfect for absorbing and holding essential oils. I prefer a 6 mm size bead. Make sure you purchase ‘natural’ or ‘uncoated’ lava beads! Waxed or coated lava beads will not absorb the essential oils.
Where to buy: Just like the gemstones, you can get lava rock from your local craft store or even better, your local bead shop. You CAN actually get good lava beads from Amazon. I’ve ordered THESE before and been quite happy with them.
Miscellaneous Supplies
What to get: The beads are threaded onto a simple elastic cord so you can easily slip the bracelet on and off. I prefer Stretch Magic in Clear. Stretch Magic comes in different thicknesses (diameters). I hate to say it but, size really does matter. You want to use the thickest cord that will fit through all your bead holes. The 1 mm cord is very durable but there are a few beads that won’t fit on it. The .8 mm Stretch Magic is a safe bet.

You also need a tube of Hypo Cement to glue the knot you will make in the stretchy cord. This insures your bracelet won’t fall apart. For both the Stretch Magic and the Hypo Cement, I’ve given you Amazon direct links; HOWEVER, Amazon does not offer the best prices for these items. If you have Amazon Prime (free shipping) it will even out. As outlined in my disclaimer, I do get a small commission from Amazon if you purchase from these links but honestly, in this case, I really do encourage you to check out your local bead shop where the prices may be better and they can answer any questions about using the products.

Lastly, I REALLY recommend using a bead design tray. It isn’t necessary but will really help you design and size your bracelets. Additionally, it will prevent your beads from rolling all over the place (your kitty will be so disappointed).
Measure Twice Curse Cut/String Once
So you’ve gathered all your supplies but how do you know what length to make your bracelet? Where is the ‘middle’ of your bracelet (if you want to use a special accent stone)? How much does a stretchy cord stretch? How many beads will you need? Well. . .
FIRST, get a string or 1/2″ wide strip of paper. Wrap it around your wrist (not tight/not lose) and mark where the ends meet. Now lay that string or paper next to a ruler or tape measurer. This tells you the circumference of your wrist. Most ladies run somewhere between 6 and 8 inches.
NOW, if you made your bracelet the length of the circumference of your wrist it would be too small. Why? Because the beads themselves take up space so you have to take that into consideration. Okay – now don’t freak out – promise? I’m going to say the dreaded words MATH and EQUATION but I’m following it with the words SUPER EASY.
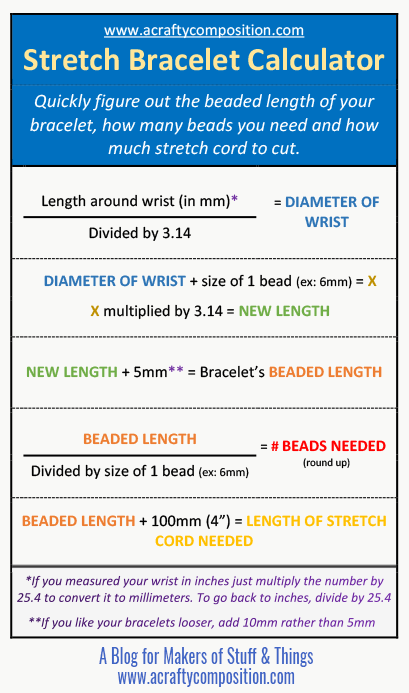
See – basic addition, multiplication and division. Now you know. . .
- The minimum length to cut your stretchy cord
- How many beads you need for one bracelet
- How long the beaded portion of your bracelet needs to be.
The most important number from the formula sheet is the BEADED LENGTH. You may use a larger focal bead in the center, decorative spacers or beads of different sizes; consequently, this will change the total number of beads needed. If you just stay focused on the final beaded length, you’re all good.
Design Time
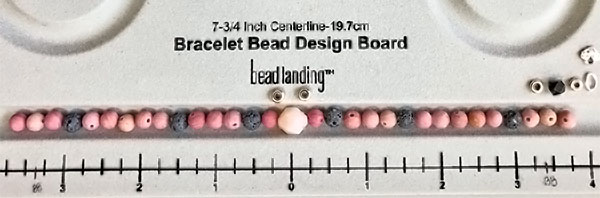
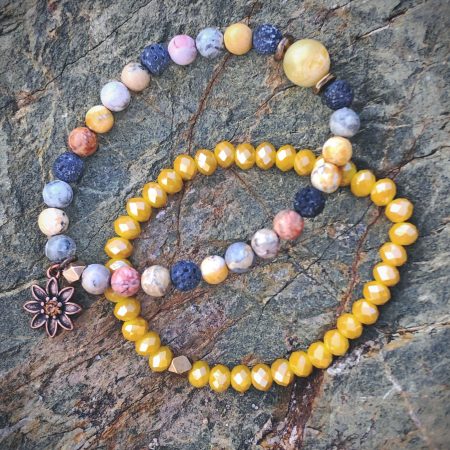
I like to lay out my beads before I string them – in case I change my mind. Most bead trays have a center ‘0’. Build your bracelet from this center mark; going out half the total desired length in each direction.
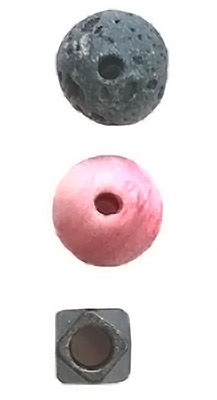
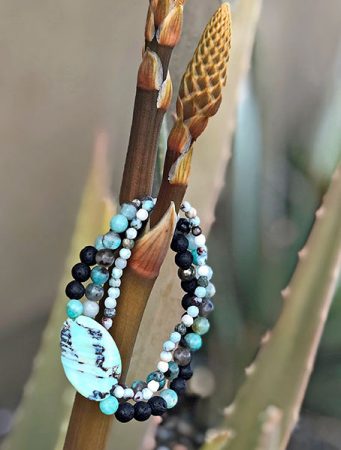
I mix lava stones with gemstones but since the lava stones are the only beads that can hold the essential oils, I make sure to use at least 5 lava beads per bracelet. I’ve also learned to incorporate one bead that has a larger hole for the back center – this way I can hide the cord knot in the bead. It makes your finished bracelet look really nice.
You can see an example of this ‘knot bead’ in the picture of three beads next to ‘miscellaneous supplies’ (the bottom bead) and in the picture of the G-S Hypo Cement (left side of strung bracelet).
A Good Stretch is Important
At this point, all you have left to do is string your beads onto the stretchy cord and tie a knot. BEFORE YOU CUT YOUR STRETCHY CORD –
S-T-R-E-T-C-H I-T-!
STRETCH IT GOOD (naa na na na – na na – na na)
If you skip this step, your bracelets will eventually stretch out and you’ll be able to see the cord between the beads. Not a great look. So take a few minutes, protect yourself against the inevitable snap (yes, it hurts) and stretch the cord before you cut it. Give it a minute to go back to it’s normal size and then measure and cut it. I use the general formula of the beaded length plus four inches for tying the knot.
After that, just string your beads, going from left to right in the order you laid them out. Use a square knot with a dab of Hypo Cement to tie the two ends together. Let sit for 24-hours then trim your ends and gently pull your knot into the hole of your finished knot bead. And there you go.
Here’s a link to a quick You-Tube video showing how to do a square knot.
Essential Oils
It’s easy to get carried away making these bracelets because they are easy and very quick. In just a half hour or less you can be sporting a few of these on your lovely wrist. See, you’re feeling better already. . . you’re looking pretty, you’ve got your healing stones . . . healing – now all you need is some essential oils.

First, Go On A Smelling Spree
The next time you are at a Whole Foods, Sprouts, New Seasons or other ‘health conscience’ grocery store, head to their beauty section. Most of them will have a good selection of essential oils that you can take for a . . . sniff.
This is REALLY important because what smells good to one person can cause a crashing headache for another. Over time, you’ll find the single element essential oils that YOU like. You might prefer florals like jasmine, rose or magnolia. Perhaps herbal is your thing, like peppermint or bergamot. Or maybe you feel uplifted by the zesty scents of lemon and tangerine.
Additionally, most essential oil companies make blends that focus on a certain mood or need. Like sandalwood, ylang ylang and patchouli to invigorate and awaken or lavender and chamomile to help you rest. Over time, you’ll find what works best for you and which scents to avoid.
Use Quality Products
Your skin is your biggest organ so what you put ON your skin needs to be good for INSIDE your skin. Use companies that are reputable, don’t add artificial scents or additives.
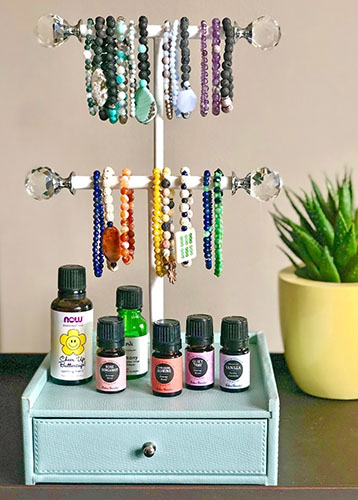
Here are two of my current FAVORITE essential oil companies
EDENS GARDEN: All their essential oils are therapeutic grade, third party tested and 100% free of synthetics. They are also very ecologically minded; using sustainable practices through out their entire production. My Favorite Eden’s Garden Scents: Their vanilla is out of this world delicious smelling and I love their Rose Bergamot blend.
NOW HEALTH GROUP: NOW Essential Oils are just a portion of what this company produces but they do everything with your health and well-being as their #1 concern. Their oils are also purity tested and free of synthetics. Their website is super easy to maneuver as you can look up oils by scents (floral, spicy, musky…) or by purpose (energize, relax, romance). My Favorite NOW Essential Oil at the moment is their uplifting happy blend called Cheer Up Buttercup!
Well lovelies. I hope you’ve enjoyed this little adventure into my bad mood buster bracelets. Please know I’m NOT suggesting this as a remedy for depression, anxiety etc. It would be absolutely amazing if putting on a pretty smell-good bracelet of healing stones could cure all that ills but it’s just not so. If you are experiencing anything beyond the occasional bad moods or just want to pet puppies days, please talk to a family member, a friend, or make an appointment with your doctor. You are NOT alone and you are NOT broken. Most of all, YOU and your well-being MATTERS – often more than you can imagine.

Have a wonderful week and please don’t forget to check A Crafty Composition out on Facebook, Pinterest and Instagram. If you want to benefit from all the goodies on the Subscriber Freebies page, just head over to the top of the side bar on the right, add your email and first name (which is NEVER shared) and click SUBSCRIBE NOW!! Easy Peasy
Related Posts

5-Minute Mini Gift Bag
If you have followed A Crafty Composition for a while you know it is fairly…
January 262 COMMENTS
COMMENTS (I love hearing from you!)


Vikki | 14th Feb 19
Such pretty bracelets and an excellent tutorial. You do have to take those oils for a sniff–they are different to everyone.
Love!—oh, and World Peace. Yep, World Peace.
Now, bring on the puppies (or bunnies).
JoElle | 15th Feb 19
Thanks Vikki…and I agree, world peace and bunnies have to be in the mix too!