
Adult Face Mask with Wire @ Nose and Pocket for Filter
This face mask offers full coverage over the nose, mouth and cheeks. There is a flexible metal piece at the bridge of the nose and a pocket to fit disposable filters. This mask can be made with two elastic loops for around the ears or twill tape for a tie behind the head strap.
Servings 1 DIY Face Mask
Cost varies
Equipment
- Sewing Machine
- Scissors
- Iron
Ingredients
- 2 patterns You can find the mask patterns at A Crafty Composition's Sewers' Dozen Face Mask Challenge
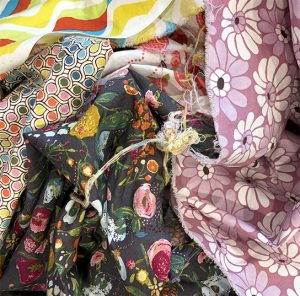
- 1 piece 16" x 7.5" PRE-WASHED cotton fabric (Face Mask's Outside)
- 1 piece 14" x 7.5" PRE-WASHED cotton fabric of a different color or pattern than the other fabric (Face Mask's Inside)
- 1 spool sewing thread
- 3 inch piece of wire, doubled pipe-cleaner, or other flexible metal
- 8 inches 1/4" elastic, for ear loops - OR
- 1 yard 1/2" cotton twill or ribbon, for strap around head
OPTIONAL
- 1 piece soft cotton batting to encase the nose wire
Instructions
PREP
- IMPORTANT! Pre-wash, dry and iron all fabric
- Print out the face mask templates from A Crafty Composition Sewers' Dozen Face Mask Challenge. Verify proper sizing by measuring the 1" test box.
- Cut out the templates
TRACING AND CUTTING THE PIECES
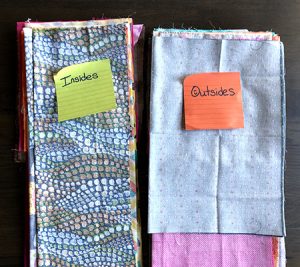
- Decide which fabric is your front or "outside" piece and which is your back or "inside piece
- Fold each piece of fabric in half with the right(good) sides together.
- Lay the template (downloaded from the blog post) onto each piece of fabric. The 'Outside' template goes on the 16" fabric piece and the "Inside" template goes on the 14" piece.
- Trace the template onto the fabric
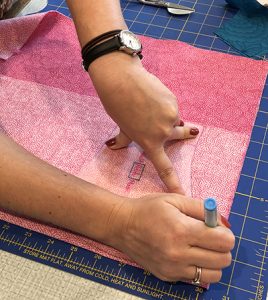
- Cut the traced image. Because the fabric was folded in half, you will get TWO pieces of each template
SEWING THE MASK - use 3/8" seams
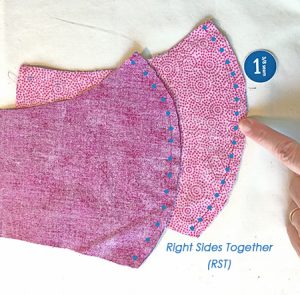
- STEP 1: Sew the two "inside" pieces together at the outer curve. Sew the two "outside pieces together at the outer curve. Now you have 1 full "inside" piece and 1 full "outside piece". Note: It's helpful to notch the outer curve and gently press the seam
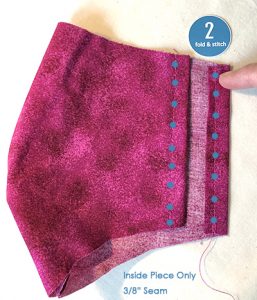
- STEP 2: On the "inside" piece only - fold each end twice and stitch. Press.
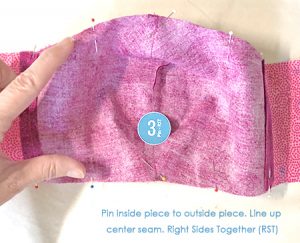
- STEP 3: Place the "inside" piece and the "outside" piece on top of each other with the right (good) sides of fabric together. Carefully line up the middle seam, both at the nose and at the bottom of the mask. Pin
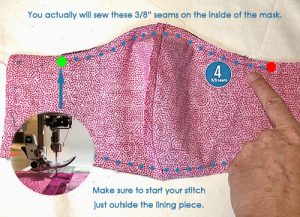
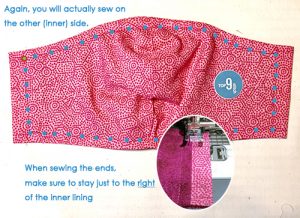
- STEP 4: Working on the inside of the face mask, sew a 3/8" seam STARTING JUST OUTSIDE the folded end of the "inside" piece and stitching across to just outside the opposite end of the "inside piece. You will do this along the top AND the bottom of the mask.
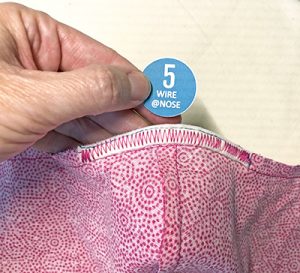
- STEP 5: Working on the inside of the face mask, center the piece of metal wire across the top of the mask. The metal will be placed to the RIGHT of the stitch (in the seam). ZIG ZAG machine stitch or HAND WHIP STITCH the metal to the fabric.
- STEP 6: Turn the mask right side out and carefully flatten and press the seams.
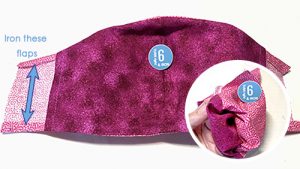
- STEP 7: Working on the inside of the face mask, fold in each end of the "outside" piece 3/8". Press. Now stitch down the side and end folds of this "outside" piece - do this on both ends. MAKE SURE NOT TO CATCH THE INSIDE PIECE IN YOUR STITCH

- Working on the inside of the mask, Fold each end of the "outside"piece in, tucking it into the pocket formed by the "inside" piece. Make sure the ends are tucked into the pocket by about 1/4" to 3/8". Press. This creates the channel that the elastic or twill straps will run through.

- Working on the inside of the face mask (the picture show the outside of the face mask), start a 3/8" stitch on the top/left - just outside the inside pocket. Work across the top of the mask, stop and pivot just outside the opposite end of the inside pocket. Continue stitching right along the outside of the inside pocket (but not on it). Stop and pivot again to sew a 3/8" stitch across the bottom of the mask, stop and pivot just outside the inside pocket. Continue stitching right along the outside of the inside pocket (but not on it). End in the left top corner, where you first started. DON'T SEW ACROSS THE CHANNEL MADE FOR THE STRAPS IN THE PREVIOUS STEP.
- PRESS the entire mask
STRAPS
- For ear straps, using a safety pin to help guide, run the elastic through the strap channel. Tie the elastic ends together securely
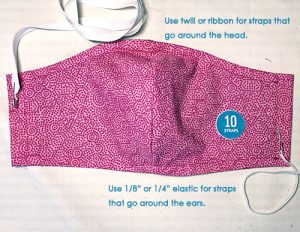
- For head straps, looking at the inside of the mask and using a safety pin to help guide, run the twill/ribbon up the BOTTOM LEFT strap channel, out the TOP LEFT strap channel, in the TOP RIGHT strap channel and out the BOTTOM RIGHT strap channel. This will provide a double, adjustable strap to go around the back of the head. You may want to make knots at each end of the twill to prevent it from being pulled out of the channel.
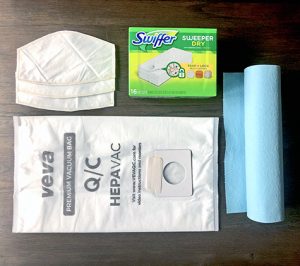
The Filter Pocket
- The inside pocket of your face mask is for an optional filter. Please refer to this video and the Sewers' Challenge blog post on www.acraftycomposition.com for instructions/templates for DIY filters. The filters must be removed prior to washing your face mask.
SAFETY TIPS FOR USING MASKS
- Always wear your face mask with the filter pocket against your mouth. That is why you use two different colors/patterns of fabric - so you know at a glance which side goes against your face.
- Try to only touch the straps when taking off your mask.
- Don't lay your used face mask on counters/tables or place in purses or backpacks. Perhaps carry a ziplock-style bag with you to place your mask in after using. The mask can then be dumped directly out of the bag and into the wash.
- Wash your face mask after every use.
- Wash you hands with soap and water or hand sanitizer after removing your used mask.
- Don't share face masks.