
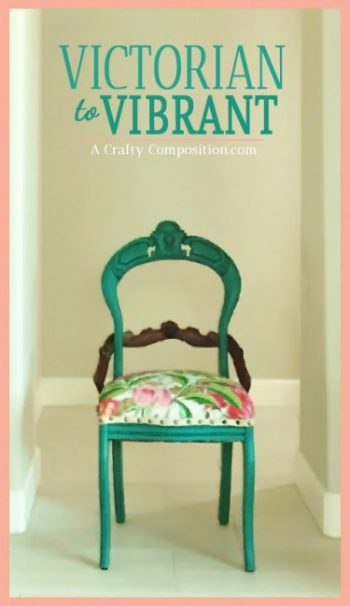
Victorian To Vibrant: The Transformation of an Antique Chair
Do you have an antique piece of furniture living in a closet, storage room or garage? It can be difficult to incorporate these pieces into your modern day decor so there they sit, waiting to once again be appreciated. That is the recent history of my little Victorian balloon back chair.
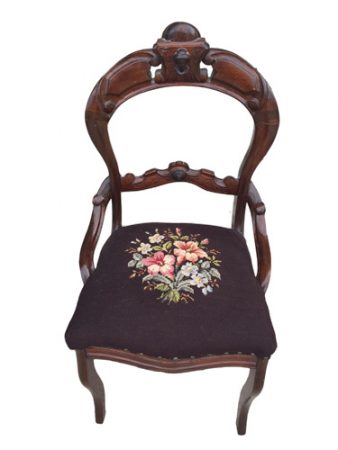
My Mom bought me this chair from a little antique shop in Arizona back in the early 90’s. It’s a sweet little chair and it has floated around to various rooms in my house. Eventually though, as our decor style developed into something more modern, the chair moved into storage. I tried multiple times to sell it to someone who was in love with Victorian Era furniture but there were no takers. During my recent (and on-going) craft room remodel, I found an opportunity to transform this chair into something a bit more my style.
The Antique Dilemma
It’s difficult to settle on the idea of re-styling an antique. I mean, refurbishing is one thing because you are preserving the piece so that it can continue to exist in it’s authentic form. But completely re-styling an antique sits a little heavy with my soul. As a fellow maker-of-things, I can’t help but think of the time and talent that went into creating this chair. I know these chairs were mass produced but someone took the time to hand embroider the chair cushion. Someone took the time to put the final sheen on the wood. It’s hard not to get sentimental about undoing this. And then there’s always the ‘Antique Road Show’ fear. “In it’s original condition this chair would sell for twenty thousand dollars….but now…”. You’ve seen that show, right?! Well, after doing some research and failing to find a new Victorian-styled home for the chair, I decided to transform it myself. Better to enjoy it in a new way than hide it. So, there it began.
The Strip Down
The first step in transforming my chair was stripping off the seat cushion to see what I was dealing with on the inside. I strongly suggest you do this step outside. I carefully removed the embroidered seat cover so I could use it as a pattern for the new one. Under the fabric was a layer of cotton batting and under that… a mess of horse hair and hay. Let me just say, the smell is…special and it’s very messy.

Underneath the hair and hay was another thin layer of muslin fabric and a roll of burlap used to create an edge roll at the front of the seat cushion.
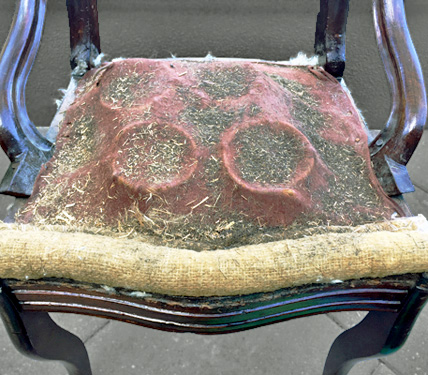
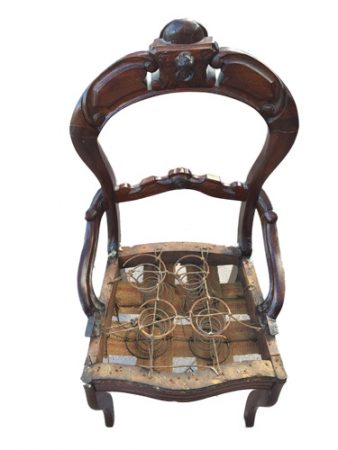
All of this went into a bag and quickly into the garbage. Now I could see the guts of the chair support – the springs and the strapping.
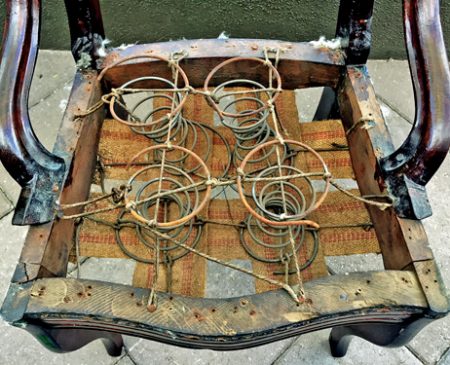
I decided to use the original springs but, in the end, the strapping and ties were replaced. More about that in just a bit. With the chair pad completely removed I considered my options for the chair’s wood frame.
Repairs & Stripping
The chair frame was in great shape except for the wobbly top section of the balloon back. At some point during the chair’s 100+ years of existence, this part had broken and been repaired. I was able to re-open the split large enough to add some wood glue and then used clamps to hold it tight as the glue dried. I also used a bit of wood filler to smooth out the repaired area and then gently sanded that down. There was no way to hide the crack 100% so I decided re-staining this section was out of the question.
There was a serious amount of varnish on the entire frame of the chair. I needed to strip some of it off to help the paint adhere better. The last time I stripped an old piece of furniture I nearly died from the fumes. Seriously! Of course that probably had something to do with the BAD bit of advice I got to use full strength ammonia. DO NOT EVER use full strength ammonia! NEVER. This time around I tried Motsenbocker’s Lift Off Paint and Varnish Remover because it is low VOC, non-corrosive and bio-degradable.
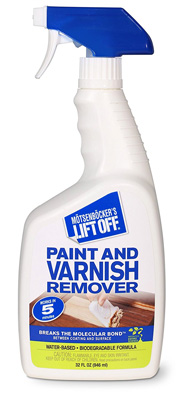
I’ll be honest. This stuff get’s mixed reviews but my experience is this. It didn’t smell horrible (I used it in my garage with the garage door open). It took two applications and careful scrapping to remove the old varnish. Yes, it was a lot of work but I think it would have been no matter which product I used. What I liked about it though is it did not remove the original stain and was more gentle on the wood than the stronger varnish removers. I also didn’t almost die – so that’s a bonus.
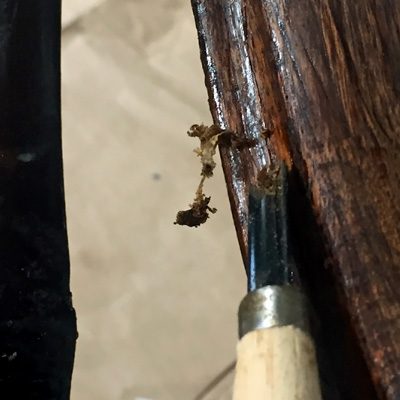
With the thick layer of varnish removed, the chair was ready for painting. These chairs were usually made from mahogany or rosewood so I wanted to preserve a portion of the original wood. The horizontal back piece of the frame and the arms of the chair were perfect for this.

I wrapped these lateral frame pieces as well as the straps and springs to protect them from the spray paint. I had not yet realized the strapping and ties needed replacing; otherwise, I would have removed them prior to painting the frame. Honestly, I was very intimidated by the idea of replacing the straps and re-tying the springs so I originally tried to get by without tackling the job.
Painting With Chalked Spray Paint

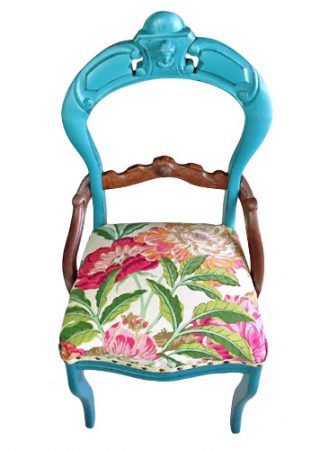
Feeling a little boho bright vibe for the chair, I decided to use Rust-Oleum Chalked Spray Paint in Tidal Pond.
The look of chalk paint with the ease and convenience of a spray paint was nothing short of AMAZING! There are a ton of awesome colors too! I got mine at Joann Fabrics for about $11 but if you want to chose from the full color line, check out the link above at Amazon.
P.S. If you click & purchase through my Amazon links I get paid a small (okay, tiny) ‘salary’. It doesn’t increase YOUR price for the item or add any additional charges to your purchase. PLUS, I only offer links for products that I have personally used and like – See my Nitty Gritty link on the side bar for the full scoop. THANKS!
A little tip: It worked best to do several light layers of chalked spray paint to avoid dripping or pooling.
And Now For My ‘Sock Puppet’ Staining Method
The last step in transforming the chair’s frame was staining the lateral wood pieces. This part of the chair had a lot of detail so I used what I call my ‘sock puppet’ method of stain application (very professional).
First get yourself some of these.
Now go find your stash of orphaned socks. You know you have this stash because, like me, you’re hopeful the location of all your missing socks will magically be revealed someday. News Flash…they are gone! FOREVER
So, grab a nice thick crew length sock from your stash and also a couple of Qtips. Put your rubber gloves on and then slide the lonely sock over your dominant hand. Resist the temptation to do this…it will be very strong.

Dip your Qtip into the wood stain and run it along the detailed (carved) portion of your piece.

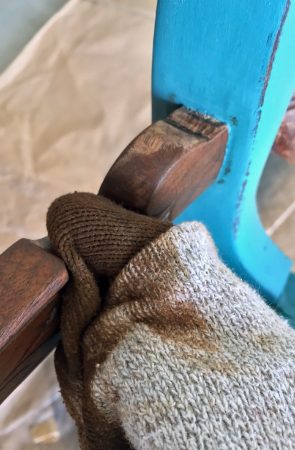
This will allow the stain to soak into the cracks and emphasize the pretty detail. Next, use your sock puppet to distribute the stain from the detailed area out to the smoother parts. As much as possible, go with the wood grain and work in smaller (4″ by 4″) sections.

The sock puppet is perfect for getting into all the cracks and curves of your piece.
Before you finish, rotate the sock puppet around your hand so that you have a fresh bit of sock at your fingers. Go over your entire piece one more time, buffing your stain into the wood and evening out any uneven areas.
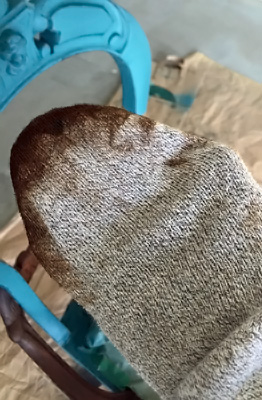
And there you have it… the socket puppet method of wood staining. You heard it hear first!
Re-Constructing & Re-Upholstering
For this next part of the project I am referring you to THE BEST on-line instructions for reconstructing and upholstering a coil seat chair. Seriously! I have NEVER reconstructed a chair before and this tutorial was a lifesaver. I followed Design Sponges, Amanda Brown’s instructions exactly and found them to be easy to understand and duplicate.
Here’s the link for PART ONE: which covers putting in new strapping, coils and coil ties.
PART TWO covers forming the seat cushion.
The final tutorial, PART THREE, covers upholstering the seat and adding finishing touches. I followed this one to about Step 7 and then went on my own for adding the trim and tacks.
A Thousand and One THANK YOU’s to Amanda Brown!!
The REVEAL
From sweet ANTIQUE
To ROUGH & RAW
Now a bright & fun chair with a little boho vibe.

I hope this post emboldens you to try a DIY that intimidates you. In the end, I completely reconstructed the guts of this chair and I’m really proud of myself for taking that on. I learned so much; mostly not to underestimate myself.
What was your most intimidating DIY project and how did it turn out?
Related Posts

Fun & Functional DIY Lighting
I have a dilemma. A significant crafter’s dilemma that I’m sure…
November 18
4 COMMENTS
COMMENTS (I love hearing from you!)


Vikki | 30th Mar 18
Bwaaha ha! I love your Sock Puppet Staining Method!! Your chair looks fabulous and now it can come out of storage and take its (proud) place in your house again. Gold stars for the fabric and choice of paint and stain you chose. (…..and I’m glad you didn’t die!)
JoElle | 2nd Apr 18
Thanks so much Vikki! I’m really glad I didn’t die too.
Tania | 30th Mar 18
OMG, I LOVE that chair! I love the color, the way you left the arms and back piece and the fabric you chose too! What a great job you did!
Tania
JoElle | 2nd Apr 18
Thank you very much Tania. It was a great learning experience and now I’m not so intimidated by re-upholstering.