
Two Clever Solutions To Frame Odd Sized Prints

One of my favorite things to do when I travel is to find a print, greeting card or postcard with art from a local artist. It’s fun to flip through them; enjoying the art while reminiscing about my visit. I often think how nice it would be to frame some of these but they are often odd sizes and I can’t find a frame or mat that works. During my craft room purge a few weeks ago I came across a box of these pretty little prints and decided I must find a way to showcase a few of them in my craft room makeover.
Project One
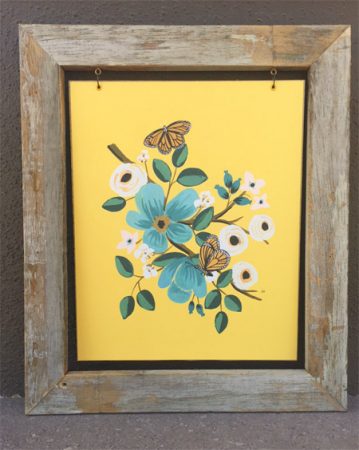
The first print I want to frame is this sweet ‘Monarch’ drawing from Anna Bond of Rifle Paper Co.

Anna actually lives and creates in Florida but the first time I saw her work was in Portland, OR. A fantastic little shop of whatnots called Noun had a wonderful window display of Anna’s work and I instantly fell in love with her crisp yet sweet images and use of open space. I had the perfect frame for The Monarch but the print was slightly smaller than the frame opening and the frame didn’t have glass. If I used a mat to make the print fit the frame, it covered up too much of the nice open space in the print.
…quite the creative conundrum don’t you think?
Really though, the solution was quite simple. The frame is made of reclaimed wood and full of bits of old paint (made by my super talented Step-Dad). I wanted to design something that would embrace the rustic feel of the frame.
I used:
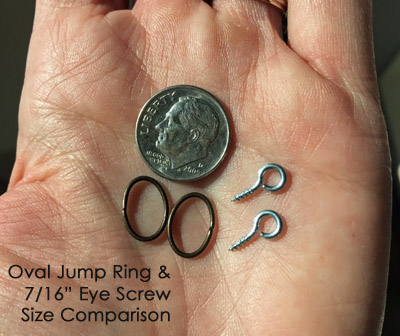
- two 7/16″ eye screws, two large oval jump rings and 2 3/16″ metal eyelets
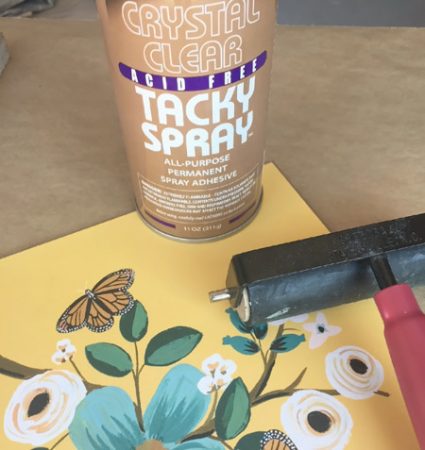
- spray adhesive and a bit of metallic spray paint
- a piece of chipboard – at least .050″ thick.
- tools: scissors, eyelet setter/hole punch, brayer or gift card
That’s it!
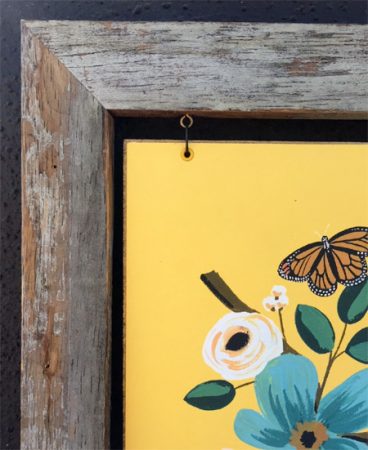
First, determine how big the opening of your frame is. As I mentioned, my print was already smaller than the opening but if yours isn’t, trim your print about 1/2″ smaller than the opening on your frame. Cut your chipboard 1/4″ larger than your print in both width and height.
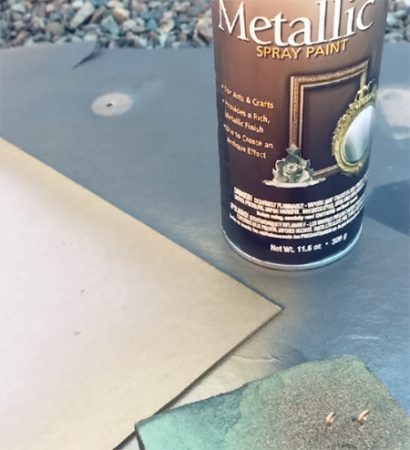
Now spray both sides and edges of the chipboard AND the two eye screws with the metallic spray paint. Don’t get your chipboard too soggy.
When the chipboard is dry, spray one side of it with spray adhesive and lay your print carefully down. Use a brayer or edge of credit/gift card to ensure the print is completely stuck down. You will have a nice 1/8″ ‘frame’ of chipboard around your print.
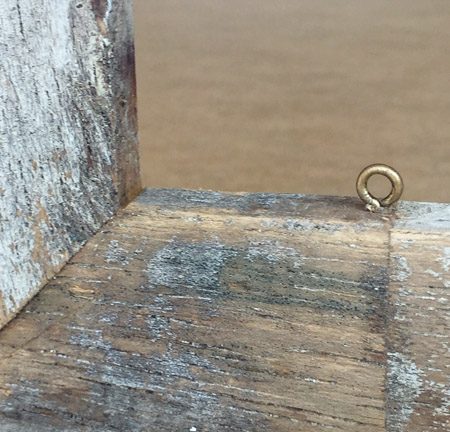
Screw the eye screws into the top inside edge of your frames opening. I did mine about 1″ in from each corner. If your wood is extra hard, tap in a tiny nail and remove it to create a starting hole.
Next, hold your print inside the frame opening to measure and mark where the eye screws are. At these marks, move down about 1/8″ from the edge of the chipboard and punch a 1/8″ hole (I used my trusty Crop-A-Dile Eyelet and Snap Punch for this). Optional: set small metal eyelets like these in each hole.
Attach your jump rings and voila!
I love the way this turned out and I am so pleased to finally get this beautiful print on my craft room wall.
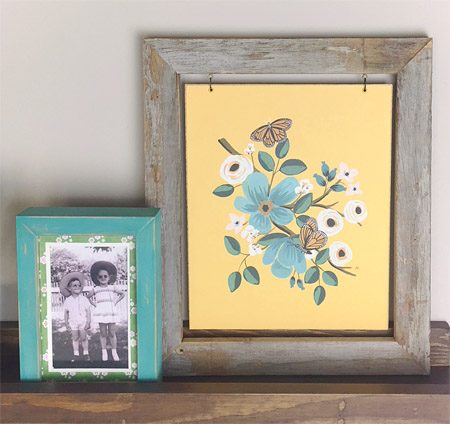
Love the picture of my Mom and her brother too – so cute!
Project Two
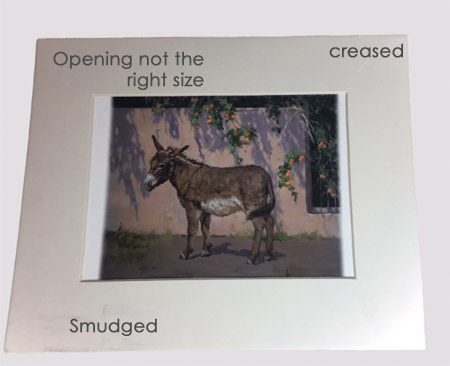
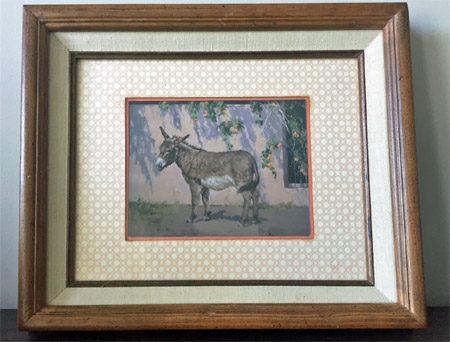
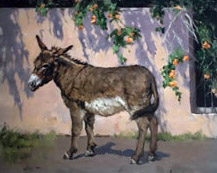 This second print is actually a greeting card copy of a piece from Linda Budge. Linda is a fantastically talented artist from Arizona and she paints the most adorable critters like bunnies, quail and this darling little burro.
The problem with framing greeting cards or postcards is they are often NOT standard frame opening sizes. Sometimes you can just add a mat and that will take care of the problem. In this case, the print was the right height for the mat but not the right width. PLUS, the re-purposed mat I was using had a crease on one corner and a big smudge on the other.
Basically, I just needed to cover the existing mat with a nice paper and cut the picture opening to fit the picture on the card.

First, I covered the mat with Scor-Pal Scor Tape, 1-Inch by 27-Yard (love this stuff!) Then, I peeled the tapes backing off and placed it down on THE BACK side of the decorative paper.
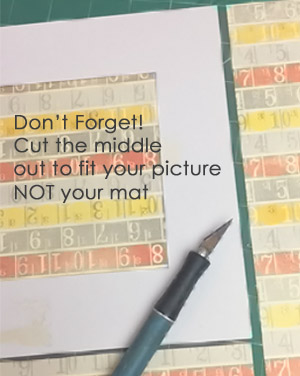
Placing a ruler along the outer edges of the mat, I trimmed the excess paper off with an X-acto knife. I measured the height and width of the actual image and cut the middle photo opening to that measurement.
I wanted a double mat so I repeated the process; this time sticking the right or good side of the paper down onto the back of the mat. That mat was trimmed slightly smaller than the first mat.
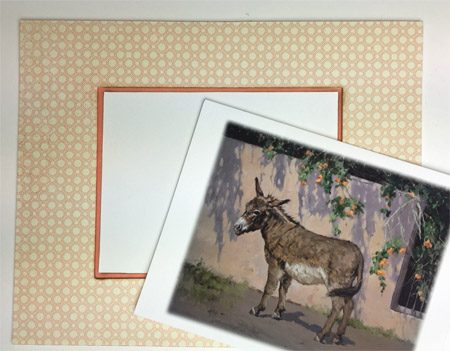
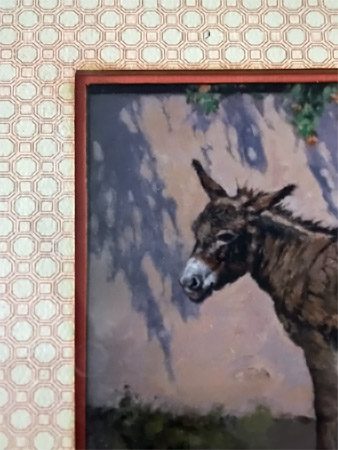
Now the picture fits perfectly into the frame.
Each of these solutions are quick and easy ways to get your odd sized prints framed and out where you can enjoy them. These two will definitely have a place in my craft room makeover.
Related Posts

Fun & Functional DIY Lighting
I have a dilemma. A significant crafter’s dilemma that I’m sure…
November 184 COMMENTS
COMMENTS (I love hearing from you!)


Vikki | 2nd Mar 18
What great ideas–I never would have thought of those. You (and Mel) are very creative. Keep these good projects coming!!
JoElle | 6th Mar 18
Thank you!
Tania | 2nd Mar 18
Aww, these are great ideas JoElle! I especially love the first method, it’s very unique and I would love that it gives the picture a little movement and interest!
Tania
JoElle | 6th Mar 18
Thanks Tania. Both solutions were super easy.