
Go Paint A Rock!
Seriously! Right now. Well, maybe read the post first. . . but then go paint a rock. You can’t help but have a good time and in the end, you might just make someone’s day.
Getting Back to Crafting Basics
I know what you are thinking – isn’t rock painting a kid’s craft? Well, it certainly can be. In fact, I would say painting rocks is a craft for all ages and skill levels. It’s also totally affordable and the supplies are easy to pick up (wink wink – unless you go for the big ones!). You know, sometimes I feel us creatives tend to over-challenge ourselves; each project leading to a more difficult or detailed endeavor until we have convinced ourselves that we are not talented. I know I do this; here’s a perfect example. I learned how to decoupage. I liked that so then I took on a mixed media journal. After that, I took a class from an amazing collage artist…and then came to the conclusion that I’m not good at decoupage. See how that works. I challenged myself right out of a hobby that, on simpler terms, I enjoy.
Rock painting is like going back to the basics. You can make them as simple as a painted heart or as detailed as a beautiful landscape and because your ‘canvas’ is a rock you are free to play and explore because when your done, it’s still a useful rock. I can’t tell you how many blank art canvases I own; all shapes and sizes, stacked in a closet. Why? Because, for one, canvases are expensive and secondly, they are intimidating. ARTISTS paint on canvases and so therefore, at least in my mind, I have to wait until I have an amazing idea and at least moderate skill to use a canvas. This is A LOT of pressure! But a rock. . . no pressure, just fun and as I was about to find out, a little act of random kindness.
The Rock Scoop
About a year ago a sweet friend of mine started a group called Fountain Hills Rocks. Fountain Hills is a suburb on the outskirts of Scottsdale and just so happens to be ten minutes from my house. Over the past year I saw many of Lisa’s Facebook posts and knew she was the obvious person to get the rock painting scoop from. So, over the mountain and through the desert I went.


This is my friend Lisa (beautiful inside and out) and let me tell you. . . she is a CRAFTER. Actually, she’s a Machinist which is pretty impressive in it’s own right, but she is also a MEGA crafter. I remember the first time I realized this about her. I knew Lisa as a valued customer of the scrapbooking/paper arts store I co-owned in Reno, NV. She took several of our classes, was a fantastic store promoter and super helpful at events. Every fall, the store brought 50 ladies to the forest to “camp” (in a beautiful lodge) and craft for four days. Lisa participated in many of these camps over the years but I’ll never forget the first time. She pulled up in her filled-to-the-roof van and began to unload…and unload…..and unload. Kinda like that commercial where a shocking number of clowns keep pouring out of a VW Bug. Within two hours though Lisa had transformed her allotted space into a smaller version of her well stocked and organized home craft room. She said, “I’m the type of crafter that doesn’t know exactly what I might work on so I bring a little of everything. Besides, you never know what someone else might need.” Let me tell you, It was impressive and from that day forward, I knew Lisa belonged in our circle of craft-crazed soul sisters.
It was in this cheerful yellow craft room that Lisa talked about how she started rock painting and what she has learned, trial and error, over the passed year. In true Lisa fashion; always kind & helpful, she explained everything she knows about painting rocks and what she gets out of sharing them.
This post is a big one so it’s broken up in parts.
First, I’ll cover the basics of painting rocks. I know this seems like a no-brainer but there are some very useful tips that may spare you time, money and aggravation. After that – pure rock painting inspiration with images of rocks that totally ROCK! Next, I’ll share why, in addition to being down-right addictive, there’s an especially good reason to get into rock painting. Later in the week I’ll share two of my own techniques: Paint Pouring Rocks and Transferring images from a book to a rock.
So, are you ready? Well let’s get rollin’. . .or rock n rollin’ that is (sorry, you knew it was coming).
Rock Painting Basics
Rocks: Size, Shape and Texture Matters
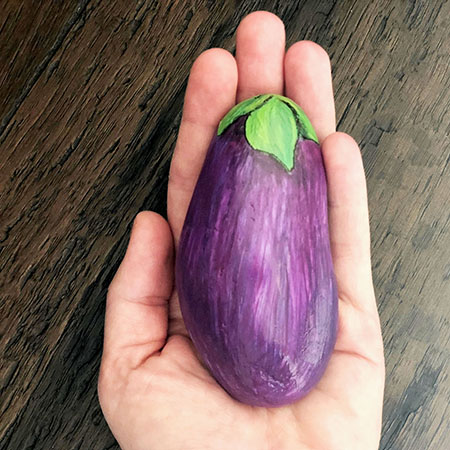
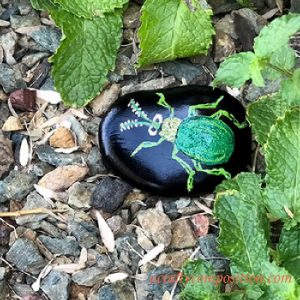
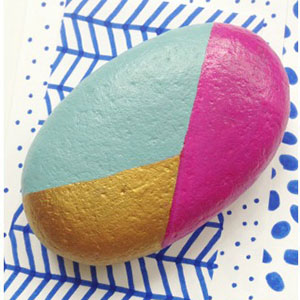
What kind of rocks are best for rock painting? Well, smoother is definitely better as pencils, markers and paint glide easily over the surface. Ideally, the rock is free from major cracks and pits. Sometimes, the shape of the rock can inspire your design – like this silly eggplant rock I painted to use up some leftover purple paint.
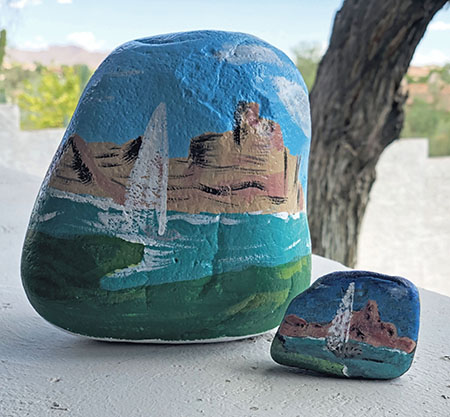
There is no perfect size; it really depends on the picture, project or use you have in mind. Smaller rocks are fun for terrariums, pots and kids but you don’t have a lot of room to work. Large rocks make great door stops or memory markers and give you loads of room for creativity. Here’s an example of a wonderful large rock Lisa graciously gave me and it’s cute little twin. The picture portrays the stunning fountain that runs hourly in the Fountain Hills Town Center.
Cool Tip: Lisa shared a neat trick to help a rock stand up in the position you desire. Simply use wood filler on the surface of the rock you need to be flat. Let dry, give it a gently sanding and paint. Pretty clever.
Where Do You Get Good Rocks?
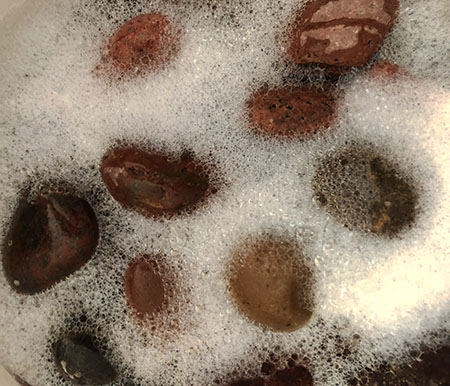
This may sound like a silly question but not every environment has nice smooth rocks readily available. For example, most rocks here in the desert are rough in texture and pretty jagged. Consequently, I purchased a bag of Mexican River Rock from Home Depot. It cost about $10 and gave me 30+ smooth palm sized rocks. In different geological locations, you may find nice smooth rocks for free on a short walk. Always be consciencious about disturbing potential wild life habitats or causing run-off issues by removing too many rocks from one area. Also, it’s probably not a good idea to slowly dwindle your neighbors landscaping rocks. However you obtain your rocks, give them a quick washing (water and a little squeeze of dish soap is fine). Make sure they are thoroughly dry before you start painting them.
Paint, Pens and Markers … But First, A Public Service Announcement
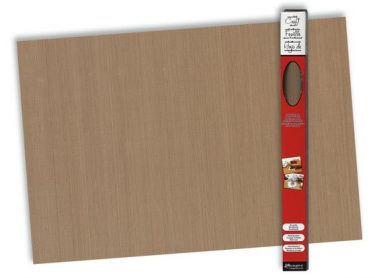
So, before we discuss the best paints, pens and markers for rock painting, I want to encourage you to invest in a Ranger Inkssentials Non-stick Craft Sheet. I use mine EVERY time I messy craft. They are super durable (you can even iron on them), easy to clean and compact to store. Let’s just say it… crafting produces a lot of trash. I totally get it, crafting is messy and you need to protect your surfaces. I know I’m guilty of reaching for paper towels instead of a rag. But there is one thing you can do that absolutely reduces your craft-produced landfill contribution. Rather than loading up on Dollar Store plastic table cloths and plastic coated paper plates, purchase a craft sheet. They effectively protect your work surface and can be used 100s of times. I have two; one of which I cut in half to create two smaller paint mixing mats. (no plastic coated paper plates every time I paint). The paint easily scrapes off the mat when dry and the craft sheet rolls up; ready for your next messy project.
You’ll notice if you click on the Craft Sheet link above, I don’t send you to Amazon for this item. Amazon offers many knockoff craft sheets but I REALLY like the Ranger Inkssentials one. Amazon over-charges for this item so I recommend going to Jo-Ann’s or Michael’s and using one of their 40% off coupons. You will love it and the environment will thank you.
NOW… Paint, Pens and Markers Oh My!
Once your rocks are washed and dried you need to give them a nice, even-colored base coat. You can do this with either flat white or black acrylic paint but I prefer to use black or white gesso.
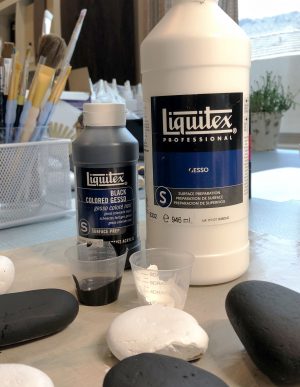
The brand really doesn’t matter. Choosing black or white gesso is just personal preference as you will paint over part if not all of it. Note, white gesso may require two coats; especially if the rock is a dark color. I usually paint the top and sides of the rock but leave the bottom without paint at this point – mostly so it won’t stick when I set it down.
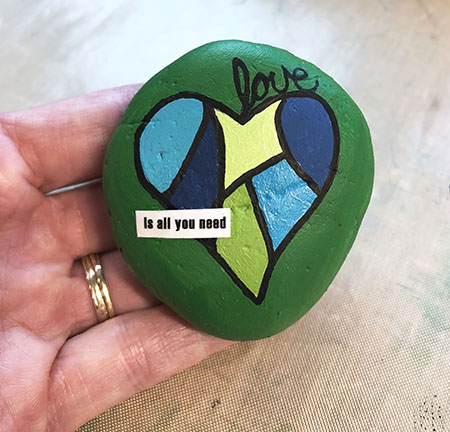
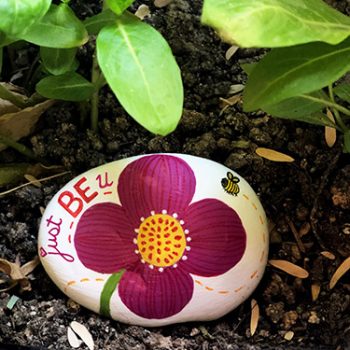
Next, it’s time to let your creative juices flow. Use a pencil and light pressure to draw out the basics of your picture or design. Start with something easy like a heart or flower. This will give you a chance to feel how the paint moves on the rock. Keep it simple and have fun.
You have several product choices when it comes to adding color and detail to your rock. You can stick with just one or use any combination of the following:
Basic acrylic or craft paint for filling in big areas of color
Permanent markers for detail and outlining. Brands like Sharpie, Micron, Atyou Spica, Uniball Signo and Gelly Roll all work well. I LOVE the white Gelly Roll pen!
Paint pens like Uni-Posca or Artistro. These pens give you a way to color with acrylic paint through the convenience of a pen. They are a bit pricey but can be refilled. They come in different sizes (nibs) from extra broad to ultra fine. I think the fine and medium are the most useful.

Special Note: Please don’t add bulky embellishments (gemstones, coins, string etc.) to your rocks as birds and small animals can pull them off and eating them causes digestive issues or choking.
Finishing and Protecting Your Awesome Rock
Once you are happy with your rock design and it is completely dry, flip it over and paint the back of it. I usually use the white or black gesso here but you could use any coordinating color of acrylic paint. All you have left to do now is seal your rock so the paint will stay clear and vibrant over time. The following Rust-0leum products work well for this step.
Ultra Cover CLEAR in Semi-Gloss or Gloss
LACQUER
Triple Thick GLAZE
Cool Tip: writing on your rock can be challenging. Solution – type quotes, sayings or lyrics on your computer (or typewriter) and glue down the cut out strips with mod podge or gel medium.
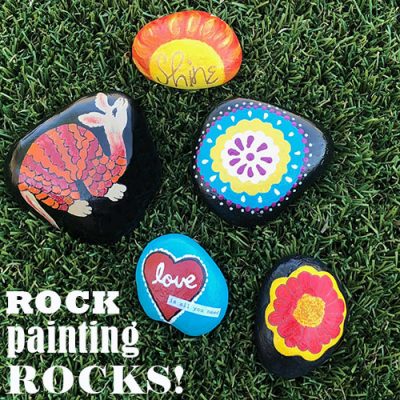
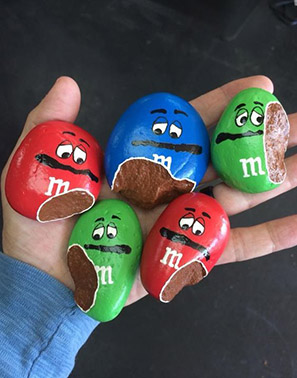
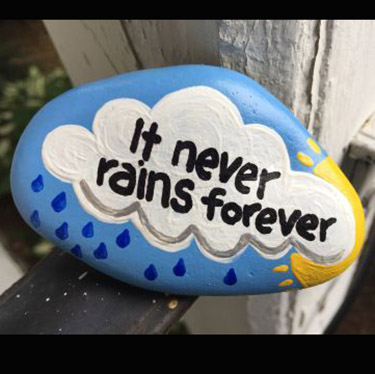
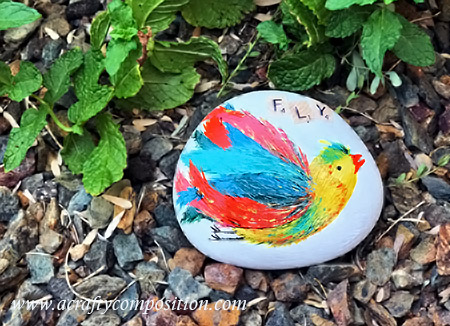
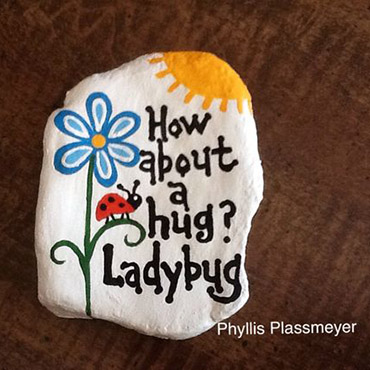
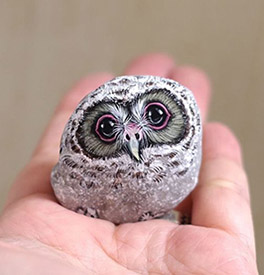
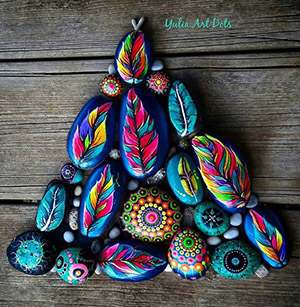
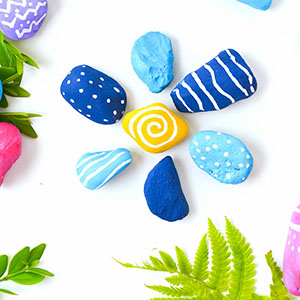
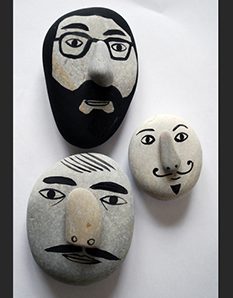
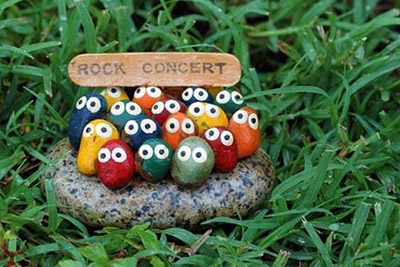
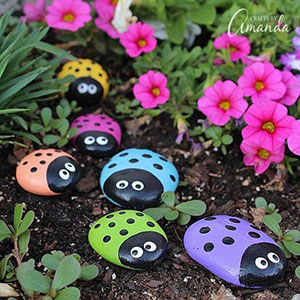
Rock Painting Inspiration
The cool thing about rock painting is you can make it as simple or elaborate as you want. There are endless themes and one idea will lead to another. Grab a bucketful of rocks because this is a whole lot of rock solid inspiration.


Rock Painting As A Random Act of Kindness
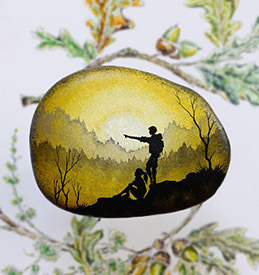
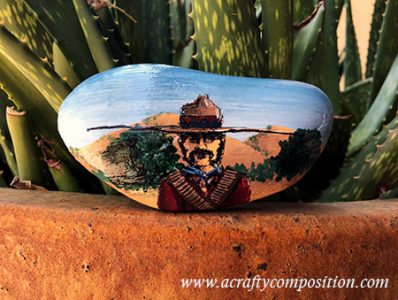
Rock painting is so much fun for many reasons. Anyone can do it; my husband even set down and did one with me (the Vaquero). It doesn’t require a lot of space or supplies or $$. You get to be casually creative; I’ve heard of rock parties and I think that would be a blast. All of these are perfectly great reasons to paint rocks on their own but what if I told you that your rock could really make someone’s day?
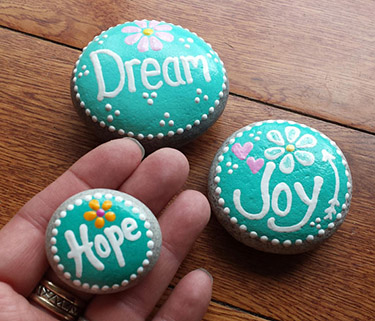
While chatting with Lisa about her fun hobby, she shared with me her Facebook page, Fountain Hills Rocks. Apparently most cities have one of these pages and their purpose is to help spread happiness, hope and joy through painting, hiding and finding rocks. Here’s the basics of how it works. Find a ‘Rock’ facebook page for your area and follow it. Then, have a blast painting some rocks. Place a label or write on the back of the rock. My label says:
I hope this brings you joy. Keep it, gift it or re-hide it; your choice. Please post a pic & location found on (insert FB page info). Enjoy!
Now hide the rock with happy intentions. It may take a while for your rock to appear on the FB page. Honestly, you may never know who found it but if you do; it’s simply double the joy. You already had a great time making it and if you don’t know for sure, why not choose to believe you made someone’s day special, even if they didn’t post it on the FB page.
Lisa told me about one gal who found a rock Lisa placed on top of the big blue box outside the Post Office. The finder took a picture and posted on the Facebook Page sharing that she was dropping off thank you’s for people who had helped her with her Dad’s funeral the previous week. She felt like finding the rock was her dad smiling down her; letting her know everything was okay.
Let’s face it. Life’s hard sometimes. Everybody has bad days and finding something funny/beautiful/cool that you can fit in the palm of your hand or slip in your pocket may be the very thing that gives hope, encouragement and a smile.
Here’s some great locations for hiding rocks: Neighborhood parks, National Parks, Hiking Trails, Campsites, Entrances to doctor’s/dentist’s offices or public areas of hospitals, Library entrances or entrances to public welfare buildings, On top of public mailboxes or at apartment mailbox areas, Laundromats, Park benches, Nursing homes, Bus stops and train stations, Dog parks, Gas stations, With your check at a restaurant or when you leave your table at a cafe… I’m sure there are many more fantastic hiding spots
Special Note: Places NOT to hide painted rocks: Inside retail stores. Some stores sell painted rocks or kits and you don’t want someone to get accused of stealing because they slipped something into their pocket. In grass lawns where they can damage mowers. In ponds or pools.
BONUS INFO
To help you get started I’ve put together an easy-peasy Amazon shopping. Remember, using these links does NOT cost you anything and you will still get all the perks of your Prime accounts. What using these links does do is help to support A Crafty Composition so I can continue to bring you all the Crafty Goodness you can stand. So if you need any of these items, PLEASE use the links. I’m very careful to only provide links to items I personally use and find to be a good product and value.
Well that is it for today. Don’t forget to check in towards the end of the week for a second post about some really cool rock art techniques involving paint pours and transferring images. Until then, have an amazing week and as always,

Related Posts

5-Minute Mini Gift Bag
If you have followed A Crafty Composition for a while you know it is fairly…
January 26
Gum Nut Paper Garland
Have you ever seen a Eucalyptus tree blossom? It’s one of the most…
November 710 COMMENTS
COMMENTS (I love hearing from you!)


Cheryl | 27th Jul 23
Please please do instructional video on how you pour & use the lighter/torch!! I fell in love with rock painting 30 yrs ago! 🥰 There’s just nothing else better for me! I’ve been rock hound since childhood. It’s just so fun to rock hunt to see what treasure God puts on your path! A abundant blessings to you! Your post reminded me of the joy it brings & I thought I was the only one felt this way! 💜 ~Cheryl A
JoElle | 31st Jul 23
Loved your comments Cheryl – thank you so much for taking the time to respond to this post. I have a (not very good) video on YouTube showing the paint pouring on rocks. Here is the link https://youtu.be/jvTZhQwf44c. Basically, it is the heat reacting with the silicone (lubricant/oil) in the paint that creates the really cool ‘cells’ The other products (pouring medium or floetrol) allow the paint to flow. I love how beautifully unpredictable this process is. I hope you keep doing what makes your heart sing.
Angela Conley | 6th May 20
Thank you for all the great information! I’ve started “hiding” rocks in my hometown and I’ve been blessed to find several also. What an fun way to spread joy and bring smiles.
JoElle | 8th May 20
Wow! Thank you for your comment Angela. Sometimes finding one of these painted rocks is just what the recipient needs – and it’s great fun for the rock painter too. Keep up the good work!
LIsa Wooden | 7th Aug 18
Joelle, What a fantastic post. Thank you so much for spending time with me. I am so impressed with how quickly you became addicted to rock. Ha! Ha! Such a great amount of information. I can’t wait to share it with my Fountain Hills Rock group. I am so glad that you are just over the hill. I am looking forward to spending some more crafting time with you. Lisa <3
JoElle | 8th Aug 18
Thank you for your comments Lisa. It was great reconnecting with you; let’s not allow so much time to pass next time. Thanks for introducing me to the world of rock painting. I hid my first batch yesterday and felt so good about it. I hope they bring a smile to someone’s face.
Vikki | 7th Aug 18
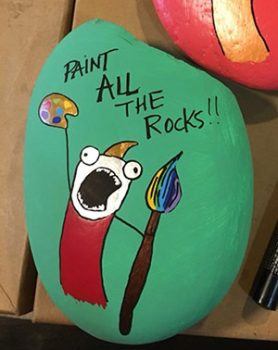
These are so cute and such good instruction and information. (my favorite rock—“paint ALL the rocks”!!!!)
JoElle | 8th Aug 18
I LOVE that rock too!!!! Unfortunately, I found it on pinterest and I could not source the original artist. It depicts exactly how one feels after they have started rock painting. Thanks for your comment and supporting the blog. HUGS.
Lenneke | 6th Aug 18
Love it! I can’t wait to start painting!
JoElle | 8th Aug 18
Woohoooooo! Paint All The Rocks. Thanks for your comment and support Lenneke.