
Oui Planters
Every blogging article I read talks about how important post titles are. Consequently, I put a lot of thought into each week’s title. I know, you’d think they would then be more clever – right?! Well, the blogosphere experts say that titles must grab a readers attention AND reveal the post’s subject in six words or less for optimum Search Engine Optimization (blah blah blah). It’s a little challenging and sometimes, a bit of a fun sucker.
Not this week though. This week I have a play on words, speaking French (that’s intriguing right?) AND telling EXACTLY what the post is about in two words.
“Oui” and “Wee”
HOMOPHONE
Two words are homophones of each other if they sound alike but have different meanings and spellings.
www.homophone.com (yes, this really exists!)
Oui means yes in French. It also is the name of the most amazing yogurt; seriously delicious yogurt that comes in the cutest little glass jar.
Wee means very small and this describes the size of the little planter you can make from the jar or pot the Oui Yogurt comes in. You see where this is going now right?!
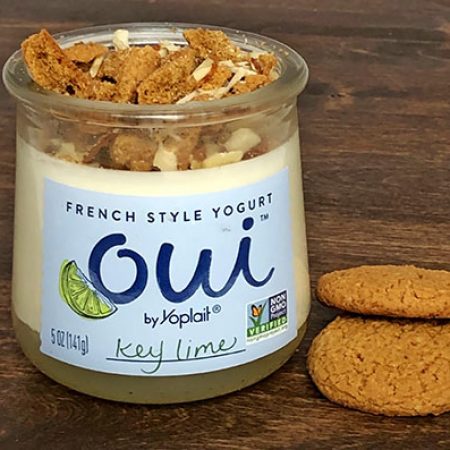
Today I’m going to help you re-purpose your Oui decanters into wee planters (it even rhymes!) Believe me, after you taste this yogurt, you’ll realize just how many of these little glass pots are in your future.
Ahhhhh Lot!
The First Step is the Best Step
Eat the yogurt! That’s your first step. It’s easy and, more importantly, quite enjoyable. Once you’re done, soak the glass jar in warm soapy water for 10 or 15 minutes. The Oui label should peel off easily after soaking. There will still be some sticky residue and for that you need one of the following products.
OR Duck Adhesive Remover from your local hardware store.
Once all the adhesive is removed, give the glass another good wash with a little soap and warm water to remove the residue of the adhesive remover. Let dry and now you’re ready for the next step. . .

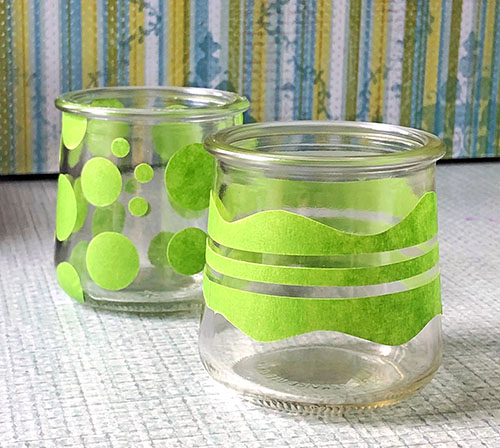
Glass Etching
There are several ways you can decorate these wee (Oui) – cups. For instance, you can paint them with chalk paint for a farmhouse flair or decoupage them with mod podge and pretty paper. In this tutorial we are going to etch patterns onto the glass. You may recall the last glass etching project we did, Uniquely Etched Light Bulbs. This project uses the same process and many of the same supplies. Here’s what you’ll need.
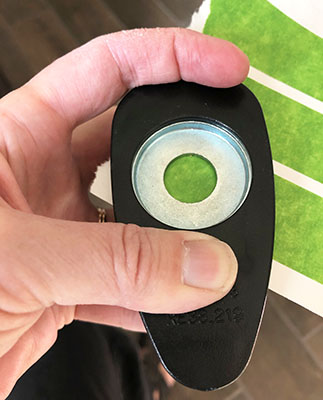
You will also need a ruler, a cutting board or cutting mat and a piece of butcher or waxed paper (to stabilize the Frog Tape if using hole punches). You can use any combination of circle punches LESS THAN 1″ and any kind of X-acto knife or straight blade. It’s also super helpful to have an old credit card or dough scraper like THIS ONE.
Frog Tape for Masking
I’m in love with FROG TAPE! It is on my Top 10 list of tools I can’t live without. Frog Tape for me is like duct tape to MacGyver – with it I’m invincible. Okay, maybe not invincible but certainly capable of a crafty miracle or two. Every painting project I do involves Frog Tape. Need to temporarily tape anything . . . Frog Tape. Mask off an area for spraying or etching. Frog Tape. I’ve kissed a lot of crappy tape good-bye to find the prince of craft tapes . . . you guessed it – FROG TAPE.
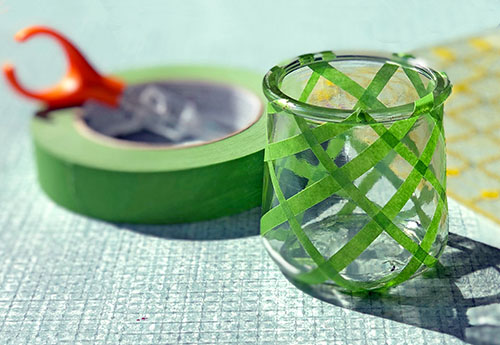
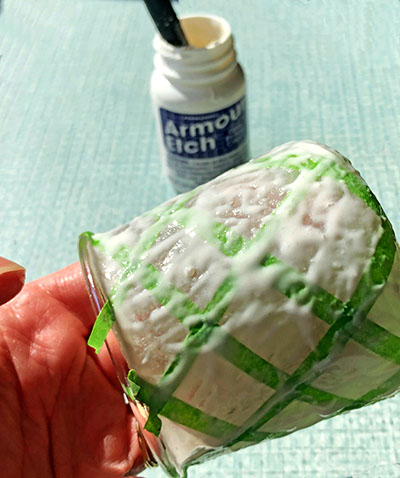
After you’ve placed your Frog Tape design onto the glass, go over it with an old credit card or pastry scraper to make sure every bit is tightly adhered to the glass. Next, spread a decent layer of Armour Etch over the exposed glass and leave it on for about 5-10 minutes. Rinse off with warm water and remove all of the glorious Frog Tape.
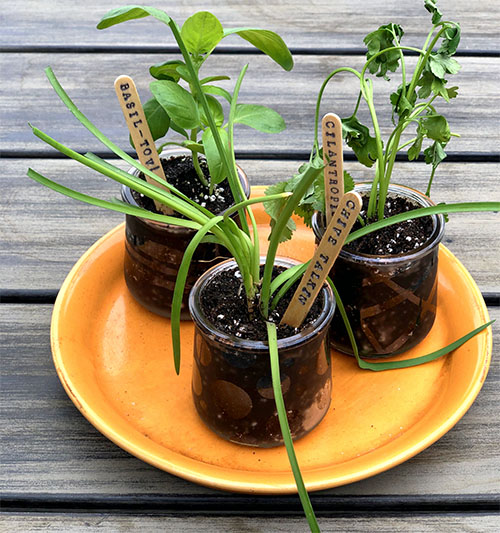
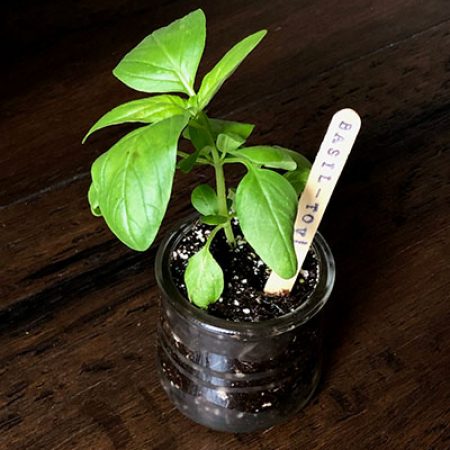
Finally, Add A Little Dirt, Seeds or A Plant . . and voila! Oui Pots for Wee Plants
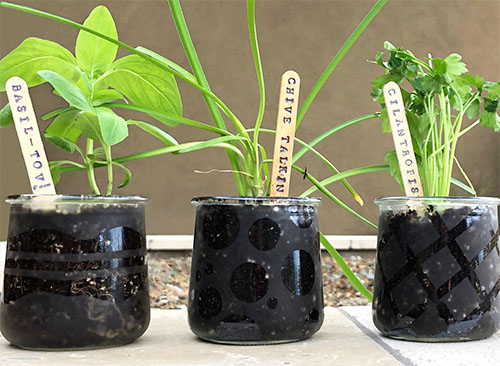
I love re-purposing projects and these quick Oui planters are easy to make and so stinkin’ cute. Need more Punny Plant Marker ideas? Head on over to the Subscriber Freebie Page (under Tutorials and Information Sheets) to get a full list. Yes, you do have to subscribe to access the page but I promise you, it’s private, painless and full of FREE crafty goodness. Plus, I only send four nice, happy, crafty emails per month.
Have a wonderful weekend and happy crafting!
Related Posts

5-Minute Mini Gift Bag
If you have followed A Crafty Composition for a while you know it is fairly…
January 26
Gum Nut Paper Garland
Have you ever seen a Eucalyptus tree blossom? It’s one of the most…
November 74 COMMENTS
COMMENTS (I love hearing from you!)


Tania | 22nd Mar 19
Those are so cute! I have a bunch of those little containers hanging around too! lol!
Tania
JoElle | 22nd Mar 19
Thanks Tania – I’m sure these planters are just one of many things you can do with them. I know you’ve got some good ideas up your sleeve!!
Vikki | 22nd Mar 19
I LOVE this yogurt. So many ideas….so little time.
For now it’s—-oui, oui, oui, all the way home.
JoElle | 22nd Mar 19
Thanks for your comment Vikki. They are so so delicious. I can’t wait to see your decoupage version!