
Polymer Clay Jewelry: A Beginner’s Perspective
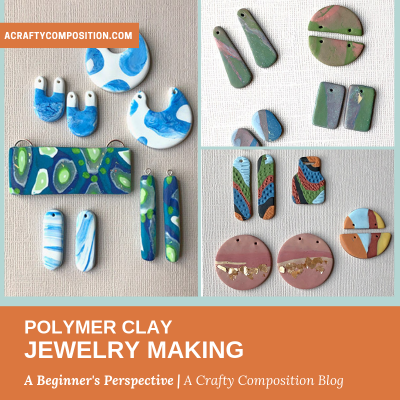
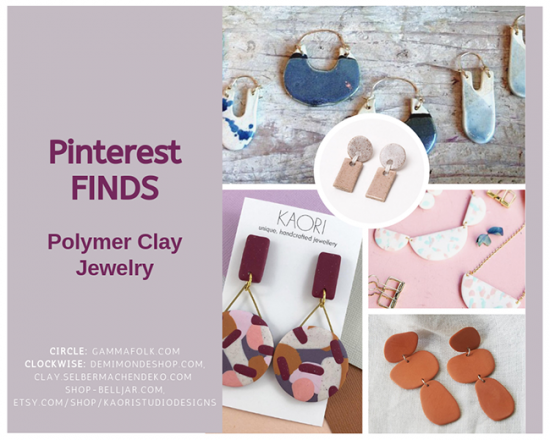
One of the signs of a true artist, is the ability to make things look beautifully simple. Recently I became obsessed with polymer clay and ceramic jewelry on Pinterest. The pieces look organically chic and fun; I want to buy a dozen or so. BUT, I’m a crafter and I suffer from a chronic case of Maker’s Syndrome. So I uttered the words, “I can make that.”
If you too are a maker of stuff and things, you’ll recognize the dialogue. “Surely, with the right tools and supplies I can figure out how to make polymer clay jewelry. . . today. Heck, I can feasibly whip out three a night until I have a piece to go with every outfit. Oh yes! The blue and white one’s to go with jeans and perhaps something in warm desert colors. . .”
RIGHT?! How difficult can it be – said the girl suffering from Maker’s Syndrome.
Get Some Supplies . . . she said
The basic supplies for making clay jewelry are pretty straight forward; you need oven-bake polymer clay. Period. Available in an array of beautiful colors, it’s easy to go a little crazy. On that topic . . . read on.
LET’S TALK CLAY
There are several polymer clay brands, the most popular being Sculpey (III or Premo), Fimo and Kato. I’m not sure why there’s a collective belief that all clay brandnames must end in an “O”. Thoughts? Anyhow, according to what I’ve read on-line, these three brands are very similar which allows you to mix them within one piece. I purchased a starter pack to supplement a block of white Sculpey clay I already had. For a bigger color selection, you can purchase two ounce sizes of individual colors.
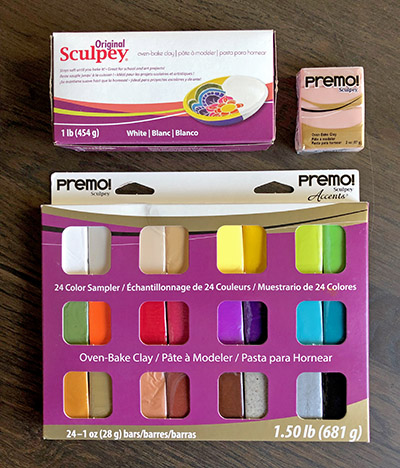
Learning Curve Discovery: You can mix colors to make any color you want. Therefore, I recommend buying twice as much white.
I Just Need a Few Tools . . . she said
Theoretically, all you need in addition to the clay itself is something to roll the clay and something to cut the clay. That said, you will own more than that. . . this is a fact of Maker’s Law.
Maker’s Law: Any craft-tool purchase, upon it’s non-returnable opening, will become the spontaneous motivation for another craft-tool purchase. . . and so on, and so on.
JoElle, www.acraftycomposition.com
LET’S TALK TOOLS
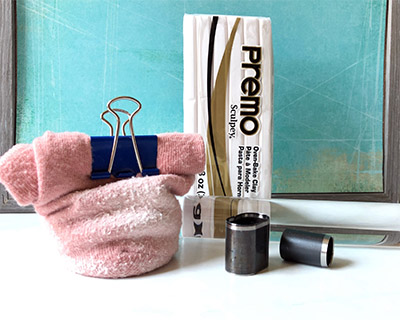
So, let’s start with the basics. You need to ‘condition’ and roll out the clay. Wood is not a good option as the clay tends to stick to it. You can use a piece of PVC pipe or you can purchase one of these acrylic rollers. You also need something to cut the clay. A simple X-acto knife does the trick. Additionally, you need a few household items:
1) a glass casserole dish or solid cookie sheet
2) an oven
3) toothpicks or a skewer
4) waxed or butcher’s paper
5) baby wipes and paper towels
6) Frog or painters tape and
7) a deck of playing cards (I’ll explain later-has nothing to do with winning earning more money for crafts)
In a perfect world, that is all you need to make polymer clay jewelry. BUT . . what fun would that be. Here are a few additional items to consider – but first, a word from your sponsor.

Tools you definitely use: 1) clay shapers 2) these AWESOME punches that are perfectly sized for jewelry and 3) wet/dry sandpaper in 400, 600 and 1,000+ grit.
Tools you might use: 1) Sculpey Bake & Bond 2) silicone molds for more complex shapes and 3) silicone bead-making molds.
Splurges you will LOVE: 1) Kemper Clay Cutter circles: a spring makes getting the clay out of the cutter so simple. 2) Atlas Clay Press: makes conditioning the clay and getting even sheets a breeze.
Learning Curve Discovery: Any household item you use to make clay jewelry is now, forever, a clay tool. For example, you can’t use the acrylic roller or glass casserole dish on clay and then use it on food.
How Difficult Can it Be . . . she said
First, let me start off this section by saying making polymer clay jewelry is not hard. The skills you need are really quite simple; however, there is a learning curve that, at times, feels quite steep. Much of that curve comes from learning how the clay moves, reacts and bakes in YOUR environment.

To begin learning how to make clay jewelry I watched a few YouTube videos. I also read MANY on-line articles. My absolute favorite on-line source on this topic is Ginger Davis-Allman’s Blog, The Blue Bottle Tree. This gal is nothing short of AMAZING when it comes to detailed information on working with polymer clay. Here’s an excerpt from her Meet Ginger page and it explains the benefit of her blog to a T. . .
In this website are hundreds of articles that give you accurate information that you can trust. I want to eliminate uncertainty and help you be successful, no matter what your project will be
Ginger Davis-Allman, The Blue Bottle Tree
Who Needs Experience . . . she said
While Ginger is fabulous at explaining the technical side of working with polymer clay, I also needed some creative coaching. Luckily, I met this fun and artsy gal, Carrie Godwin, while she was teaching a local art class. A professional artist and graphic designer, Carrie has worked extensively with precious metal clay. When the cost of metal clay skyrocketed she found herself drawn to the ease and flexibility of polymer clay.

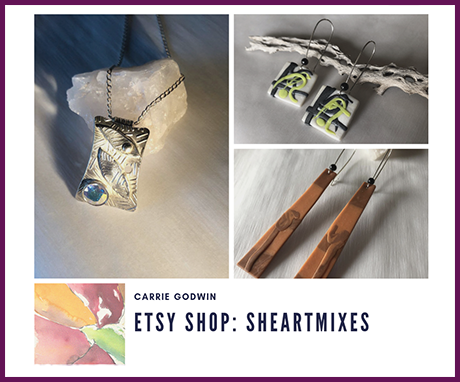
An Interview with Carrie
Over a two-hour iced latte on an uber hot Arizona day, Carrie and I chatted about her journey from metal to polymer clay.
I like how forgiving it is; the unknown of what the piece will become. Sometimes the mistakes are the best surprises.
Just start out simple. Dabble and play until you find what works for you.
I’m open to whatever happens during the creative process really. I do make both sides of my earrings interesting – so you can wear them either way and get a different look.
Look around your house. There are so many ‘tools’ for creating cool textures and shapes. Also, coating your roller and tools with a dab of olive oil does wonders for sticking.
Learning Curve Discovery: Add a little acrylic paint to white or beige polymer clay to make absolutely any color you desire. It does require a lot of finger kneading to thoroughly mix the colors. . . if your fingers get tired, just go with the swirl effect.
Making Clay Jewelry Takes Practice . . . she realizes
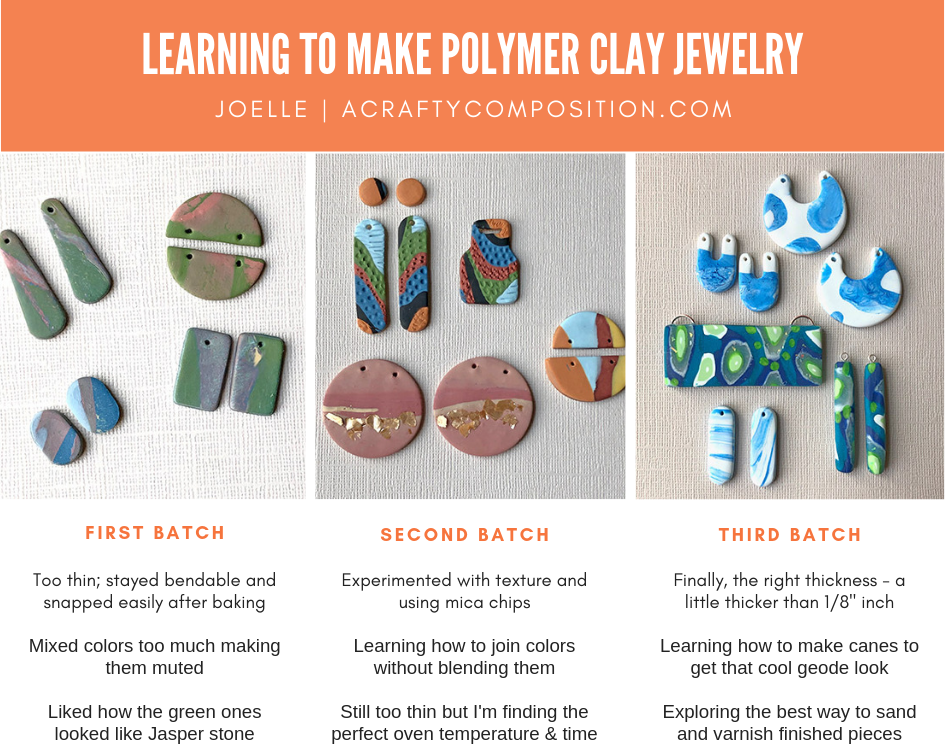
It shouldn’t come as a surprise to me. Good art & crafting takes patience and practice. Those beautiful clay jewelry pieces I see on Pinterest – those represent a lot of time. Furthermore, they represent a learning curve that begins with a lot of really . . . crappy . . . polymer clay pieces. Eventually though, you find the sweet spot and you learn.
You learn the perfect oven temperature and baking time.
For me that is 280 degrees (f) and 28 minutes
You discover methods for dealing with warm, too soft or sticky clay.
Two tricks worked for me: 1) a little sock pouch with corn starch in it which I patted on my working surface and tools and 2) If the clay is sticking to everything, place (rolled out) clay on a piece of copy paper for 30 minutes to leach out some of the ‘oil’
You learn about mixing colors
I discovered that if you over-work or excessively roll your clay, your colors will homogenize into one really muddy muted color. Less IS more.
And about clay thickness
If you make the clay jewelry too thin, it snaps with the slightest pressure. For me, the ideal clay thickness is between an eighth and a quarter inch thick.
Most importantly, you learn from others
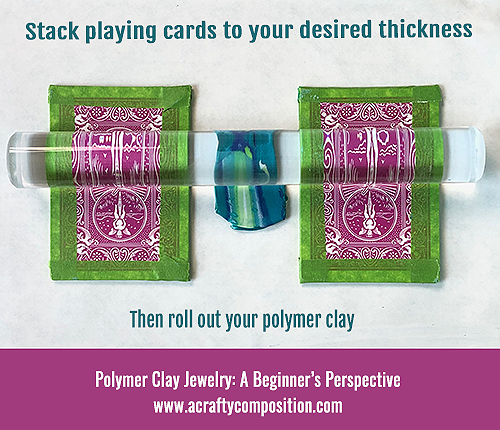
Like Carrie’s genius tip to ensure even thickness when rolling clay. Simply tape a number (I do 10 cards per stack) of playing card together to create two equal stacks. Place your cards stacks on your work surface, about 3″ apart. Lay the clay between the card stacks and move your roller back and forth over the cards. You will get predictable clay thickness every time. Thanks Carrie!
She’s Not Completely Wrong – She CAN make Polymer Clay Jewelry
With a little time, patience and practice.
Making clay jewelry becomes creatively addicting and fun – once you get the basics down. In the beginning of this post I talked about a true artist’s ability to make something beautifully simple. Learning the clay jewelry-making process reminded me just how long it really takes for crafters and artists to perfect their craft.
If you are interested in learning the art of clay jewelry making, definitely head to The Blue Bottle Tree website. It’s a wealth of information! Are you an Arizona local? If so, look for Carrie Godwin’s polymer clay jewelry class through Scottsdale Parks and Recreation – coming in early 2020.
For those who don’t suffer from Maker’s Syndrome and love these gorgeous bits and baubles – I encourage you to click on the various stores and artist links mentioned in this post. They are truly spectacular and I think you would look divine in any of their wares. Gammafolk, Demimonde, Clay Ideas, Bell Jar, and Kaori Studio Designs
Enjoy the rest of your week and as always, Happy Crafting!!

If you liked this post, check out Make A Boho Crochet necklace in Under one Hour.
Related Posts

5-Minute Mini Gift Bag
If you have followed A Crafty Composition for a while you know it is fairly…
January 26
Gum Nut Paper Garland
Have you ever seen a Eucalyptus tree blossom? It’s one of the most…
November 72 COMMENTS
COMMENTS (I love hearing from you!)


Vikki | 26th Jul 19
It’s nice to know someone else who is in the Maker’s club. You give hope—your third picture does look so much better than the first. (Although I like the ones in the second picture too.) There is an artist in each of us; some are “Jackson Pollock”, some are “Monet”, some are “Banksy.” We should all go find our inner artist and create.
JoElle | 26th Jul 19
Very well said Vikki!!Thanks for your comment and I’m glad to be part of the Maker’s Club with you.