
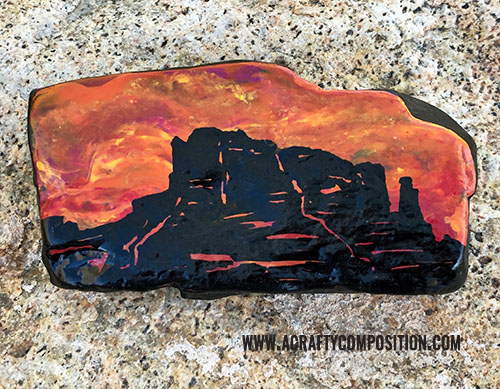
Rock Painting: Sunsets and Silhouettes
Why do we stop doing things that brought us such joy as kids? In my childhood, I spent hours making mud pies, playing house under the weeping willow and finger painting masterpieces. I know the obvious answer – we became practical and time became valuable. . . and it’s hard to make a living selling mud pies. This week, let’s take a tip from our 5-year-old selves. Collect some rocks. Grab some paints and get the paper towels . . . we’re gonna finger paint.
Find your inner-child.
Growing up has it’s benefits. We get to stay up as late as we want. Instead of holding a single bite of green beans in our mouth for forty-five minutes – refusing to swallow, we get to chose what’s for dinner – and breakfast – and lunch. We get to go on the best rides, say bad words (quietly) and cut our own hair (and then have the hairdresser fix it). There is a down side to growing up though. We become our own worse critic. We worry about what other people think – about our outfits, our words . . . or creativity. There’s pressure to always be productive and have something usable, beautiful or important to show for every minute spent. There is never enough time to watch clouds and daydream and we avoid things that are unpredictable or too messy.
Until today
Today we are tapping into our inner-child and finger painting sunsets on rocks. Yep. I know . . . not a great use of valuable time – or is it? You might have a little fun. You may find it freeing. . . and in the end, you’ll have some really cool painted rocks.
Why paint rocks?
I know many of you are like, “what is it with the painted rocks, JoElle?” How many painted rocks can one have? (Infinity +1). What do you do with all these painted rocks? (Hide them, gift them, put them in flower beds or on bookshelves . . .) Why do you paint rocks? (because it’s cheaper than my therapy sessions and it’s fun)
SERIOUSLY . . .
Something as simple as a pretty painted rock can make your day. Painting it makes you happy. Giving it makes two people happy and hiding it can make an endless number of people happy. All from a simple painted rock.
JoElle @ A Crafty Composition
If you want to know more about THE KINDNESS ROCKS PROJECT click here.
Want to learn the basics of rock painting? click here.
Now, back to finger painting sunsets with child-like abandon. . .
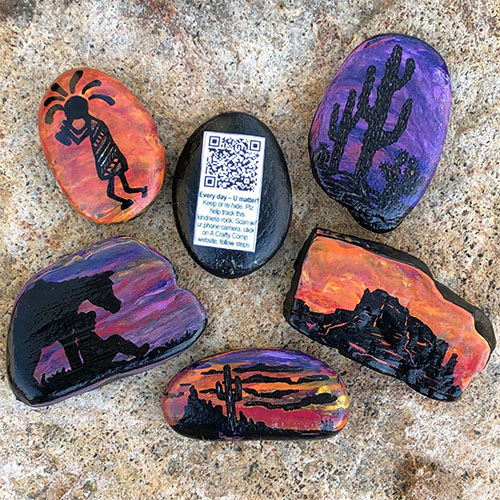
See! Aren’t they beautiful!
Okay. So the first thing you need to do is pick five or six basic acrylic paint colors. I used RED, PURPLE, ORANGE, DEEP PINK and YELLOW. From these colors (and some white) I also made a LAVENDER and an ORANGE-YELLOW. You also need a flat black or black gesso to paint a base coat on your rocks.

Mix your paints in little paper cups or these wonderful medicine cups, which don’t get soggy bottoms (hate soggy bottoms). Use popsicle sticks to mix and apply your paint. You can either eat seven popsicles – you’re an adult, you’re allowed. OR you can purchase THESE and have enough sticks to paint your sunset rocks AND build a small wooden replica of your home. I chose the second option – of course.
There are two more ingredients you need and they both are KEY to making your acrylic paint level, blend and flow.
First is Flood Floetrol. This product helps your paint settle into a nice flat surface – no ridges or bumps where paint is thicker. This makes drawing and painting your silhouette SO MUCH EASIER. You also can use this product to make Gorgeous Fluid Paint Rocks.
The second product is called Flow-Aid. (Really!? They thought that was the BEST name for their product?) Anyway, if I can get your focus off bodily functions and back to the serious task at hand, this is what will help your colors blend in beautifully unpredictable ways.
The Formula
1 part acrylic paint to 1 part Floetrol
Plus a couple drops of water until the paint takes about 3 seconds to drip off the end of the popsicle stick. (very scientific). You’re looking for a dressing or applesauce type thickness
Pour about 1″ worth of Flow-Aid into one of the medicine cups; all by itself. Set that aside.
Let the finger painting begin!
So, all your rocks are primed with flat black paint or black gesso AND you’ve mixed your paints and Floetrol. Use your popsicle stick to apply stripes and dabs of paint onto your rock.
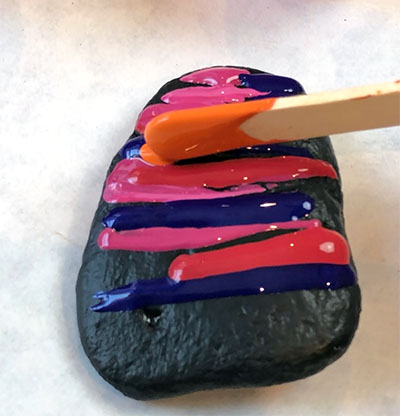
One note on color combinations. When yellow and purple get too blended. They make brown. Brown is a nice color on wood, eyes and chocolate – but not in sunsets. So, don’t put yellow and purple together. Just sayin’
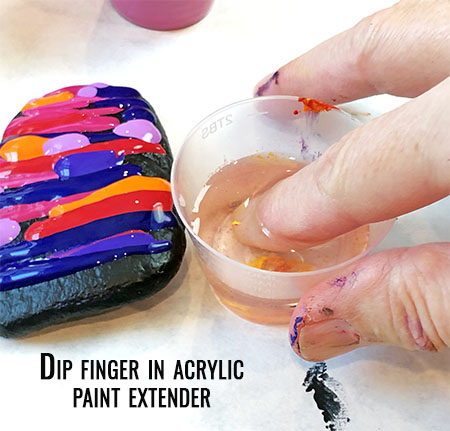
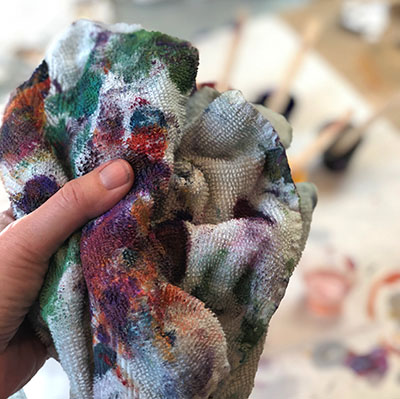
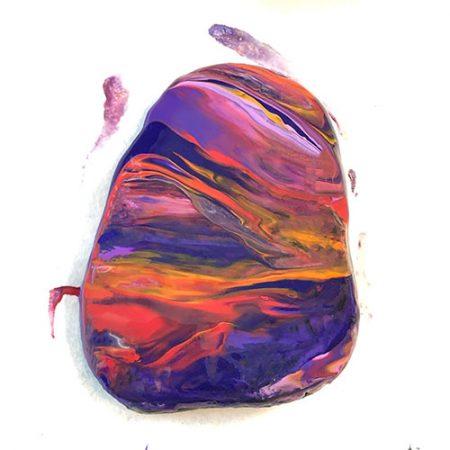
Now, dip your finger into the little cup of Flow-Aid. GENTLY move your finger over the painted rock. Use light pressure! Swirl it. Blend it. Tip the rock to let the paint flow. Don’t try to control it too much. Just let it do it’s thing. Try to remember what it was like to paint as a five-year-old . . . and if you absolutely hate it – wipe the paint off with a paper towel and start over. Remember, every sunset is unique and some are more spectacular than others.
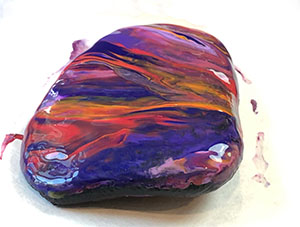
Let your sunset rocks dry over night. Yes. This really is necessary. While you’re waiting you can pick out your silhouette images on Google Images. I mean, you can do other things like read, and sleep and eat and binge watch 6 episodes of Schitt’s Creek. . . but also, get your silhouette images ready.
Finding, printing and tracing silhouette images
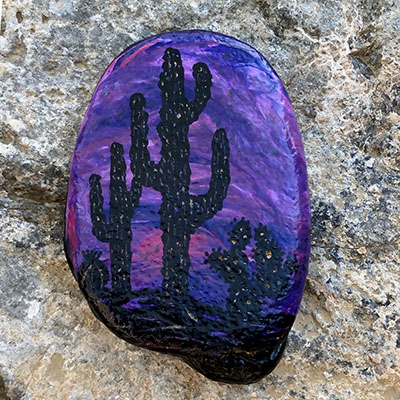
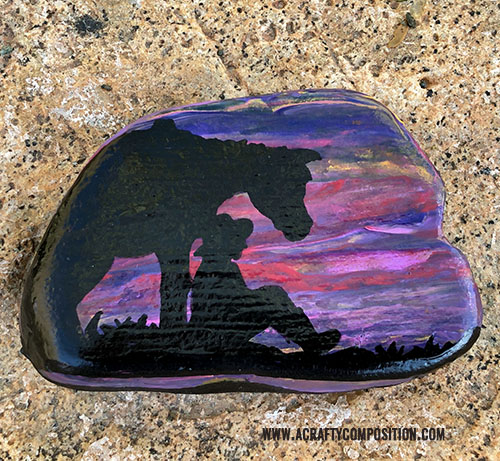
Arizona has some spectacular sunsets and we have some awesome mountains. Consequently, I decided to stick to a southwest theme for my silhouette images.
On your computer, open up your internet and your word processing program (for the sake of making things easy, I’ll refer to this as Word).
- Create a new blank document in Word.
- Search the internet for “silhouette images of FILL IN THE BLANK”.
- When you see an image you like click on it, then right click on it and select ‘copy’.
- Go back to Word, click anywhere in the new document, right click and select ‘paste’
- The image you selected should appear in your word processing document and you should be able to reduce the size to fit your rocks.
- Keep adding images to your Word document until you fill up a page
- Print out TWO copies; one to cut out and the other as a detail reference
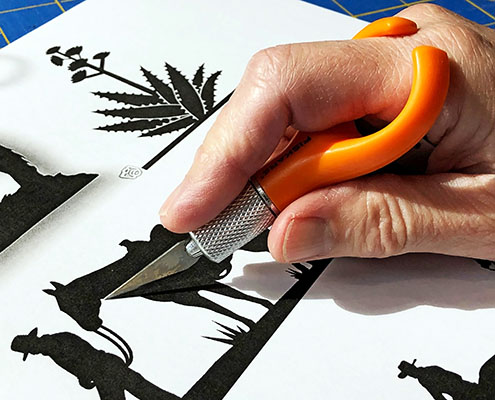
Cut out THE BASICS of your silhouette shapes just INSIDE the line (so slightly smaller). DO NOT bother with the small details like the grass blades or the horses reins. They are too tedious to cut out. You will use your second printed copy as a detail reference and draw these things in later.
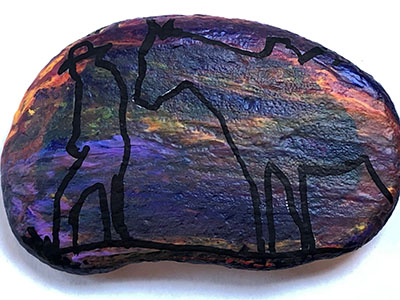
Lay the cut out silhouette on your dried sunset rock and trace with an ultra fine black Sharpie. You can add a little bit of temporary adhesive underneath the paper to help hold it in place. I like Removable Glue Dots.
Coloring the Silhouettes
Color in your traced shape with either a black Sharpie or my favorite, a black Posca Paint Marker. I use the Posca Fine (which really seems more like medium) for all the fill in and Posca Extra Fine for the detail work. I like the Posca pens better than the Sharpie for filling in large areas because you don’t get any lines or streaks.
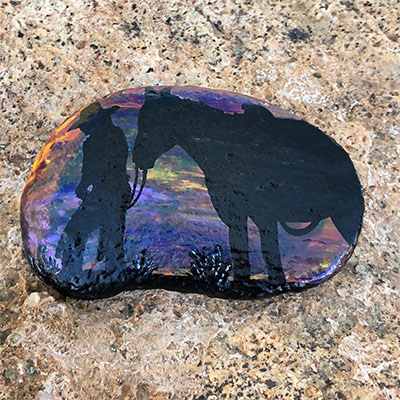
For little open areas like where the cowboy’s hand is or between the blades of grass, you can use a utility knife to GENTLY scrape away the black and expose the underneath sunset color again. This is also a great way to give a little texture to a cactus
To finish the rocks, I touch up the edges and paint the back with my mat black paint. If I plan on hiding the rock I use Mod Podge or a regular Gel Medium to adhere the QR label on the back of the rock. Make sure not to smudge or glob the adhesive where the QR code is or it may become difficult to scan. Once everything is dry, give the front and back a good spray with Rust-oleum Semi-Gloss CLEAR. This weather proofs the rock and makes sure the label stays on.


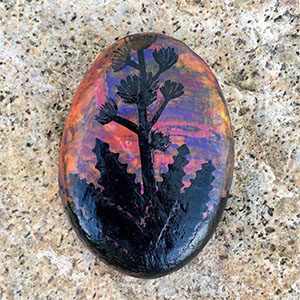

I love how these rocks turned out. You couldn’t make two identical rocks if you tried. Each of the sunsets are completely original – beautifully unique. So what do you think? Ready to let your inner five-year-old come out and play?
Here’s a Complete Amazon Shopping List for this Project.
Simply click on the red colored links provided and add the items you need to your cart.
- Acrylic Paint, Cracker Barrel, 18 colors. More colors than needed but good for other projects. Includes a black for the base coat.
- Black Gesso, Liquitex. LOVE this stuff; great streak-free finish.
- Medicine Cups, 1 ounce, 100 count. Just say no to soggy bottoms.
- Popsicle Sticks 200 count
- Flood Floetrol,
- Flow-Aid
- Posca Paint Pen, Black, Fine.
- Posca Paint Pen, Black, Extra Fine
- Mod Podge Water-Proof, 8 oz
- Rust-oleum Painter’s Touch 2x Semi-Gloss Clear,
All items have FREE SHIPPING options
I hope you enjoyed this project and as always, happy crafting!

Related Posts

The Ultimate Rock Painting Video!
So, I’m not exactly new to video making. To date, I have 28…
October 4
Kindness Rocks: A Good Craft for A Rough Week
Holy Guacamole it’s been a tough week for good news! August has certainly…
August 813 COMMENTS
COMMENTS (I love hearing from you!)


Julie V. | 3rd Feb 25
How do i find a local kindness rocks facebook group? I’ve tried searching on fb and can’t find anything local. Oh, I’m in South Louisiana. Love all your ideas. Thanks for posting!
JoElle | 12th Feb 25
Hi Julie! Thank you so much for checking out A Crafty Composition. You’ve posted a great question. After reading it, I went to The Kindness Rocks Project page in hopes of finding a registry of local clubs or chapters. Sadly, I couldn’t find anything. Facebook is definitely where I see most posts about kindness rocks. Did you try searching by hashtag like #kindnessrockslouisiana – or even better, the name of your city? You can also search under “rock painting” and your city. Sorry – I wish I had a direct link for you. Best of luck – maybe you will become the pioneer for a group in your community?
Alice | 20th Apr 24
Thank you.
JoElle | 29th Apr 24
You are very welcome!
3 Easy Techniques to Paint a Sunset on a Rock | 2nd Feb 22
[…] A Crafty Composition – rock painting sunsets and silhouettes […]
Megan | 3rd Sep 20
How are you adding the QR code to the back?
JoElle | 12th Oct 20
Hi Megan – great question. You can create your own QR code online for free from sites like flowcode.com – Honestly though, I found very few people ever used my QR code – I suppose it’s a little confusing for many. An alternative is to join a local kindness rocks facebook group and then provide the info for the rock recipient to post a picture there. Happy rocking!
Maria Conti | 15th Mar 19
Great ideas for happiness therapy! Thank you for all your effort and guidance on these happy crafts!
JoElle | 16th Mar 19
You’re very welcome Maria. I like the idea of happiness therapy. Who doesn’t need some of that?!
Lenneke | 14th Mar 19
These rocks are gorgeous! I’m hoping someone will hide one near me. I would love to find one and hide it again!
JoElle | 16th Mar 19
Thanks so much. Was that a suggestion for a hiding spot a heard?
Vikki | 14th Mar 19
These turned out so Beautiful!! I love the cowboy and the sunsets. I’m with you—be good to your Inner Child. Sometimes you’re the only one to spoil her for a little while. A great post and very good ideas! Pinned!
JoElle | 16th Mar 19
Thanks so much Vikki – and thanks for Pinning!!