
Two For One Holiday Tablescape: Napkins and Name Cards
Happy Friday everyone! AND Happy November. It seems absolutely impossible that there are only two months left in 2018. Whew, time absolutely flies; as it did this week for sure. Here it is Friday and I’m just now sitting down to write this week’s post. I’ve had so much fun playing with the different possibilities for my woodlands tablescape. This week it’s all about the name cards and napkins. When I see cloth napkins and crafted name cards on a set table, I know I’m in for a memorable experience. I know the host/hostess has put time and energy into making the evening special and that, in a way is quite a compliment. A special table is set to celebrate and appreciate the important events and people in your life.
Today’s post is all about creating unique name cards and accenting cloth napkins
I know there are mixed thoughts about using name cards for a home dinner. Of course it makes sense at big events like weddings but I also think it holds an important role in small dinner parties too. By using name cards at each place setting the host/hostess can put some thought into who is sitting next to who; both to encourage interesting conversation and prevent a guest from feeling uncomfortable. It also allows dinner guests to ‘claim’ there space; put a beverage down they don’t want to hold and feel more comfortable with their surroundings. Some may feel name cards are too formal for home dinner parties but, simply put, it avoids those awkward few minutes right before dinner when everyone stands around the table not knowing what to do.
But First, I Had to Make a Stand!
Literally. . . I needed a stand – to hold the name card. As I mentioned in last week’s Tablescape Idea Board post, I saw these fantastic ‘stands’ made from forks at the Portland Saturday Market. The artist’s name is Mike and he makes some amazing things with silverware. Check out his website Spoonman Creations.
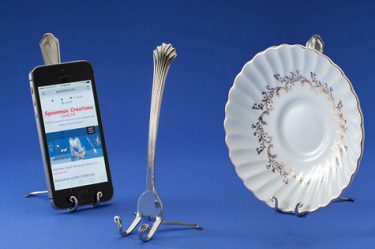
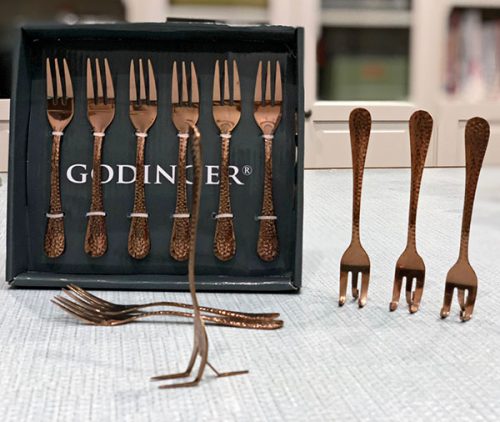
Mike’s fork stand is what I REALLY wanted but a set of 10 just isn’t in my budget so I used his design as an inspiration to make my own. I don’t have the ability to bend heavy duty silverware like Mike does. How he gets his so sculpturally smooth is a true mystery to me but I felt confident that I could transform an inexpensive dessert fork.
I found some nice hammered copper dessert forks at Tuesday Mornings; $8 for a set of 6. They are a good scale for holding a name card and are light-weight (aka cheap) enough for me to bend with plyers. The main challenge I experienced was that the light-weight [ahem] ‘copper’ flaked off where I had strongly used the plyers on the fork. I wrapped my plyers with electrical tape and that definitely helped but I suppose that’s what one gets for using a fork that costs $1.25. Anyway, not super noticeable AND the name card covers it up so all is good. Check out my quick tutorial video by clicking on the image below. So Fun!
Now For the Name Cards
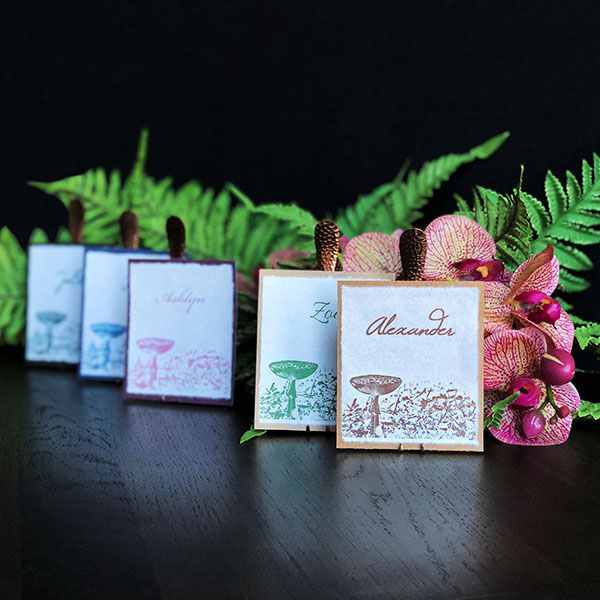
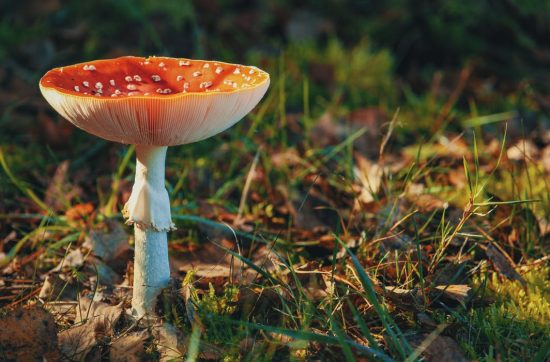
I’m going for a woodlands feel in this 2 for 1 tablescape so I really wanted the name cards to have a botanical design. I spent an entire afternoon with sketch pad and colored pencils, making terrible versions of anything you might see in a forest. Ferns, squirrels, mushrooms… it was horrible. Here’s some brutal honesty – a poorly drawn stick figure mushroom looks like a preschoolers version of the letter ‘T’? ‘T” for Truthfully . . . and Terrible! So sadly, after accepting my artistic defeat I popped open my laptop and went to one of my favorite image sites, Pexels.
Pexels.com is a fantastic website full of FREE, non-license restricted photography. Amateur photographers load up their images for anyone to use, both personally and commercially, and they ROCK! You can donate to the photographer via Paypal if you like and you can give the photographer credits if you like but neither are required. I searched the Pexels site for anything botanical and settled on a great little close up of a mushroom photographed by Tom Swinnen (thanks Tom!)
I downloaded the photograph and manipulated it in Adobe Photoshop until I came up with this.
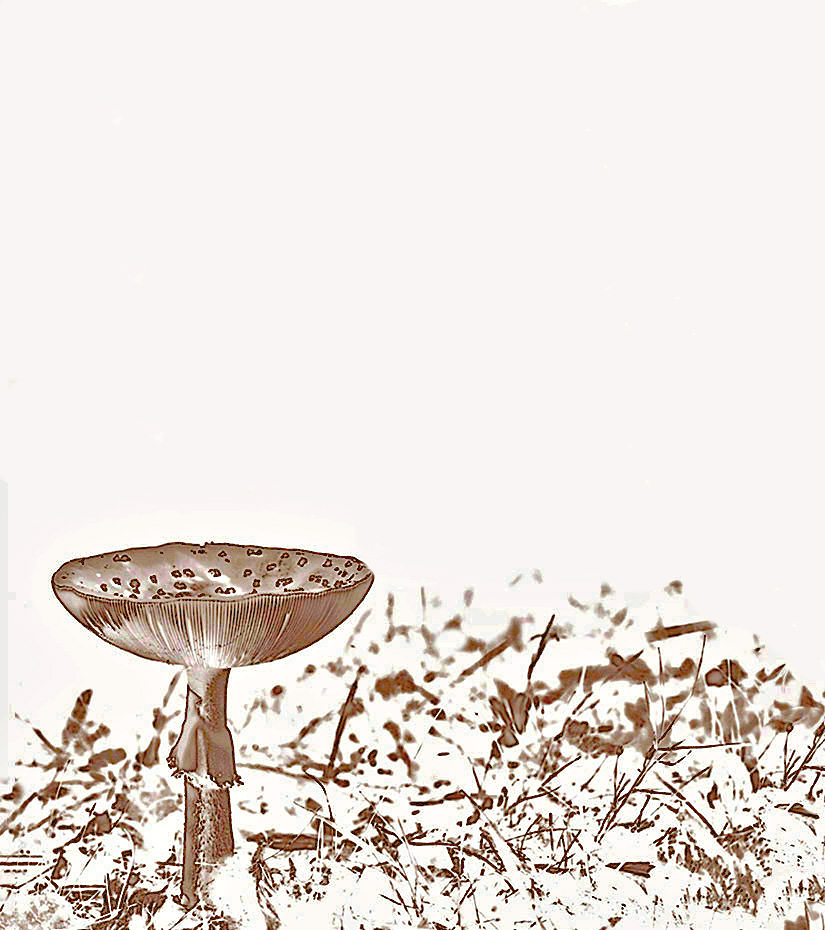
I am so pleased with how it turned out, so I made the design available to my subscribers in multiple color themes. Woohoo!!
You can find the design as a Word Document on the Subscriber Freebies Page under “Mushroom Name Card”. There are six easily personalized cards to a sheet; simply click on the “Enter Name” text on each card and type in the names you need.
If you aren’t currently a subscriber to A Crafty Composition and want access to the awesome freebies on the Subscriber Freebie page, no worries. It’s super easy to get signed up. Check out the top-right of this blog page and read the blackboard ‘Subscribe Today’ box for details. Easy peasy – now back to the name cards.
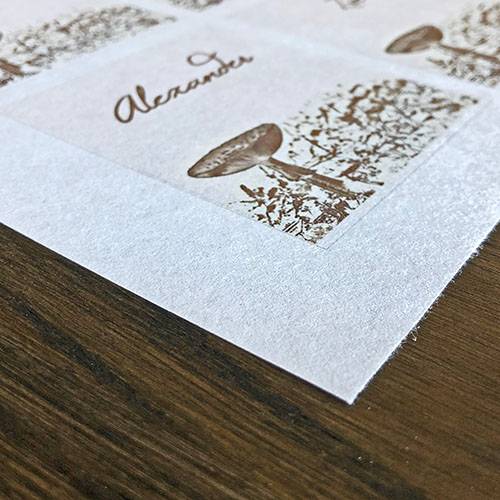
I printed the name cards on rice paper because it is beautifully soft and gets a fabulous feathered edge when you rip it. Like these…

Because the rice paper is soft and semi-sheer, I backed the cards with Kraft paper (supporting the ‘nature’ theme). I used my favorite adhesive, Score Tape, in the 1/8 inch size. I love this tape because it doesn’t need a dispenser (just tear it), it’s invisible under semi sheer material, and it really sticks! Just a strip on both the top and bottom and voila!

I love how the name cards turned out and they are a perfect size for the dessert fork stands.
Botanical name cards and name card stands – CHECK!
Now how about those linen napkins?
Embroidered Cloth Napkins
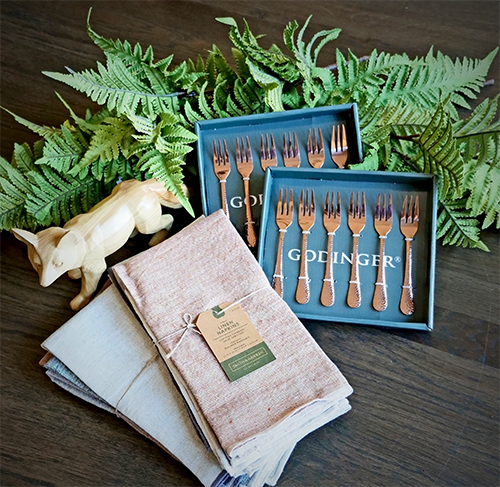
As I mentioned in last week’s Inspiration Board post, I found these great linen napkins at Target. I could easily leave them as is but I really want to add a bit of personalization. I thought adding some embroidered food-related words down the napkins edge would be fun and original. I’ve already established how horrible my drawing skills are. My freehand lettering is not any better so I’m relying on my go to method of trace and transfer.
Two Great Products Make Trace and Transfer on Fabric A Breeze
I covered all the basics of the trace and transfer method a few weeks ago in THIS blog post but there are two special and very affordable products that make this process so much easier when applying it to fabric.
First is a hot iron transfer pencil. Use this pencil to trace an image onto paper and then, using a dry, hot iron, transfer that image onto fabric. It works REALLY well but don’t forget two super important rules. 1: turn your iron’s steam off or your image will smudge. 2: If tracing a WORD, flip the image over and trace the back (mirrored image) of it. Otherwise, your word will appear backwards.
The second product is the Tikteck Ultra Thin Light Box Tracer. This thing is AWESOME! My husband bought me one after watching me tape images to a window to trace. I’m continually shocked at it’s streamlined design and the super affordable price. If you EVER need to trace things you NEED one of these and at $24, it makes a fantastic gift.
The Next Step
With only a few simple steps, you’ll see that embroidering a word onto fabric is so simple – and cool! You can’t help but to smile when you look at it and say, ” Hey, I made that!”
[Happy Dance]
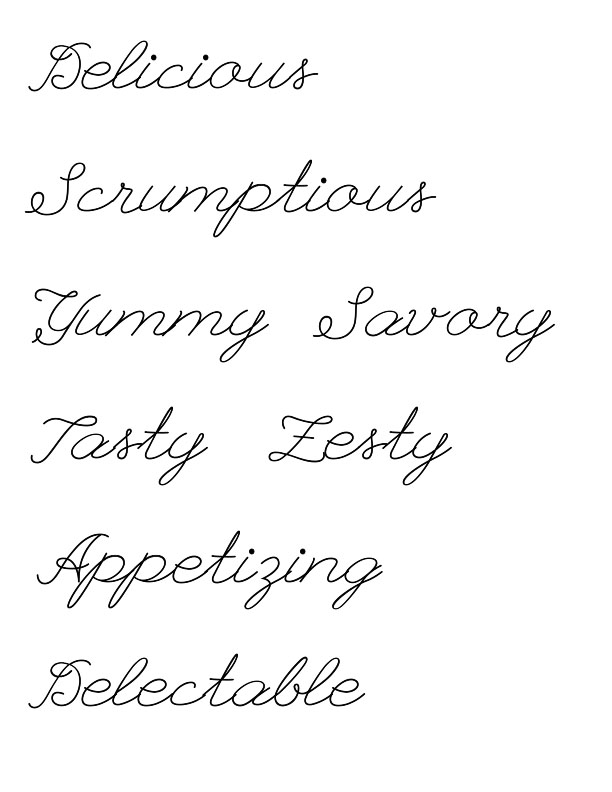
So, the first thing you must do is flip on your computer. I’m sorry . . . yes, a little technology is required. Flip on your computer and open your word processing program. I use Microsoft Word. In a font that A: you like, and B: is easy to stitch (not too ornate or small), print out your word(s). I LOVE the Google font League Script for embroidery because it is spread out and easy to read. You can download it at Google Fonts, HERE.
This is what my Word document looks like with my food words typed in League Script
After you print your words out you only have to complete three super simple steps. First, flip your printed word sheet over (right side down) onto a light box or window. Second, place a piece of tracing paper over the back of the paper and trace the letters (mirrored image) with the Hot Iron Transfer Pencil. Cut out the word leaving about a 1/2 inch around the traced image. Third, place the pencil side of the tracing paper down onto your fabric and press with a hot NO STEAM iron. Don’t shimmy your iron. Just place it down and lift it up.
And there you go! Now you are ready to start your embroidery. I prefer using the chain stitch for embroidering words and the best place to learn this is from the experts at SewGuide.com
Well there you have it lovelies. I’m leaving you in a bit of suspense. Will the embroidered napkins turn out? What is next for the 2 for 1 Holiday Tablescape? I know. I know. Tablescapes don’t warrant much drama BUT, I promise you next week I will reveal the napkins AND a simple DIY that will rock your tablescaping world (Is there a tablescaping world . . . really!?) Don don don . . . TO BE CONTINUED!
I wish you all a wonderful weekend. Hug your family, pet your pets, call your mother and as always,
Related Posts

Fall Fancy: 7 Ways to Savor the Season
No matter where you live, I think you’d agree that fall is one…
October 24
Kindness Rocks: A Good Craft for A Rough Week
Holy Guacamole it’s been a tough week for good news! August has certainly…
August 8

COMMENTS (I love hearing from you!)